

After seeing the Coastal Kits blurred bases I decided to have another go at an "in-flight" model. I really only like jets for this sort of build as there is not a perfect a solution for moving props (except for a actual moving prop). That said I'm entirely happy with the blurred base in this build as it's probably a little to small for the subject, but it takes up a lot of space in the cabinet.
This is the Hasegawa A-4 kit, depicted as an aircraft from No 2 Squadron RNZAF circa mid 1980's. I decided on a 2 Squadron aircraft as it doesn't get the attention that it's more famous brother, No 75 Squadron does, plus I served on 2 Squadron in the early 1990's.
The Kit
- 1/48 A-4K Skyhawk 'RNZAF' Kit no 09441 released in 2002.)
 This is simply the A-4E/F kit with RNZAF decals (average) and white metal parts for the two underwing AN/ALR 66 RWR antennas and the 2 VOR/ILS antennas on the tail. These systems were fitted under Project Kahu in the late 1980's and hence were not used for this project. These parts are not worth the premium price this kit seems to command on the market. You can see whats in the kit here.People often remark that this is one of Hasegawa's better kits. But after building 3 of these now I disagree. It may of been when it was first released but the fit is far from good. The main fit issues I've found are as follows:1. The intakes and 'engine front' parts do not meet up. A simple fix it s to cut the engine front in half and attach to each fuselage half. Better still fit intake blanks. Steel Beach make a nice pair.
 2. The RH rear fuselage insert requires filler to match the fuselage contours.3. Inserts for the guns/non gun fairings in the forward wing root to fuselage join don't match wing contours.4. Left Hand Wing to fuselage join has a gap5. Hump to fuselage join needs some filler.6. The Speed brakes don't match the contour of the fuselage when closed. And posing them fully open, unless the aircraft is flying or landing is just plain wrong IMHO (yes I know there are exceptions but they are that, - exceptions. A saving grace is that speedbrakes tended to open slightly after shutdown when the hydraulic pressure bled off so you can get away with not making them fit perfectly.7. If you're not using the hump I found the top of the fuselage, under where the hump would be needs a bit of filler to smooth it off.Some of my other comments on the kit are:1. The slat wells on the wings are just plain wrong. There is no step.2. Panel lines are quite shallow in a lot of places.3. Underside of the tail section (under the hook) pinches up, this is OK as there is a panel line along the centre line.4. If doing a A-4F onwards the line that represents the lift spoilers on the upper wing needs to be scribed. This is shown on the instructions. Do this before you put the wings together.5. The nose wheel would have been better if it was moulded separately.6. The slat tracks on the wings. Can you make through the whole build without breaking one off.


Aftermarket
- Aerobonus Pilot and Seat - Not recommended. The issues are that pilots visor is up, arms are to short to reach controls. I ended up using the seat/body and arms and a head from the spares box.
Quickboost Gun Barrels - Cheap nice upgrade. - Quickboost Refuelling Probe - Cheap but only marginally better than the kit parts
- Hasegawa Weapons Set A Mk 82 High Drag Snakeyes -These were modified to depict the use of a tail fuse instead of a nose fuse . The RNZAF often used a tail fuse on snakeyes, rather than the nose fuse (thanks for the explanation TC).
The Hasegawa Weapons sets are dated these days compared to lots of the new offerings but IMHO they are still OK for builds where you're not looking that hard underneath. Plus they have no resell value and I have lots of them to use up.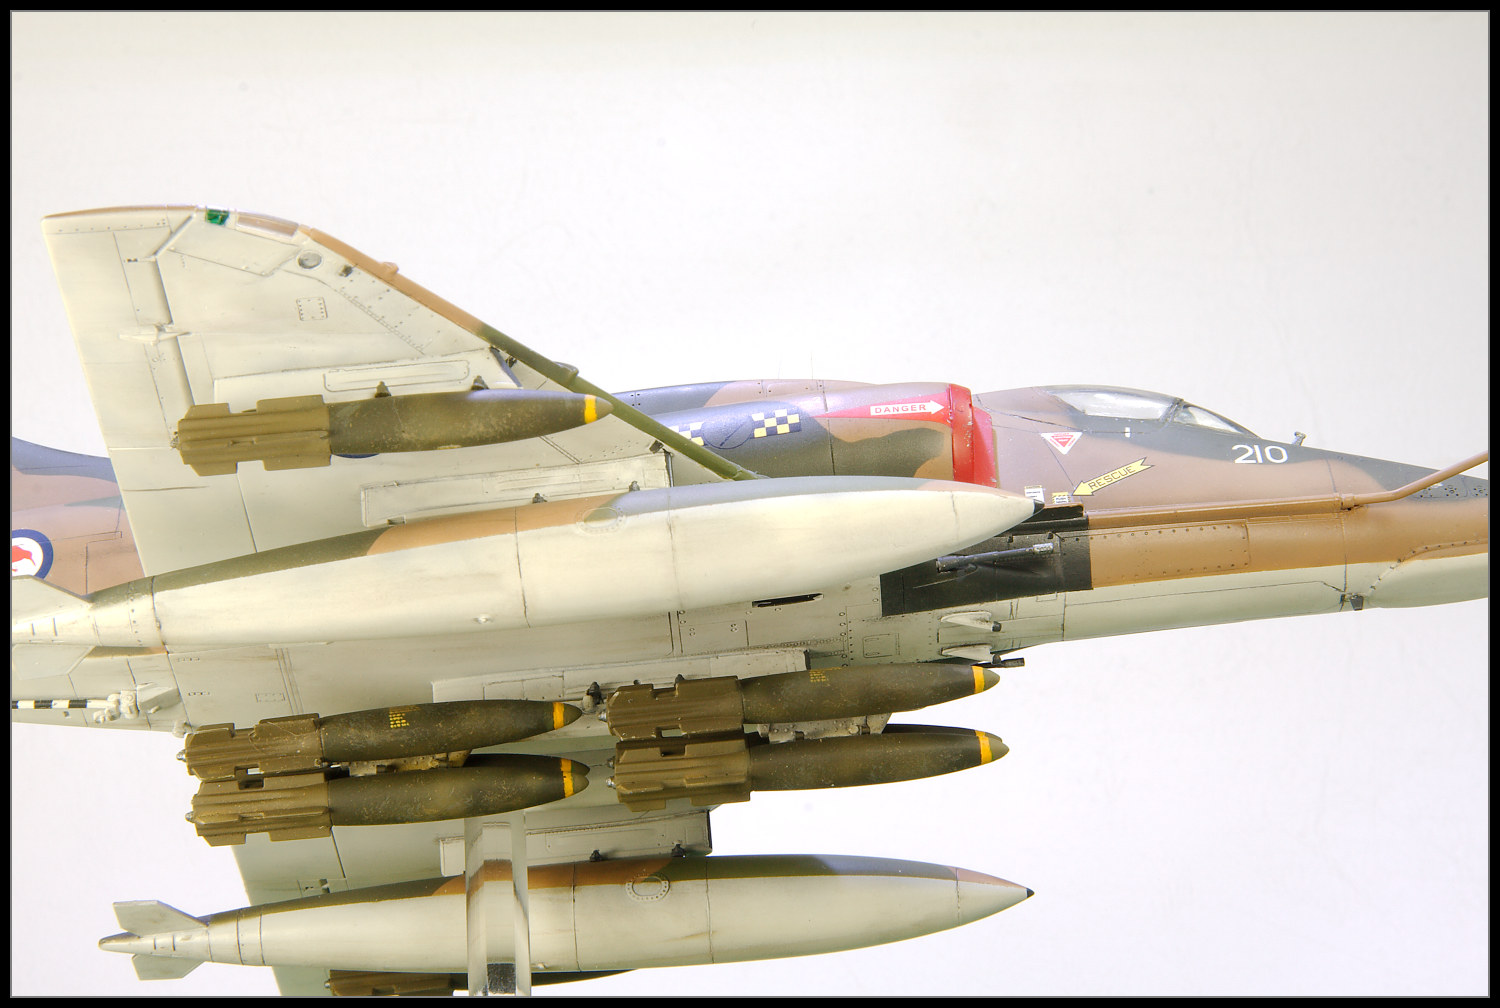
Decals
- Gekko Graphics RNZAF A-4 Sheet GG 48-002. - These are still the best RNZAF A-4 sheets around (disclaimer: my name is listed as a contributor). They were released in the early 2000's and were printed by Cartogragh so you know they'll perform well. The artwork is excellent however I'm not sure about the red and yellows used on the sheet, they seem a little light for my taste.That said you can see a difference in quality in the decal material between these sheets fromt eh early 2000's and those released in more recent times (e.g by companies like Afterburner/Furball/Kinetic). The newer ones definitively perform even better.
The Base
- Coastal Kits Base printed base. My only comment on these is that there are a bit "shiny". I should have flat coated it before I took the photos.
- Timber base - made by my father in law
The kit was mounted on a clear piece of hexagonal acrylic rod which was originally the rod used to open/close vertical blinds. A mate milled a 1/4 inch square on one end and I built the corresponding receptacle in the kit.


Paints
- Mr Color Lacquers for the main colours
- Tamiya NATO Black
- Vallejo Acrylics for details
- Tamiya Olive Drab for the base for the bombs, Mr Color Olive Drab (No 304) for the tails with other shades of OD/green.
- Gaianotes for the Gloss coat
- Gaianotes and Dullcoate for the flat coat
Weathering
- Artist Oils for the wash
- Coloured pencils and Tamiya Weathering sets for the various streaking / grime markis
Build Threads
The Photos


