This is the full build article for the 1/48 Kinetic Harrier Gr.3
If you're only interested in the finished project click here.
The Kit
- 1/48 Kinetic Harrier Gr.3 Kit No. K48060
The Paint
The only other “modern” RAF subject I have built in the green grey wrap around scheme was the Jaguar. For that I used Mr Color straight from the bottle. After the weathering was done, I felt the colours were too dark.
For this build I wanted a bit more saturation in the colours, particularly in the green. So after seeking advice online I added a couple of generous dollops of radome tan to some Mr Color RAF dark green (C330) to get something I liked
Onto Dark Sea grey. I've always liked Mr Colors Dark Sea Grey from the bottle. But the newer bottles I have appear different from my really old one The new ones have a distinct purple tone. It doesn't look as bad in the photos as it does in real life , and for the record the Mr Hobby version is the same shade. I'm wasn’t convinced it was what I wanted.
The image of the Spare harrier wing in the kit shows some of the colours I tried including the remnants of my old bottle of Mr Color Dark Sea Grey .
The Harrier images I looked at look a little closer to the purpleish shade in the new bottle of Dark Sea Grey.

After some googling and a trip to my local Hobby shop I decided
on what to use for Dark Sea Grey
The owner, who used to be a spray painter, suggested that if I don't like the purple hue, then I should add some green (as green kills red). So I
bought a new bottle of Mr Color Dark Sea Grey and added about 10 decent drops
of Mr Color RAF Dark Green. That took
away most of the purple hue
I also bought Tamiya XF77 IJN Grey (Sasebo Arsenal) which I really
liked straight from the bottle. It is a touch lighter than the modified Mr
Color so I decided that would be the one.
It's hard to get the camera to capture the subtle
differences but they are there. The 2nd image
is my RAF dark green mix, (where I added some radome tan to the bottle) and
XF77.
The Build
First few sub-assemblies.
Nothing much to report here bar a bit of filler in the ejector pin marks
in the intakes. I did try and simulate the loose fabric piece on the set
with some Magic Scuplt.
After watching a YouTube series on building this kit I
decided to follow the advice in that and not the instructions. Rather than assemble the front gear bay I
attached the pieces to their corresponding fuselage halves. I then assembled
the inner and outer intakes. Fit of these is pretty good.
The dry fit looked promising.
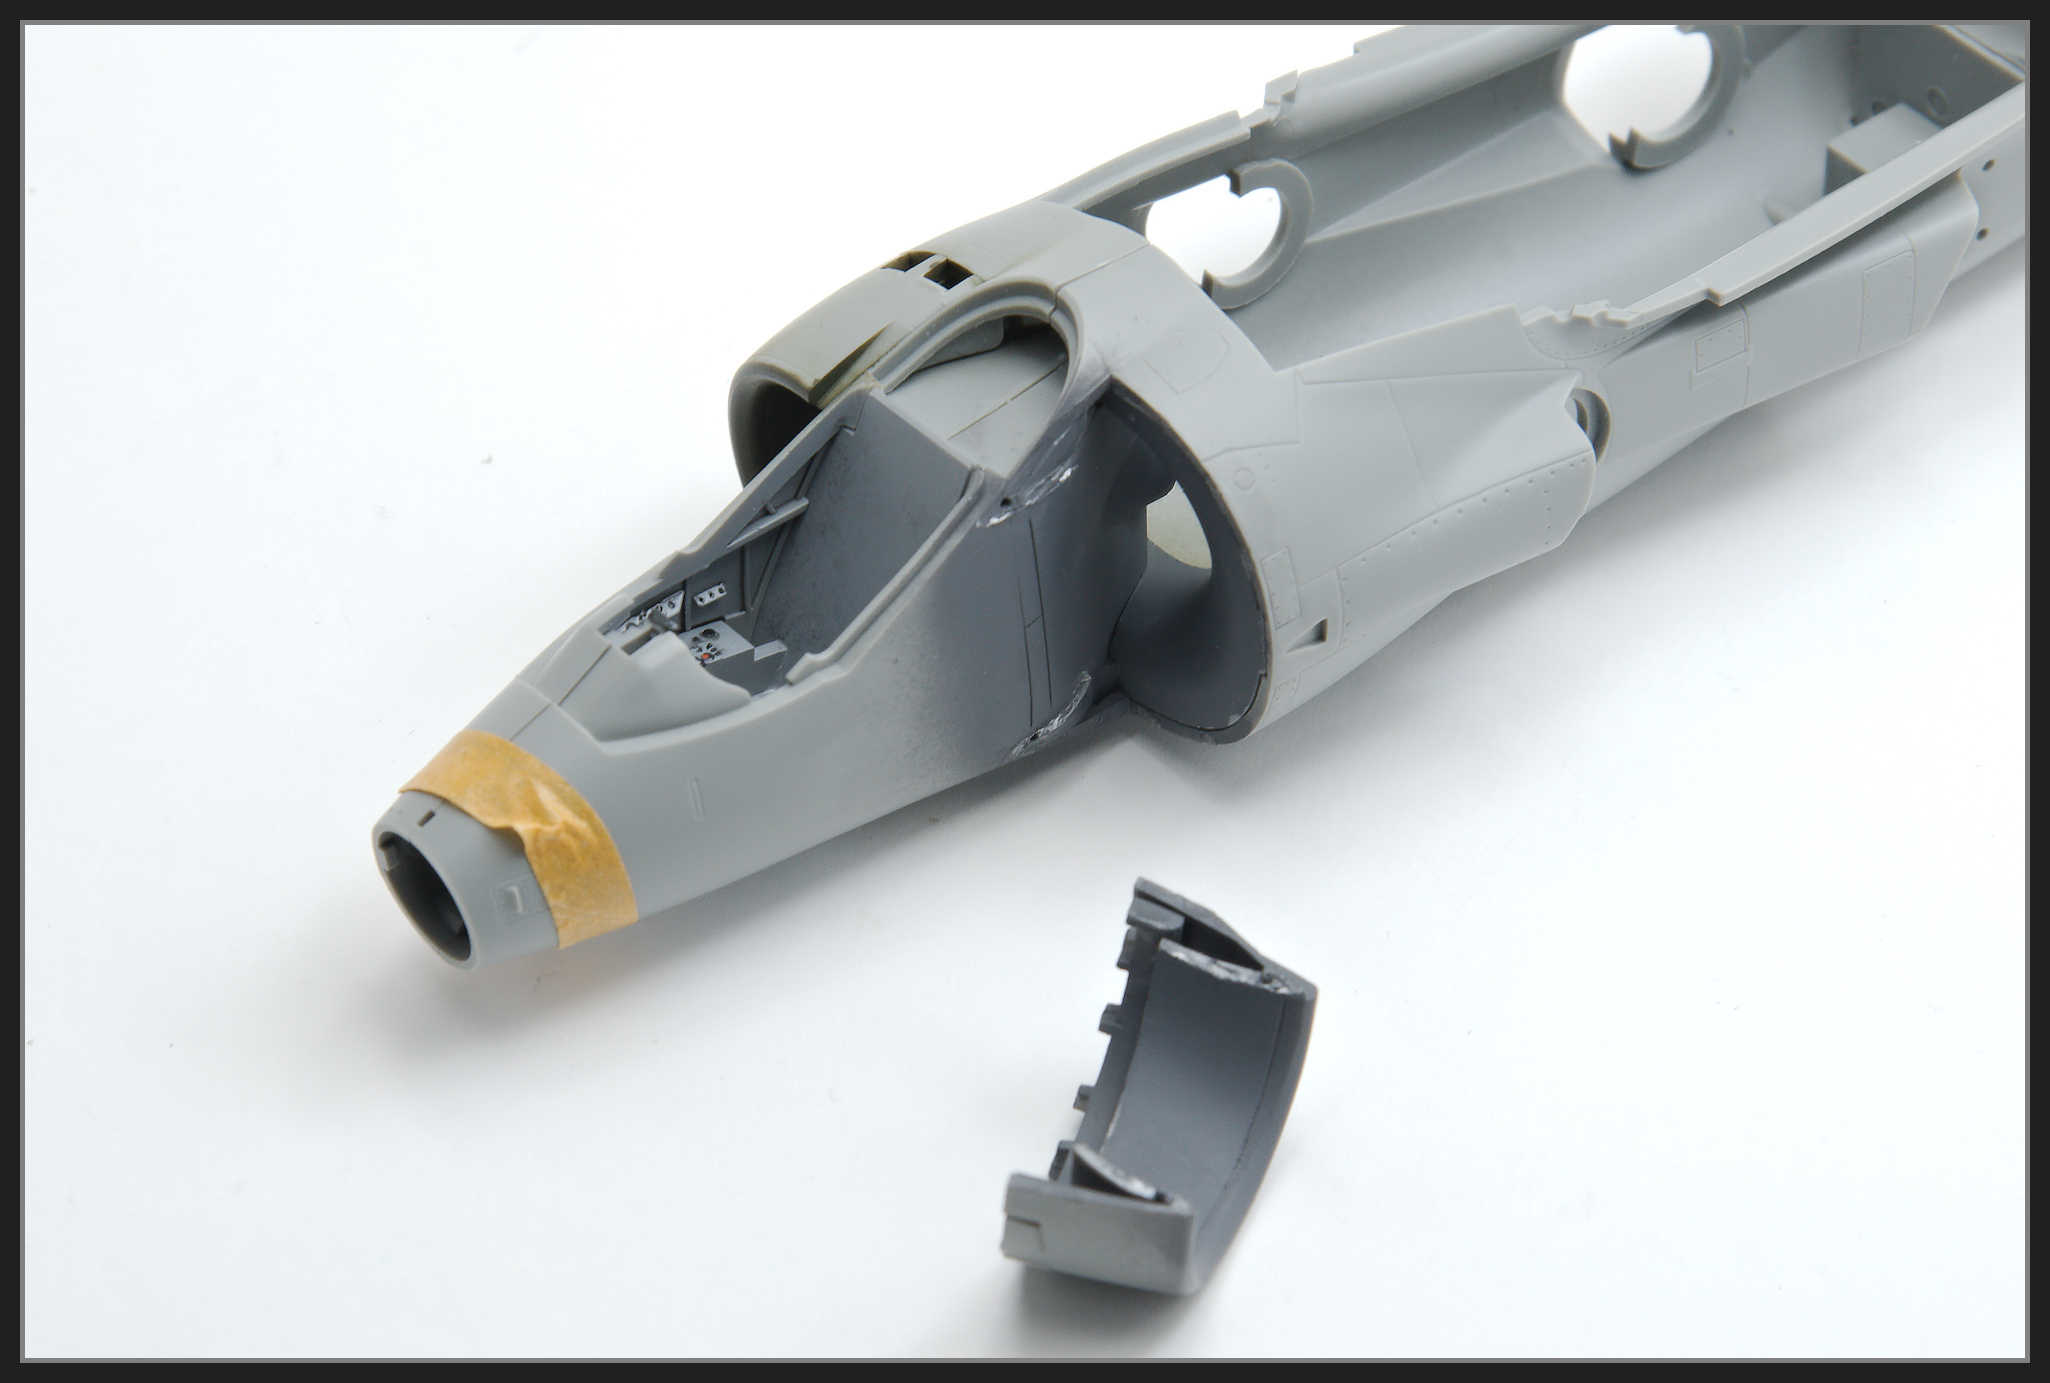
The cockpit tub is pretty basic but not much will be seen.
The IP is quite nicely detailed and would look great under a decal.
I decided not to use the Eduard PE as the colour wasn’t to
my liking. I base coated the tub and
instrument panel Mr Color FS36320. I
know that isn’t right, it’s a lighter than the real colour but I figured it would
be dark in there once the fuselage is closed.
I used decals from the Airscale WW 2 instruments sheets
along with some warning hatchings from the modern aircraft sheet. Switches etc
were picked out the old school way, using a toothpick and Vallejo paints. A wash of Future and Tamiya Flat black was
used to try and accentuate the details. A
flat coat was applied and then some Future was used for the Moving map and
instrument faces.


From what I could find, there doesn’t appear to be a resin
seat for the Gr.3. And in the past, I have found that unless the resin seat is
designed for the kit it can be too big or too small, and thus look silly. I went with the Eduard pre-painted PE.
There are a quite a number of belts on this seat but they
went on reasonably well and were secured with the VMS Black CA. The seat has a lot of placards so the
Airscale modern aircraft placard decal sheet was used for these. I didn’t follow the instructions for the blue
leg restraints but rather laid them as per a photo I had. I also painted the
silver strap (thigh restraint?) a blue grey
Once all the parts were secured, I sealed everything thing
with a gloss coat, applied an oil wash – which was pointless as it can’t be
seen. Not waiting long enough for the
oil to dry I sealed it with an SMS lacquer flat… Stupid me - this dried nice
and white. I picked most of the white
off and then decided to spray it with some lacquer thinner to try and dissolve
the reminder.
This caused the paint on the lower parts of the seat back
belts to wrinkle – AHHHHHHHH.
Once this dried, I touched up the belts with Vallejo Khaki
grey. The wrinkles now actually look quite
nice (a happy accident perhaps). I then used a 0.5mm maker to apply some shadows
and sealed everything with a flat coat
All in all, I was pretty happy with the way it has turned
out and considering how small the cockpit is it is good enough for me.


The cockpit tub was installed in the fuselage. I used some “magic wash” on the front gear bay. One side I used Alclad and Tamiya paint, this didn’t work as well as usual. So, I returned to Future and Tamiya for the other side. This worked better.
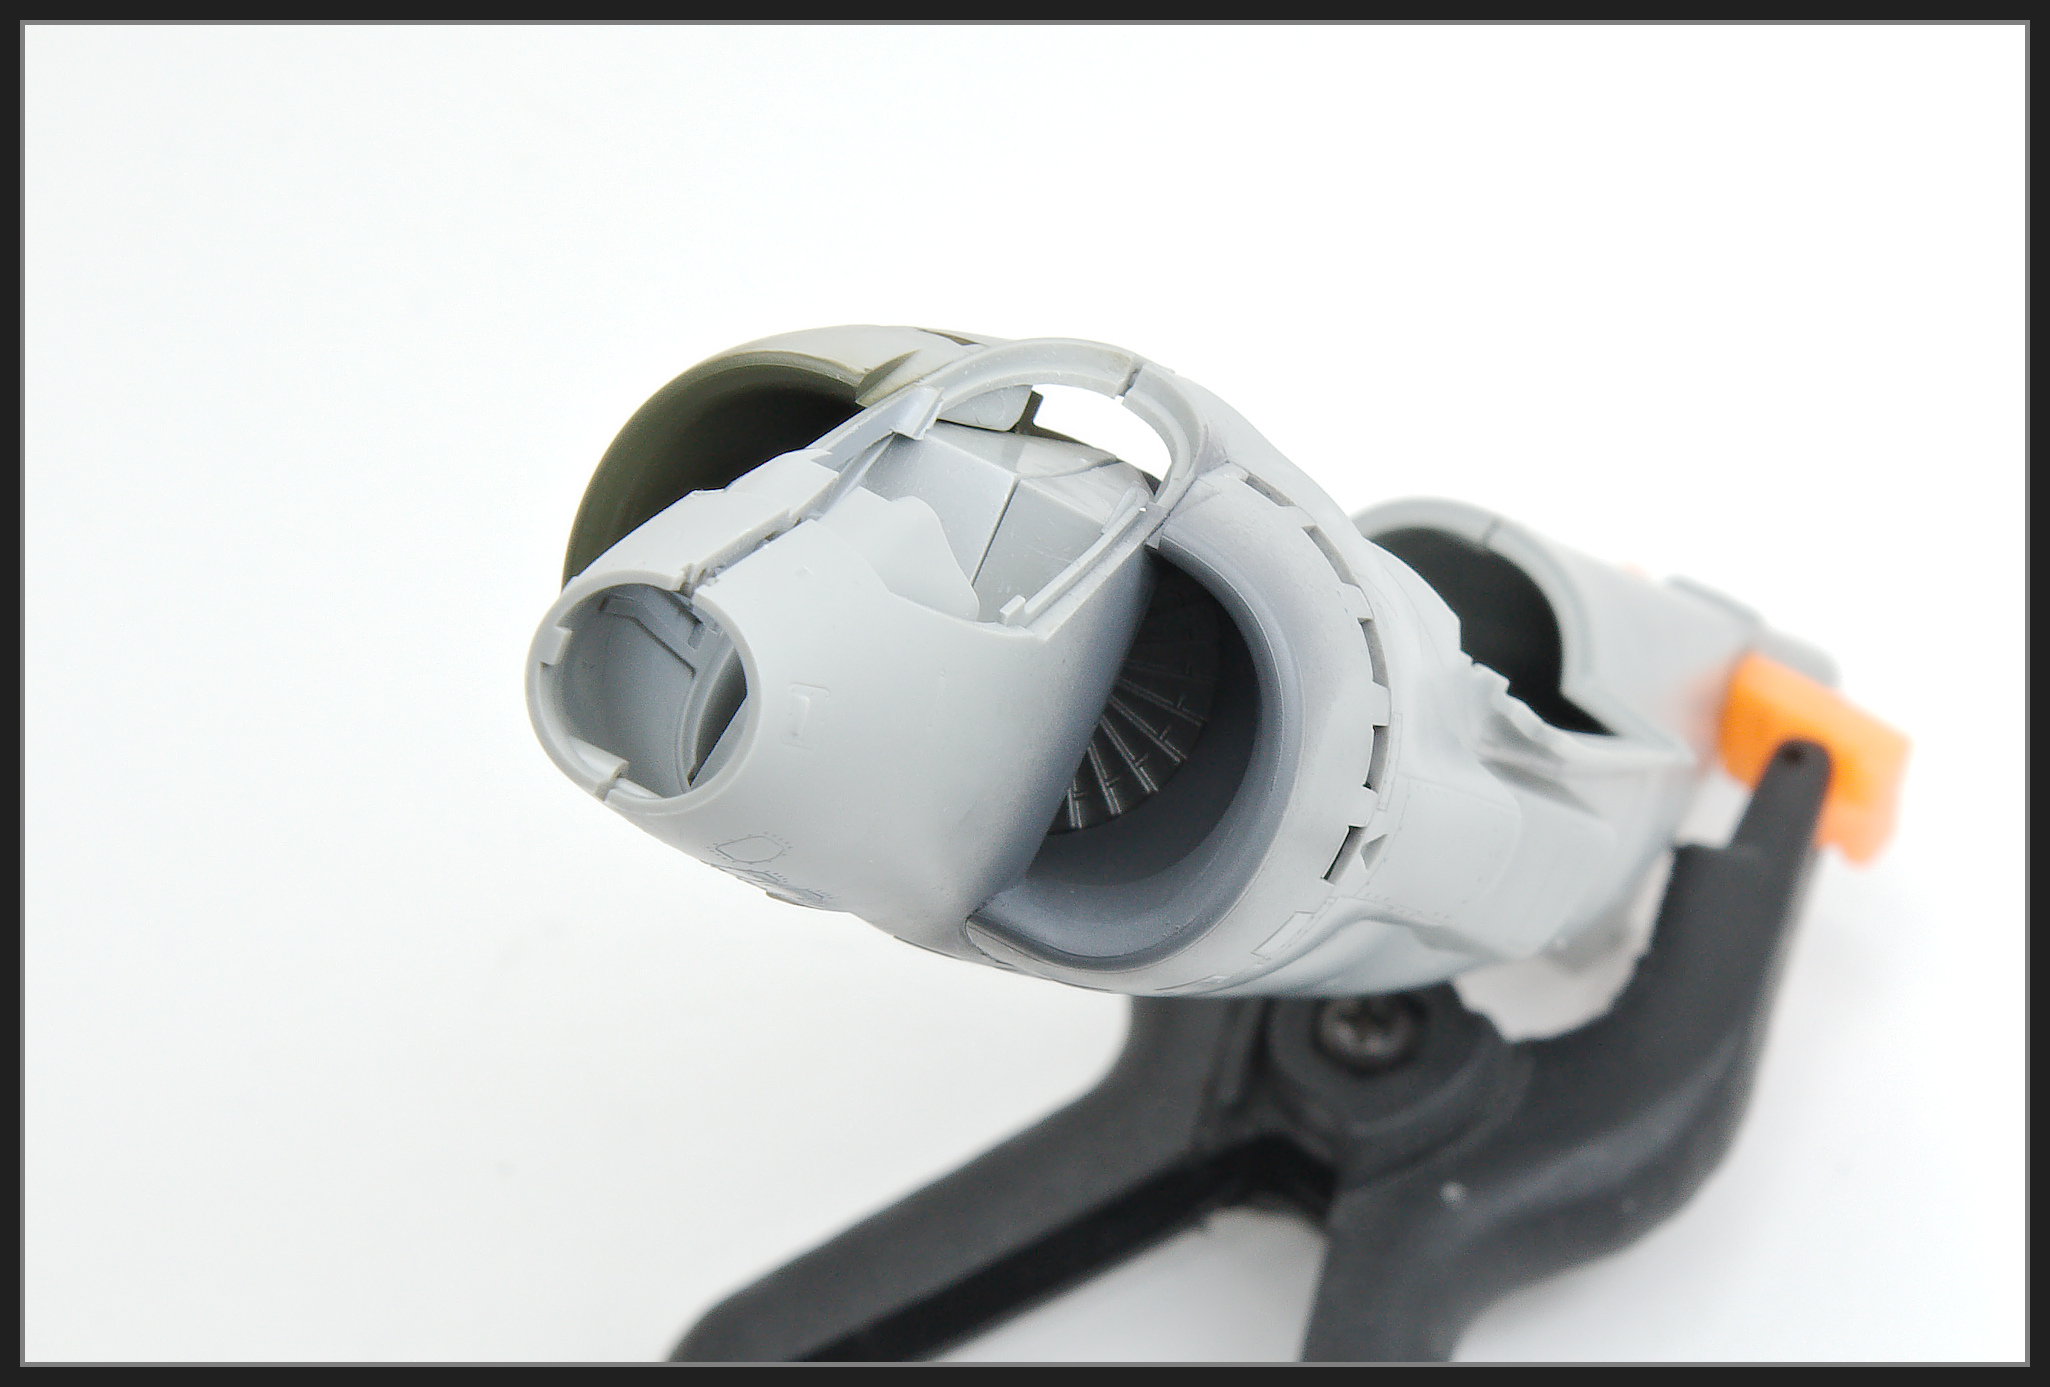
You remember that You Tube series I mentioned earlier? Well, I missed a fundamental step – Insert the bell mouth intake before applying glue to the fuselage. I didn’t and then the bell mouth intake wouldn’t go in, no matter what I tried. Then, whilst trying to force it, I broke off the left had intake. Much swearing ensued.
After I calmed down, I noticed that the Bell mount intake now slipped straight in. Silver lining.
After that set it was pretty simple to reattach the intake. But some scribing would be needed to rework the lower auxiliary intake doors.
After reattaching the left-hand intake, I had to try and
restore the panel lines. I've had a bit of work to get it looking like the
other side.
I scratched some upgrades to the Aden gun pods.
I wish there were aftermarket options available (There is now a Blackdog
set available but it wasn’t out when I did this) as I'm not much of scratch builder. That said I
am happy with the improvements. Thanks
to Nick at the Harrier SIG for his excellent reference material.
I had a metal pitot for this build from Master Models. Whilst
it is sold as being appropriate for a GR.3/ T.4 it’s really only suitable for a GR.1/T.4
(or early Gr.3 without the LRMTS nose despite the instructions showing the
LRMTS nose). I had some brass tube which
was a littler larger in diameter so using the kit part for the length I
soldered a piece of tube to the rear of the pitot.
To reduce the size of the tube to the pitot I put it in my
electrical hobby drill and spun it. I used a lapping file reduce the diameter
of the tube. A piece of brass rod was stuck
in the end to make a pin to attach it to nose. I am pretty happy how this turned out but I
will leave this off until later in the build.
The trailing edges of wings need thinning considerably to
ensure there is no step between the flaps, ailerons and wing. In my typical Hamfisted way I did one side
better than the other.
The pylons were also relocated using the information from
the Harrier SIG’s build notes. The white
circles are sprue filling the original holes.
In the image you can also see the inside of the Gas Turbine
Starter/Auxiliary Power Unit exhaust that I scratch built.
Fit of the wings on the top is pretty good. The black lines are because I’ve used Mr
Cement Black. This is useful as you can make sure the glue has flowed into the
whole join.
All my dry fits showed the gap between the fuselage and wing
on the underside wasn’t too bad. I added
and removed spreader bars but these didn’t seem to make much difference so in
the end I left them out.
But after gluing the top I turned the kit over to see that
my dry fitting skills were rubbish and there was a fair gap (as everyone says
there is). Oh well time for some old
school filling.
There was always going to be a bit of filling on the underside, even if I’d done a proper job of the fuselage to wing join. The dog’s tooth on the underside of each leading-edge needs filling to make it the same as the top of the wing. The step between the forward 1/3 the wing root and the fuselage also needs filling. I used Magic Scuplt as it can be shaped with wet finger or other tools.
The trickiest bit was re-scribe the lines into the wing root. I used a curved saw PE saw blade in knife handle to do this.
Some of the smaller sub-assemblies ready for priming. In the picture are Phase Hanger Resin Out Riggers and wheels, Res Kit wheels, Res Kit Matra Rocket Pods, Kit tanks and the modified kit gun pods. I needed to thin the nose gear fork a heap to allow the Res Kit nose wheels to fit. I chose the res Kit wheels as they have slightly better detail than the Phase Hangar ones.
Ready to fit the front glass. Prior to this I added some extra detail to each side of the HUDs to simulate what I saw on the reference photos. These are simply pieces of plastic card with some paint work.
Fit of the windscreen is really good. There was a little gap between the fuselage
halves just forward of the HUD so perhaps this was reason.
I used a tiny smear of Vallejo putty on the left had side as
you can see in the image. I know many modellers
think Vallejo (or other water based) putty is rubbish but I find it excellent
for things like this as the excess is easily wiped with a wet cotton bud.
Prior to fitting the windscreen, I painted the inside black.
I had the Eduard Tface (Two face) Mask which made that task simple. Later I realised I should have painted it
dark grey – oops.
I added some detail to the RCV openings.
Gun pods on showing some of the extra detailing that no one
will see
Ready for paint.
Because I hate adding clear parts until I have no choice, I added the
lower part of the canopy to the model without it’s associated clear part attached. It will get painted the same as the airframe
and I can remove it later and attach canopy and touch up as required. Tape, sponge and liquid frisket were used to
seal the cockpit.
I also scribed a horizontal line to show the gap in the
doors which protect the LRMTS lens on the nose.
I started by drawing a rough outline of the camo pattern using a green pencil.
I then blocked on those bits in with my Procon Boy PS
270 airbrush. Getting the pattern accurate wasn’t
important here it allowed me to practice with the airbrush and paints. Paint was Mr Color Dark C3330 Green mixed with
a generous amount of Mr Color Radome Tan.
I scanned and enlarged the instructions, then printed them out before cutting out the green to make sure the green pattern I’d spayed was reasonably accurate. Where it wasn’t I added some more green then outlined the pattern with a light grey pastel pencil.
The grey is Tamiya XF77 IJN Grey (Sasebo Arsenal), thinned with Mr Levelling thinner. Again this was sprayed through the Procon Boy PS 270. I’d forgotten how good Tamiya paint will airbrush when thinned correctly.
Some touch ups were needed. I went back and forth with the green and grey. Looking at the base camo colours I reckon it is probably the best free hand work I've done in a long time.
Onto the drop tanks and stabilators. One of the drop tanks had a different green
used for the front end. This was the unmodified Mr Color RAF dark green so you
can see how different it is from the main colours. The other one got a grey front section as per
the instructions, and some other reference photos.
Some tonal variation has been added using various splatter
masks and different greys, greens and brown.
Despite having an excellent decal sheet in the kit, I decided to paint most of the national markings for real no reason but that I could. The only markings where I decided to use decals are the ones on the intakes that cover the large auxiliary intake doors that are open on the model. I figured it will be easier to decal these.
I cut out masks from Oramask 810 using my Silhouette
Portrait and applied them to the model.
Rather than do the red inner first, which is what I’d usually do, I
decided to paint the blue first. The rationale for this is that I wanted to
reapply the blue mask and then pull off the outer mask to touch up any
overspray that might have occurred because of the vortex generators.
Tamiya Gloss Blue was used first but I didn’t like how that looked so I
overcoated it Tamiya XF8 Flat Blue.
The Blue mask was reapplied and Tamiya Flat Red XF 7 was sprayed. Pulling off the fin flashes revealed I’d screwed up the alignment so I quickly sanded the red and blue off. The alignment was off on both sides.
I then removed the outer mask for the wing roundels and did some touch ups.


Pulling of the masks I wasn’t happy with the painted markings. I’d been to heavy handed with the paint and
this couldn’t be saved with some light sanding so I removed the paint with some
Mr Color Thinners.
Mr Surfacer was applied and then it was sanded to flare with
the surrounding paint. Once this was dry
I cleaned out the panel lines with an old airbrush needle as they had been filled in with the Mr Surfacer.
When things go wrong, they tend to go wrong in multiples. Whilst touching up the tail, a big drop of thinners dropped on the model. At the same time my wife rang, wanting to be picked up from town. This saved me from trying to “fix” it instantly as I had to go and get her.
When I got back to the model, I lightly sanded the area,
applied some Mr Surfacer, let it dry. Then this was sanded before paint was applied.
I then repeated the process. It was
getting there.
New masks were made.
This time I made the masks so their edges aligned with panel lines
/detail and so they avoided other details like the vortex generators. This made aligning them extremely
simple.
Rather than Oramask this time I
used some Cricut masking material as this is less flexible than Oramask and
holds its shape better. I find Oramask
can deform easily so where the surfaces are flat, I often use label paper or
Circuit masking material in these instances.
This time I shot the red first (Tamiya Flat Red XF7) then
replied the centre mask and shot Tamiya Flat Blue XF 8. As this was over the light grey the colours
are more saturated and look closer to the decals.
The outer mask was removed and the camouflage pattern
restored. I could see a tiny bit of grey
showing in the close images but I figured I would be able to hide this with
some weathering.
When applying a wash to the model, I decided I didn’t like
what I’d done with the fuel dump pipes on the trailing edge of wings, between
flaps and ailerons. I also noticed sink
marks on the ailerons.
I cut the pipes off, and replaced them using evergreen rod sanded
to shape drilling out the ends. I also
took the opportunity to fix up the bit of grey outline on the roundel
Annoyingly these images show the trailing edge of the flaps
isn’t great.


Ready for decals.
But before decals I decided to fit the pylons. Fit of these isn’t great and was probably
made worse by me moving the pylons. Magic Sculpt was used to fill the gaps.
Like all Kinetic kits these are Cartograph decals and are
excellent. Cartograph decals make
decaling a joy as they just work without any thinking.
Most of them are on but there are some on the doors and
canopy to go yet. They were applied over
a gloss coat using Daco medium (which was probably unnecessary)
One the handy things about having a Silhouette Portrait is
the ability to whip up some custom masks in a few minutes. Rather than try and brush paint the frangible
covers for the rocket pods I made some masks.
To do this I placed a bit of Tamiya tape over one of the
covers on the pod, burnished it down and then traced the outlines with a
pencil. I then scanned the shape,
imported it into the Silhouette software and drew the shape. Cut and paste to get the required amount of masks then cut.
The longest part of the process was applying them all prior
to painting.
Weathering. I started
with coloured pencil on the starboard wing.
These worked well enough but only black was really providing the colours
I wanted. The next day I wiped the
majority of it off and started with oils ABT 502 Sepia was the main colour
used.
Usually, I apply oils over a semi-gloss base coat but this
time I did it over a light coat of SMS flat.
With a light application this clear doesn’t dry dead flat but with a slight
sheen. It also dries very smooth so I
can still work the oils easily.
The ABT 502 oils I was using are new tubes so there is lots
of oil. A blob was put on cardboard to leach out the oil. Then a tooth pick or old airbrush needle was
used apply the oil before using various brushes (both dry and wet with thinner)
to make the streaks and marks.
Fitting the Aires exhausts reminded me that I shouldn’t have
fitted the internal kit mechanism for the kit parts. The Aires exhausts don’t
like these parts. I managed to push them
in and then pull them out. The Aires
exhaust were fitted, aligned and secured with some black CA.
More weathering. Oils and pencils again with some light dry
brushing with the Tamiya weathering sets.
The Zinc chromate chipping was done with Vallejo German Dark Yellow
applied with a sponge. Black and dark grey pencils are used to touch up panel
lines as required.
Landing gear. I used the Phase Hangar Outriggers and struts but the Reskit main and nose gear . The Reskit wheels are significantly wider than the kit wheels so the nose fork needed a lot of thinning to get the wheel to fit.
The Nose gear had some wire added to busy it up a bit. The nose gear has a nice positive fit so it was glued in using Tamiya white cap glue. The Phase Hanger outriggers were assembled and then glued into place. The model was left to sit overnight.
Fitting the rear main gear proved a little frustrating. Unlike the nose gear the rear gear does not
have a positive fitting arrangement.
Getting a little desperate I went the Nuclear option and
sought a Bruce's advice since he had built three Kinetic Harriers in the past year
or so.
To my amazement his advice was good and it even worked. His idea was to cut a bit off the top of the
main leg, then drill a hole in the top, and a corresponding one in the
model. Then insert a pin in the top of
the main gear and you can adjust it so the rear main wheels were on the ground.
Once I had it in place, I used a drop of CA glue to lock
everything in place.
Conclusion
Overall, the Kinetic Gr.3 is a good although not great
kit. It builds reasonably easily into a
nice-looking replica of the aircraft but does need some work to correct
inaccuracies (if that’s your thing) and to improve the fit of certain parts. I’d definitely grab the Black Dog set if I
built another.
On this model I am happy that I achieved my aim with the
paint finish. I am actually really happy with the paint finish on this model.