Thursday, 31 October 2013

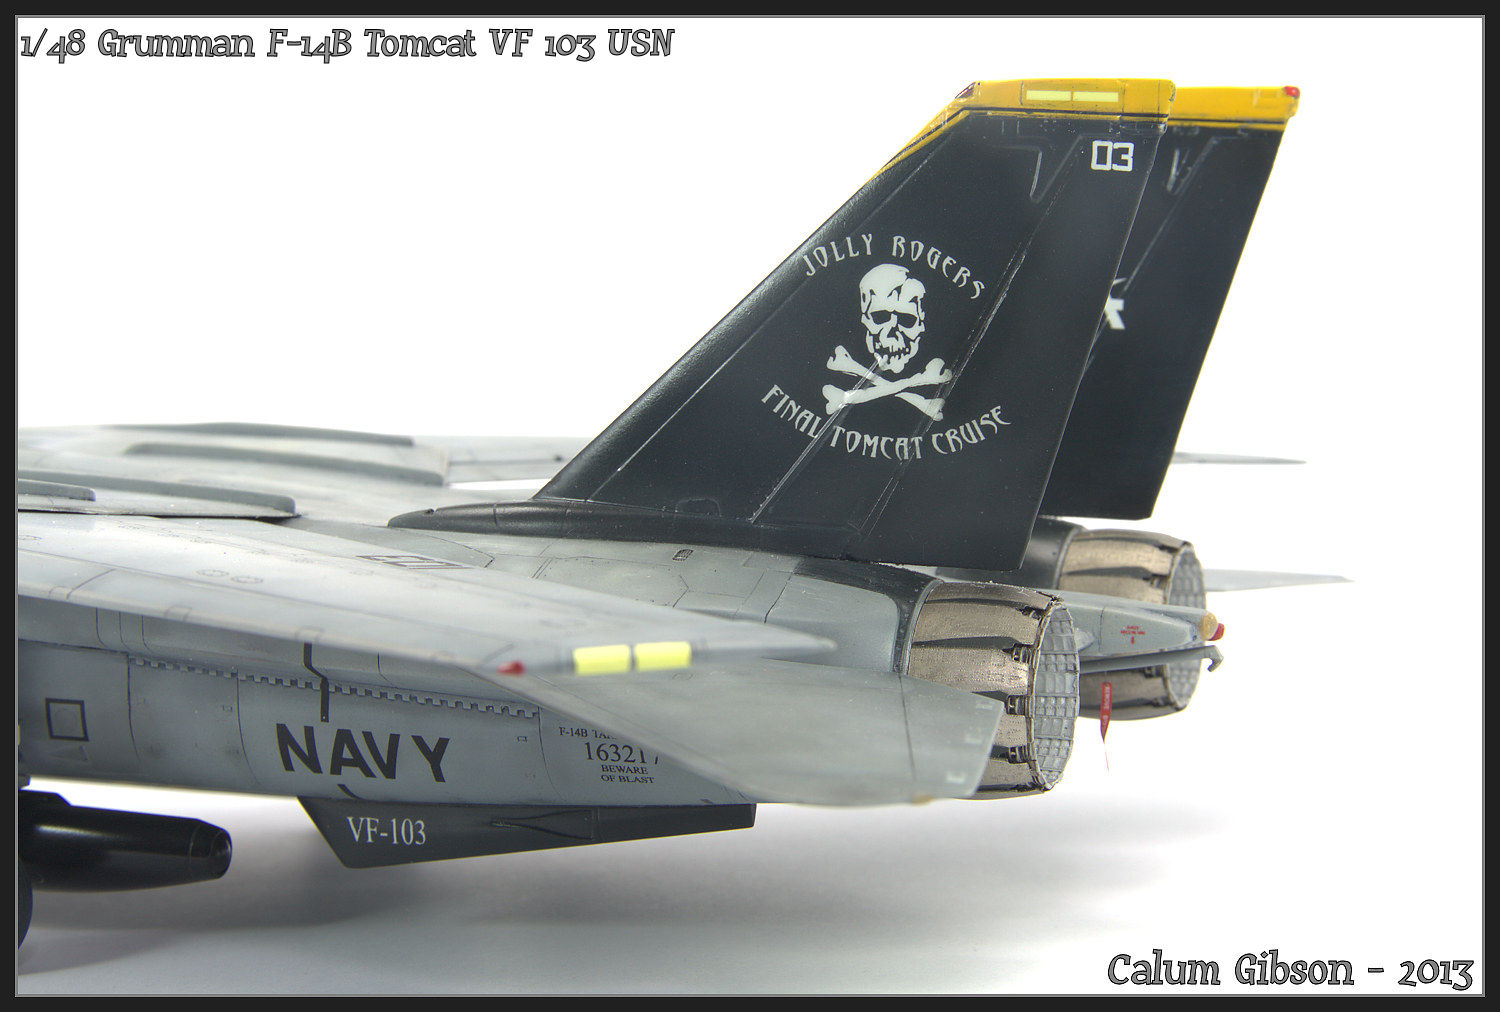
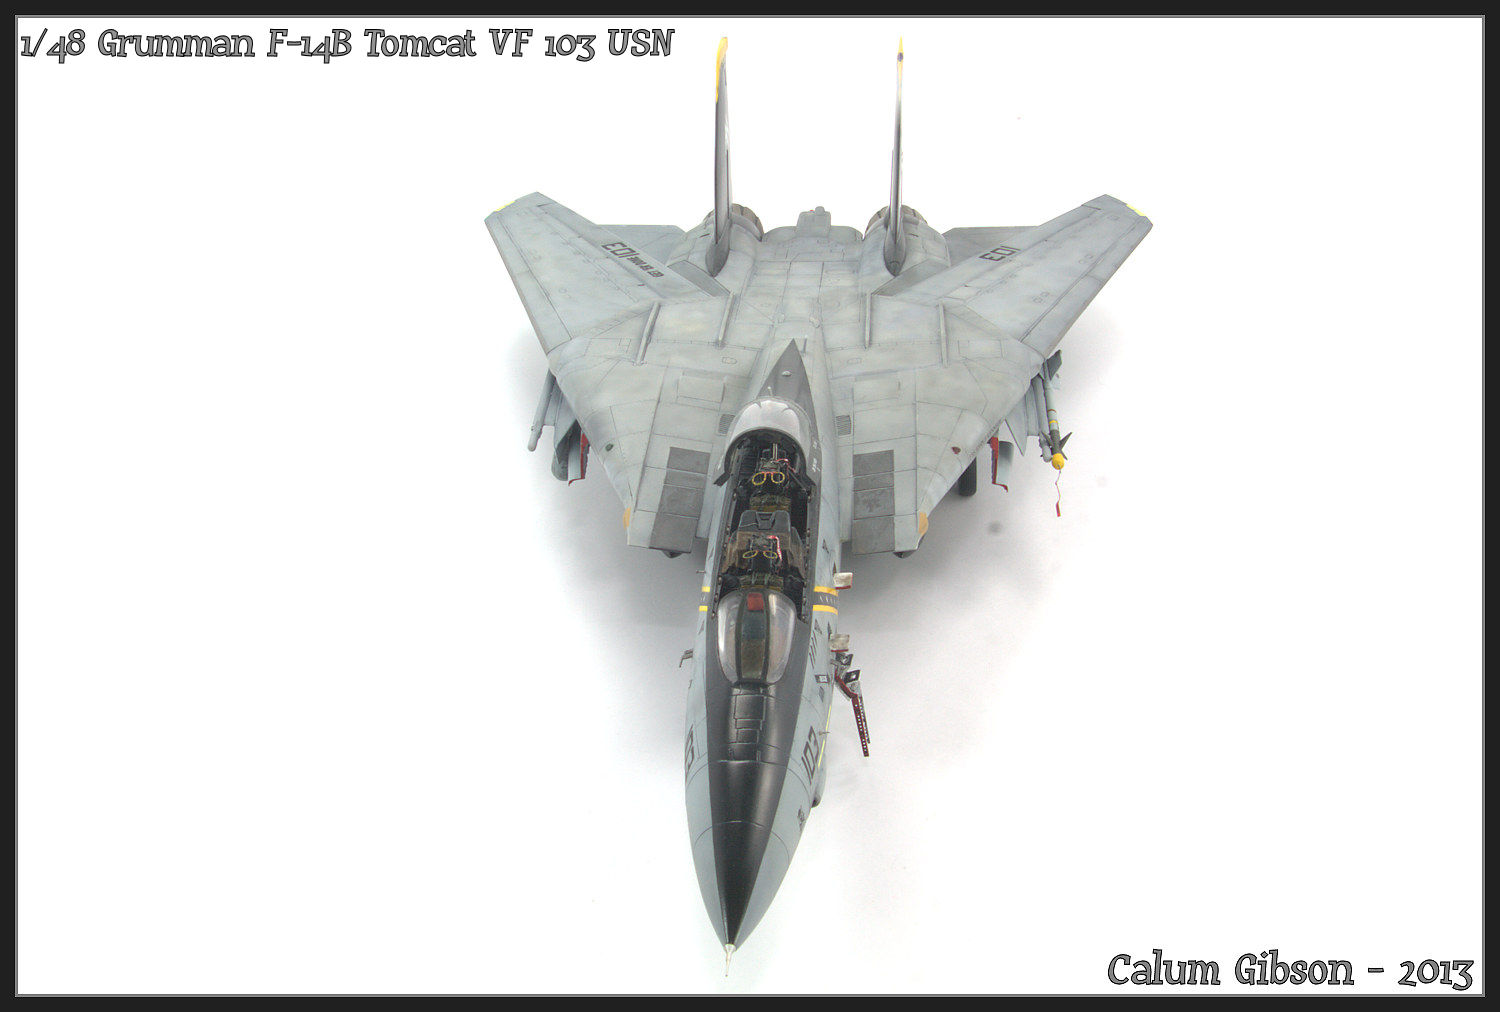
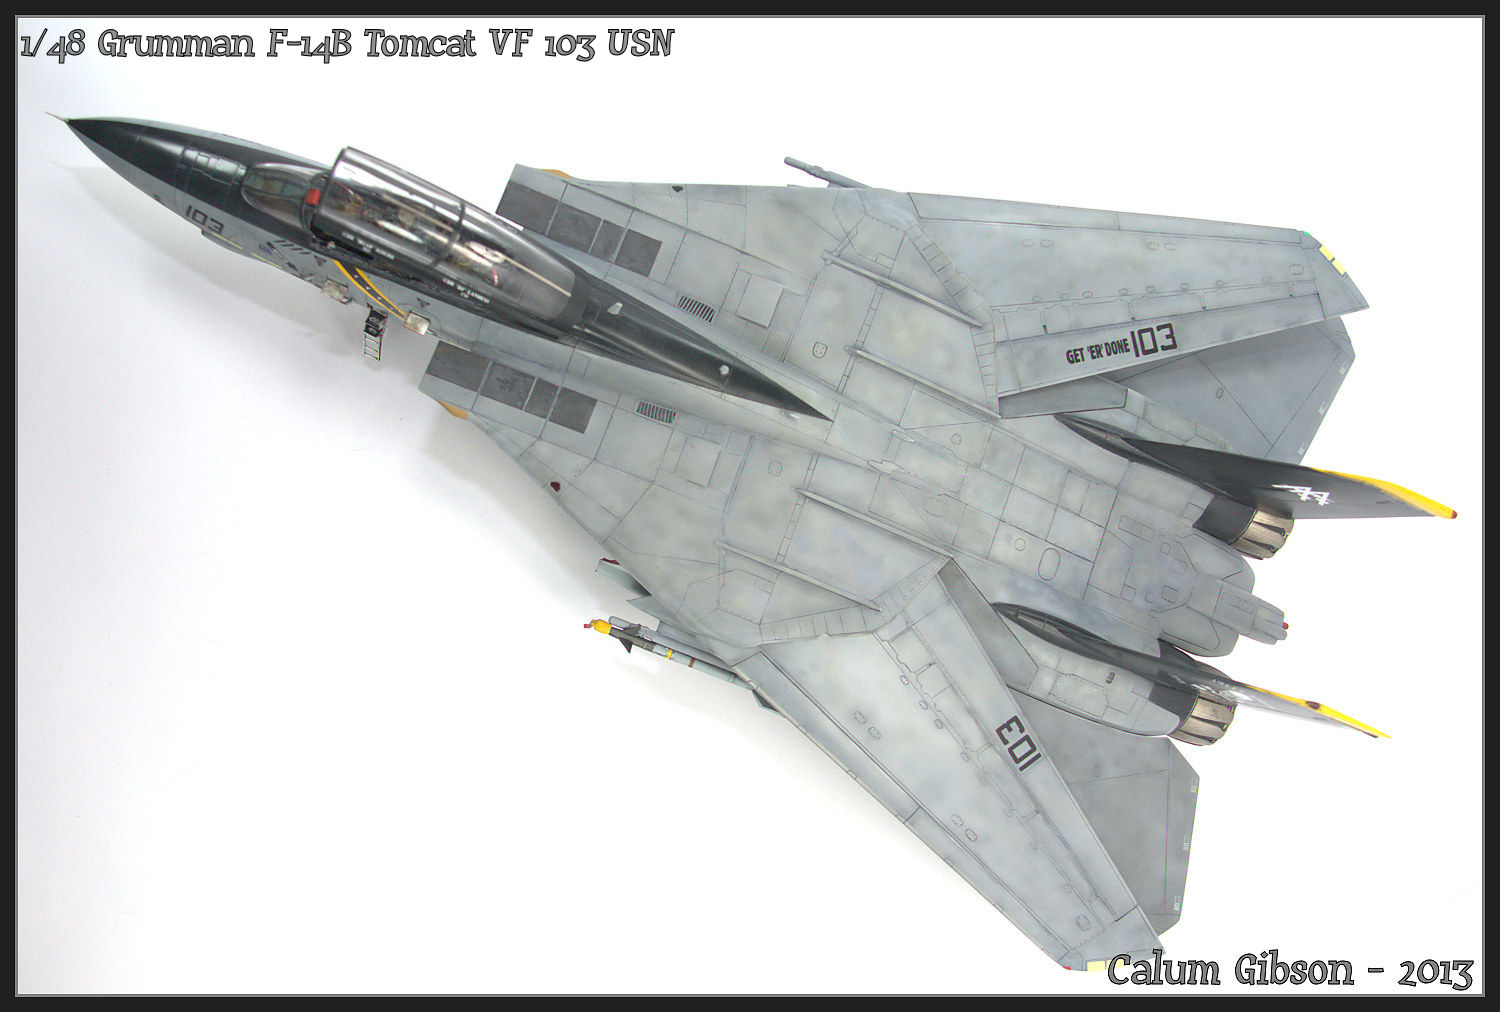
1/48 Hasegawa F-14B Tomcat - VF-103 Last Cruise - Victory 103


Some details

Kit - 1/48 Hasegawa F-14B (VF 103 Limitied edition Boxing)
Cockpit -  Aires
Exhausts -  Aries
Decals - Fightertown (with a few kit decals)
Wheels -  Royale Resin
Weapons - Tamiya (from the F-16 kits)
PE - Cross Delta detail set
Pitot and AOA probes  -Master model
RBF Tags - Aires (vinyl) , Eduard (1/72 PE) and Fighterown (decals)
Paint - Mr Color, Mr Hobby and Tamiya,
Semi Gloss Clear Coat (Black bits) -  Model Master Lacquer and Tamiya Acyclic
Flat Coat - Testors Dullcoate

Onto the Photos


Sunday, 27 October 2013

1/48 Hasegawa F-14B Tomcat - Part X

I tried the Jasmine Models sheet, but it just wasn't right, it seemed to have some of the problems of the Fightertown sheet. Plus the angle of the diagonals just didn't seem to line up right with the aircraft.

In the end I used the replacement set of Fightertown decals I’d been given. And while they when down OK, they again wrinkled when the clear coat was applied.

The model nearly flew at that stage, but after the clear coat dried I burnished the wrinkled down as best I could, sanded the remaining high spots of , which were only on the black part, then using post it notes roughly masked out the black between the chevrons and sprayed NATO black. This was actually easier than I’d though and only took an hour or so. Sorry no photos of all of the above as I was a little annoyed and wasn't in the mood.

The next job was even up the yellow stripes, the aft stripe on this side being thinner than the forward one. The reference shots show these are even.

I masked the aft side out and painted it Gunze RLM yellow. I actually think they are a little too thick, but at least they are even now. I then gave this area a coat of Tamiya Clear.


The same issues were present on this side, and the same “fix” was applied. This side had an even larger difference between the 2 yellow stripes with the forward stripe being the issue. I used Tamiya Lemon yellow on this side.

First Flat Coat on. I like Testors Dullcoate


All the other Fightertown decals performed beautifully (as usual). Before I began decaling the tail decals were the ones I was worried about, a large piece of artwork over black and a raised piece of detail. But as you can see there is no sign of carrier film. I can't understand why the diagonal pieces from the same sheet were so difficult.


Here are the Cross Delta Walkway markings, whilst these are really nice with the non slip surface depicted well paint does not stick to them at all well and will chip very easily.


Yet again I find with this kit that nothing fits, the rear hole is way to small and the forward hole means the leg sits at the wrong angle (leaning forward instead of vertical). This link shows the issue I encountered


Using a file I enlarged the rectangle and after reading some advice on the web I drilled another hole forward of the original


After 4 hours of fettling it's on it legs and everything looks the way it should (I think)


The red paint is to simulate is a lock that is removed before flight. I intend to stick a RBF tag hanging around there


Exhausts are on. These went on without much drama. Good to have something go right or a change.


RBF tags and the stores and doors are on. More to follow soon


Nearly there, Lightning Pod and undercarriage doors are on


 Top shot. Not sure if I should weather it with oils. I would like to try that technique but I've really had enough of this build.. Might save it for another


Just a few little bits to go and she'll be done. I stuffed up the pylons for the drop tanks so I'm getting some replacements


Just about done. If/when I build another F-14 I won't use the FOD guards. Not many photos of the F-14 I've seen hove then fitted.


I do need to paint the black parts semi gloss as these were glossy on the real aircraft

1/48 Hasegawa F-14B Tomcat - Part IX

If you follow my facebook page The Ham Fisted Modeller you'll know of I'm way ahead of what follows but I think I'll try and finish this build off here as well.

Firstly a little bit on the gloss coats.

I've been using Tamiya X22 Clear thinned with Mr Color thinners on my last few builds. I'd really mastered the use of that combo, and I could consistently get a beautiful smooth gloss finish. The only issue I had with it is that occasionally it would be a little susceptible to finger prints. That was always simple to fix with a light sand with micromesh.

For some reason,even though I seem to have a good solution, I always want to try something new, and I've never been one to try things on an old kit first.

I'd read about Gaianotes on another modellers facebook page so thought I'd try it.

It's dries fast, shiny and hard, but you really need to thin it (over 50% thinner). I'm not convinced I'll stick with it as I'm worried the thinner is quite hot and some decals may not like it. Although most on this build weren't bothered by it. Plus you have to get it imported, which generally means sea freight

All that said I've got 2 bottles and 500ml of thinner to use first.

Anyway, back to the model , Here it is prior to another gloss coat


Gloss Coated again with Gaianotes


I fixed the Arrestor Hook and added some Chaff and Flares to the CDS


I applied a light grey wash to the black parts


 I received some replacement decals from a member here (thanks Bill) But unfortunately these, like my original set, are way out of the registration. I did notice it on my original set but figured I'd just got a bad run. But as you can see below this one is pretty bad, perhaps this is why I had troubles. The other side is not as bad, but still not really what I've come to expect from Fightertown.

I tried to trim this one up to fix it, but I didn't look that good. so I decided to wait for the Jasime Models sets to come and see what they are like


Whilst waiting for the replacement decals there was time to do the weapons

Sidewinder is from the Tamiya F-16, the Snurf (yellow cap) is from Dr Pepper. Decals are from the Tamiya kit as well. The Lightning pod is from the Wolfpack set as is the LAU


 The GBU-12 is from the Tamiya kit. The Weapons from the Tamiya F-16 are the best available in 1/48 IMHO. Wish they'd do a  weapons set

I did break the seeker heads and droop them slightly, Plus using some stippled Mr Surfacer to add the USN Ablative costing. The coating on the more modern bombs doesn't seem to be as rough as the earlier 1990's ones.


These the Royale Resin Wheels. Always my first choice for Jet wheels


These are kit legs, I was going to to use the SAC white metal ones but the detail on them was rubbish, plus I broke the nose gear. Hopefully they'll hold the kit without bowing.

I added some hydraulic lines and electrical looms. Not accurate but they add some interest to the legs


The silver parts of the oleo's are Chrome self adhesive bare metal silver


Here are the assemblies. The wheels aren't glued in as yet. I'll wait until the legs are in the aircraft before gluing .