Sunday, 19 May 2013

1/48 Hasegawa F-14B Tomcat - Part II


Since I started this build on this blog I'll continue it here.

The Aires Seats have seat cushion detail that whilst isn't wrong, is not really common. So, stealing another idea from John S's build on ARC I decided to simulate the more common cushions with sticking plaster.


 I wasn't happy with the first go so peeled it off after painting and tried a couple of different brands. The one on the left is to coarse for 1/48, but may be good in you want simulate fabric in larger scales


After airbrushing the seats with nato Black I picked out the details with various Vallejo Paints.  Decals are from a Afterburner decals F-14 sheet. I bought one of their F-14 sheets primarily for the stencils. I gave the seats a wash with the black Tamiya enamel wash. This worked well to bring out the details in the straps. A fine Gundam Marker was used for the stripes on the ejections seat handles. I should really have replaced the PE hand grips with wire are they are a bit one dimensional (it looks worse in these big photos)


Next task was to add the cross detail self adhesive detail set to the front fuselage. This is a great idea for certain raised detail. I'd like to see more aftermarket like this


I had a go at scribing the vent detail. I still wasn't happy, but I think I could have pulled it off with a bit of a tidy up. I was thinking decals maybe the easy answer


And then I noticed


Doh!!!!!!!!!!!!!

Now I've got those huge gouges to get rid off, and it's got to smooth for the decals....

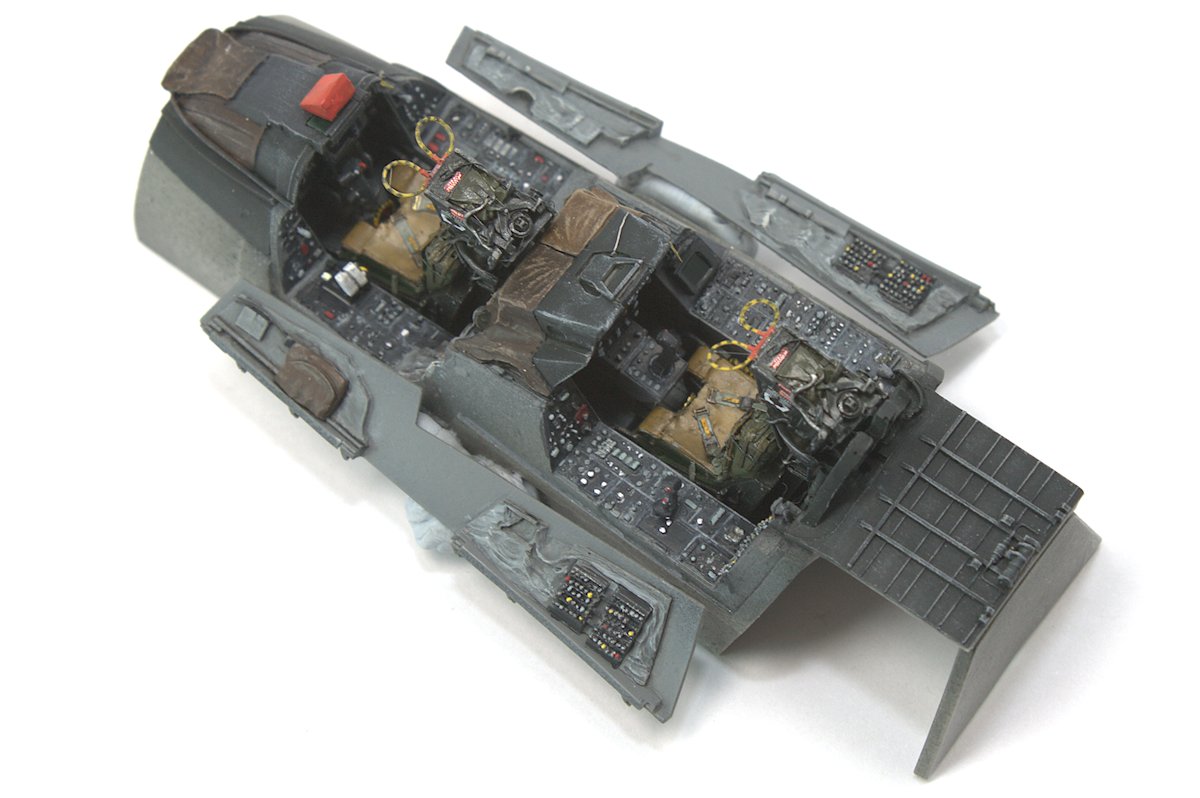
Whilst I was waiting for the filler to dry in those gouges I was working on the cockpit Tub.

I started by painting the entire tub Gunze H305 (FS36270). I find tha the correct colour, FS36231 is way to dark for 1/48th scale. The Black is Nato Black from Tamiya.

All the detail was picked out using Vallejo Acrylics, except for the yellow which is Humbrol 24 , Trainer yellow (the only Yellow paint I think looks the correct shade of yellow f that makes sense).

A grey enamel wash was used to bring out the detail and some dry brushing was done with a grey.

As the Aires Cockpit has the wrong HUD for a F-14B I decided to use a HUD cover, it's not glued on so it's a little crooked in these images


Finally, here's a close up of the instrument panels


Saturday, 27 April 2013

1/48 Hasegawa F-14B - Part 1

Everyone who builds modern Jets needs a F-14 in their cabinet so I've finally built up the courage to tackle Hasegawa's offering.

I've been collecting aftermarket for a quite a while, but until I actually got it all in one spot I didn't realise how much I actually had. 


Now obviously I'm not going to use all of this :) and I'm not sure which aircraft I'm going to model, but VF-103 is the early favourite.  

Here's the base kit. It's decal sheet is printed by Cartograf which is good as I definitely want to use the stencils. I think the same aircraft is on the Fightertown decal sheets which gives me some spares for the inevitable stuff up.

I'm also using this build as a reference and for inspiration, it's outstanding. Although I'm going to go to level John has.


First of all I fitted the gun vent. The fit is, to be blunt , crap.


This is the best image I've forund of the vent. Thanks to the owner (whoever you are). I'm not sure how I'm going to scribe this. Is there an aftermarket option?


I've run a scriber over the panel lines to deepen them slightly. I find the panel lines on some hasegawa kits can be a little shallow for my taste.


Originally I was going to use the Aionix F-14B set, but it was pretty disappointing from an accuracy and detail quality perspective so I went with  the Aires set. You can see a photo comparison with many of the issues here .


The biggest (most visible) things in the Aires set that needed correcting were the rear cockpit Tactical Information Display (TID)


 The pilots HUD
 

And the Lantirn Stick controller. For this I used a grip from the spares box , originally from a Hasegawa F-4.


As I'd already fitted the Avionix Tub, fitting the Aires one was pretty simple. There wasn't much grinding of the kit required, I just attacked the tub with my rotary tool removing the resin where it fouled on the kit pieces. I did thin the rear of the steps a little though.


This page has a good set of photos showing you what you need to remove from the kit and resin to get the tub to fit

I did get a bit carried away with the sanding stick and knife so I've got some filling to do. But I'll wait until the tub is glued in place before I fix this.


For a bit of break from playing with the resin I decided to paint the front wheel well. This need to be fitted before the front fuselage is put together so it has to be done sooner rather than later. The details isn't Aires, the to be honest I can do without the hassle Aires wheel wells bring

It's simply Tamiya flat white with details picked out with Vallejo paints. I also added a couple placards from a  Eduard F-4 Placard set


To be continued.

Friday, 19 April 2013

1/48 Tamiya P-51D Mustang - No 2 Sqn RNZAF


A quick and relatively relaxing build. I chose a No 2 Squadron Mustang as I served on 2 Sqn in the 1990's.

Kit

  • Tamiya

Aftermarket

  • Prop Ultracast
  • Seat Ultracast
  • Wheels Barrcudacast

Decals

  • Ventura 
  • Fundekkals (stencils)

Paint

  • Tamiya AS12 
  • Alclad for tinting various panels

The Photos