Wednesday, 12 October 2022

1/48 Airfix de Havilland Vampire F.B. Mk.5 - No 75 Sqn Royal New Zealand Air Force


Depicted as NZ5776 from No. 75 Squadron Royal New Zealand Airforce circa 19

After the long drawn out Hobby Boss Super Hornet build I felt like I needed a quick and easy palette cleanser under the belt.  

I had a couple of the new Airfix Vampires in my “For Sales pile that weren’t looking like being sold anytime soon and after looking at the plastic over few beers one evening I figured it looked simple enough that I could it smash it together in a couple of weeks.  

A mate also informed there was an aftermarket decal option for an RNZAF FB. Mk 5, and that I can build the FB.5 from the box.


The Kit

  • 1/48 Airfix Vampire F3 . Kit No Airfix A06107 

Aftermarket

  • None

Decals

  • Euro Decals de Havilland Vampires ED48103

The Build

This was a pretty straight forward build although I did waste some time trying to hide the join lines in the intake tunnels.  That was pretty pointless as you can’t see much in there once the intake face is on.


The kit decal on the plastic looks as good as you can get.  Results like this are why I am a fan of decals over raised decals for instrument panels. 


The booms lock into the fuselage although I had to open them up a little to get them to slide in properly.   The spars help keep everything aligned. I did fill the internal seam in the jet pipe but initially forget the external one on the bit that protrudes outside the fuselage.  This was done later.
Weight was added in in the area behind the cockpit as I was unsure that I could get the required weight in the nose.  


My upper fuselage was a little warped so some clamping was required.  In hindsight I should have fitted the intake faces at this time as they would have aligned and held everything together and I probably wouldn’t have needed the so much clamping.


CA and talc was used to fill the seams on both sides of the fuselage. Good on Airfix for putting these joins away from detail and not on panel lines.   I didn’t bother adding any weight in the nose as I thought the weight behind the cockpit would be sufficient.  I would find out later it wasn’t.


Paint

  • Primer Mr Surfacer 1500
  • Interior Black - Gaianotes Black Grey
  • Silver -  Tamiya AS12 and SMS Silver
  • Clear Gloss -  Gaianotes Gloss
  • Flat Coat - Gaianotes Flat
The windshield and canopy fitted perfectly I started with a primer coat of Mr Surfacer Black 1500. 

Then it was SMS silver, but it appeared to craze the plastic in a few spots. I have had this issue with SMS in the past. It’s pretty hot paint and I'm not a "build up the opacity slowly" kinda guy.  Scott Taylor, the owner of SMS, reached out to me advised he thinks it’s a reaction with the Mr Surfacer. He isn’t sure why it happens and it’s a bit random.

To solve this I sprayed a coat of Tamiya AS12 (which I should have just used it from the beginning) over the SMS silver. This filled a bit of the pitting.  I then spot primed the worst areas with Mr Surfacer and let it dry.


Some light sanding of the Mr Surfacer and then I applied another coat of AS 12.  Then a random dark grey paint was applied through a splatter mask to dirty up the surface a bit.  Now it is was time for decals.  


Decaling 

 The roundels, fin flash, tail boom checks and serial numbers are from the Euro Decals de Havilland Vampires ED48103.  These are printed by Fantasy Printshop and to be honest I wasn’t that impressed with how they performed.  

The first 2 roundels ripped pretty much straight away and they didn’t really settle down into the detail at all, even with multiple applications with a number of decal solvents. 


I only used the roundels in lieu of the kit ones as they are a slightly lighter blue which looked closer to the colour in my reference photos.  Thankfully the Euro Decals sheet allows you to do more than one aircraft so there were spares.  I’m not sure about the gold fern. I’d have thought it should be silver but this is a quick build so I went with it.


The stencils, bar the rescue arrow, were from the kit and performed superbly.  The decals in Airfix’s current range of kits are always excellent in my experience (they are printed by Cartograph).  

The rescue arrow came from a Gekko Graphics A-4K set.  I sealed the decals with SMS gloss prior to weathering.


Final Steps

After the decals dried I sealed them with Gaianotes gloss.  A wash of a thinned grey Oil paint for the panels and Mr Weathering Color black for the moveable surfaces was applied.  Once this dried it was removed with a paper towel.  A coat of Gaianote flat was applied to knock the gloss off. 

I then fitted the drop tanks, which didn’t mate to the wings at all well.  I adjusted these to fit as best I could then glued them on.  Vallejo putty was used to fill the gaps with the excess wiped away with a wet cotton bud (or 5).  Once dry I brush painted the putty with Vallejo Model Air Aluminium. 
Both the main and nose undercarriage set ups are a little more tricky to fit than I’d hoped. But I got them on eventually.  

If I built this again I’d dry fit all the undercarriage bits before gluing the upper and lower wings together so I could understand how they are supposed to go together.

When I put the gear on I found it was very close to a tail sitter.  To solve this I coated some lead shot in white glue and dropped it into the cockpit.  I then hung the aircraft nose down overnight to try and get the shot to stick in the nose.  This worked.


The underwing antenna had been removed earlier in the build and hole drilled in the appropriate place.  I used a piece of brush bristle to replace the plastic part. I let it sit overnight to allow the glue to cure.


Conclusions

Bar the undercarriage, this was an extremely enjoyable build. The kit goes together really quickly and there is minimal clean up required.  For me the detail is adequate for the subject and scale.  I think it took under 15 hours of build time from box opening to it going in the cabinet.  If I build another it will be done wheels up to make the build even simpler (and quicker).


So if you are looking for a quick and simple build that reminds you of modelling as kid then this kit is as close as it gets.

The Photos


Tuesday, 27 September 2022

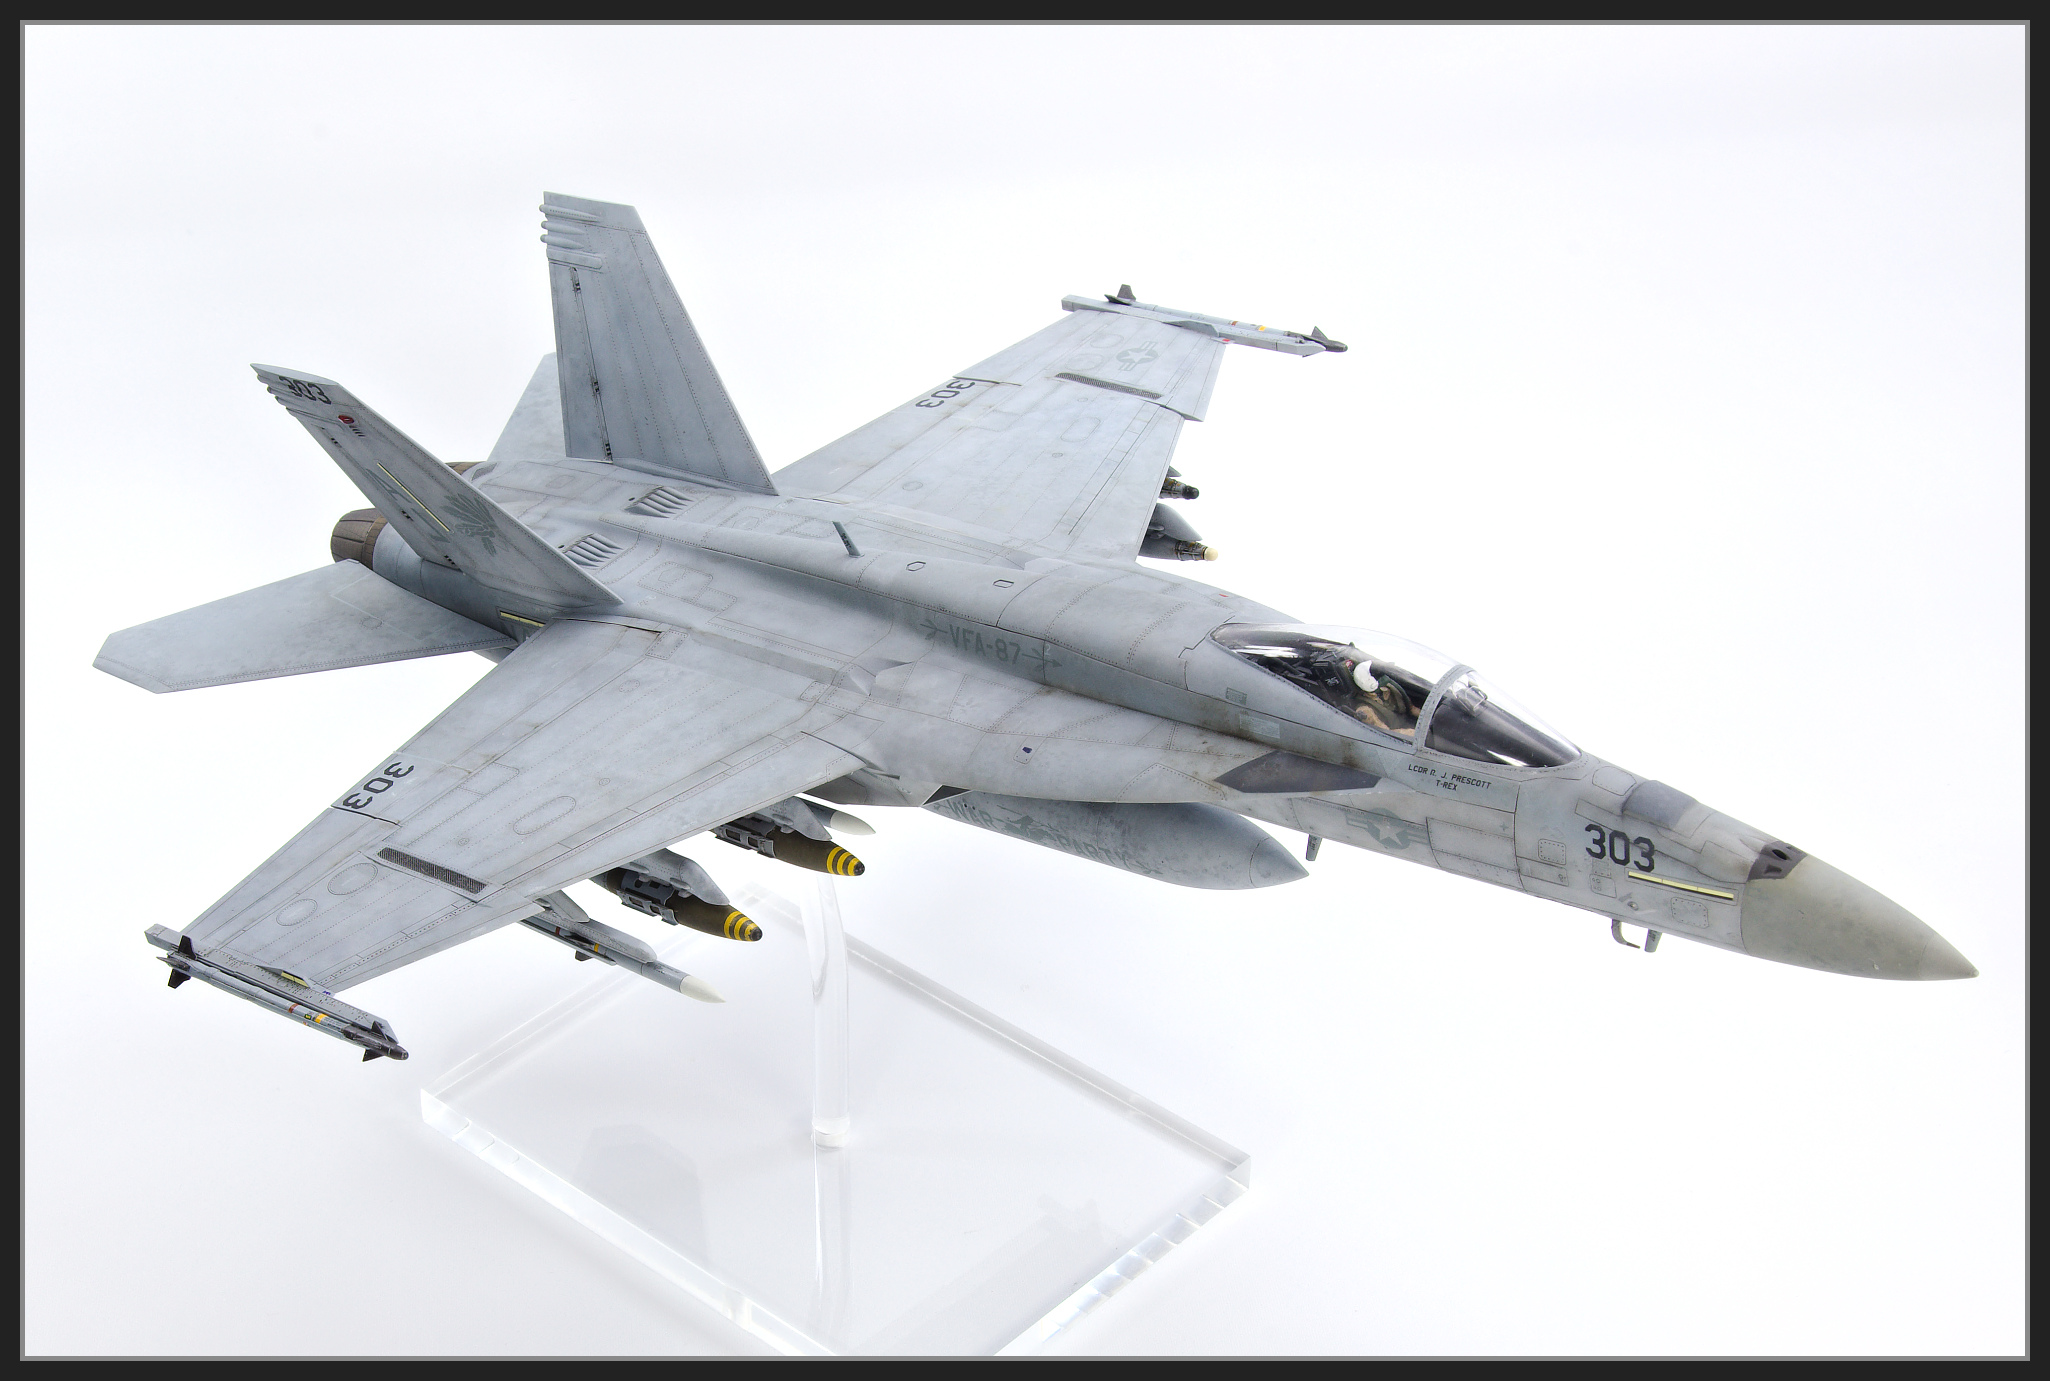
1/48 Hobby Boss F/A-18E Super Hornet VFA-87 Golden Warriors


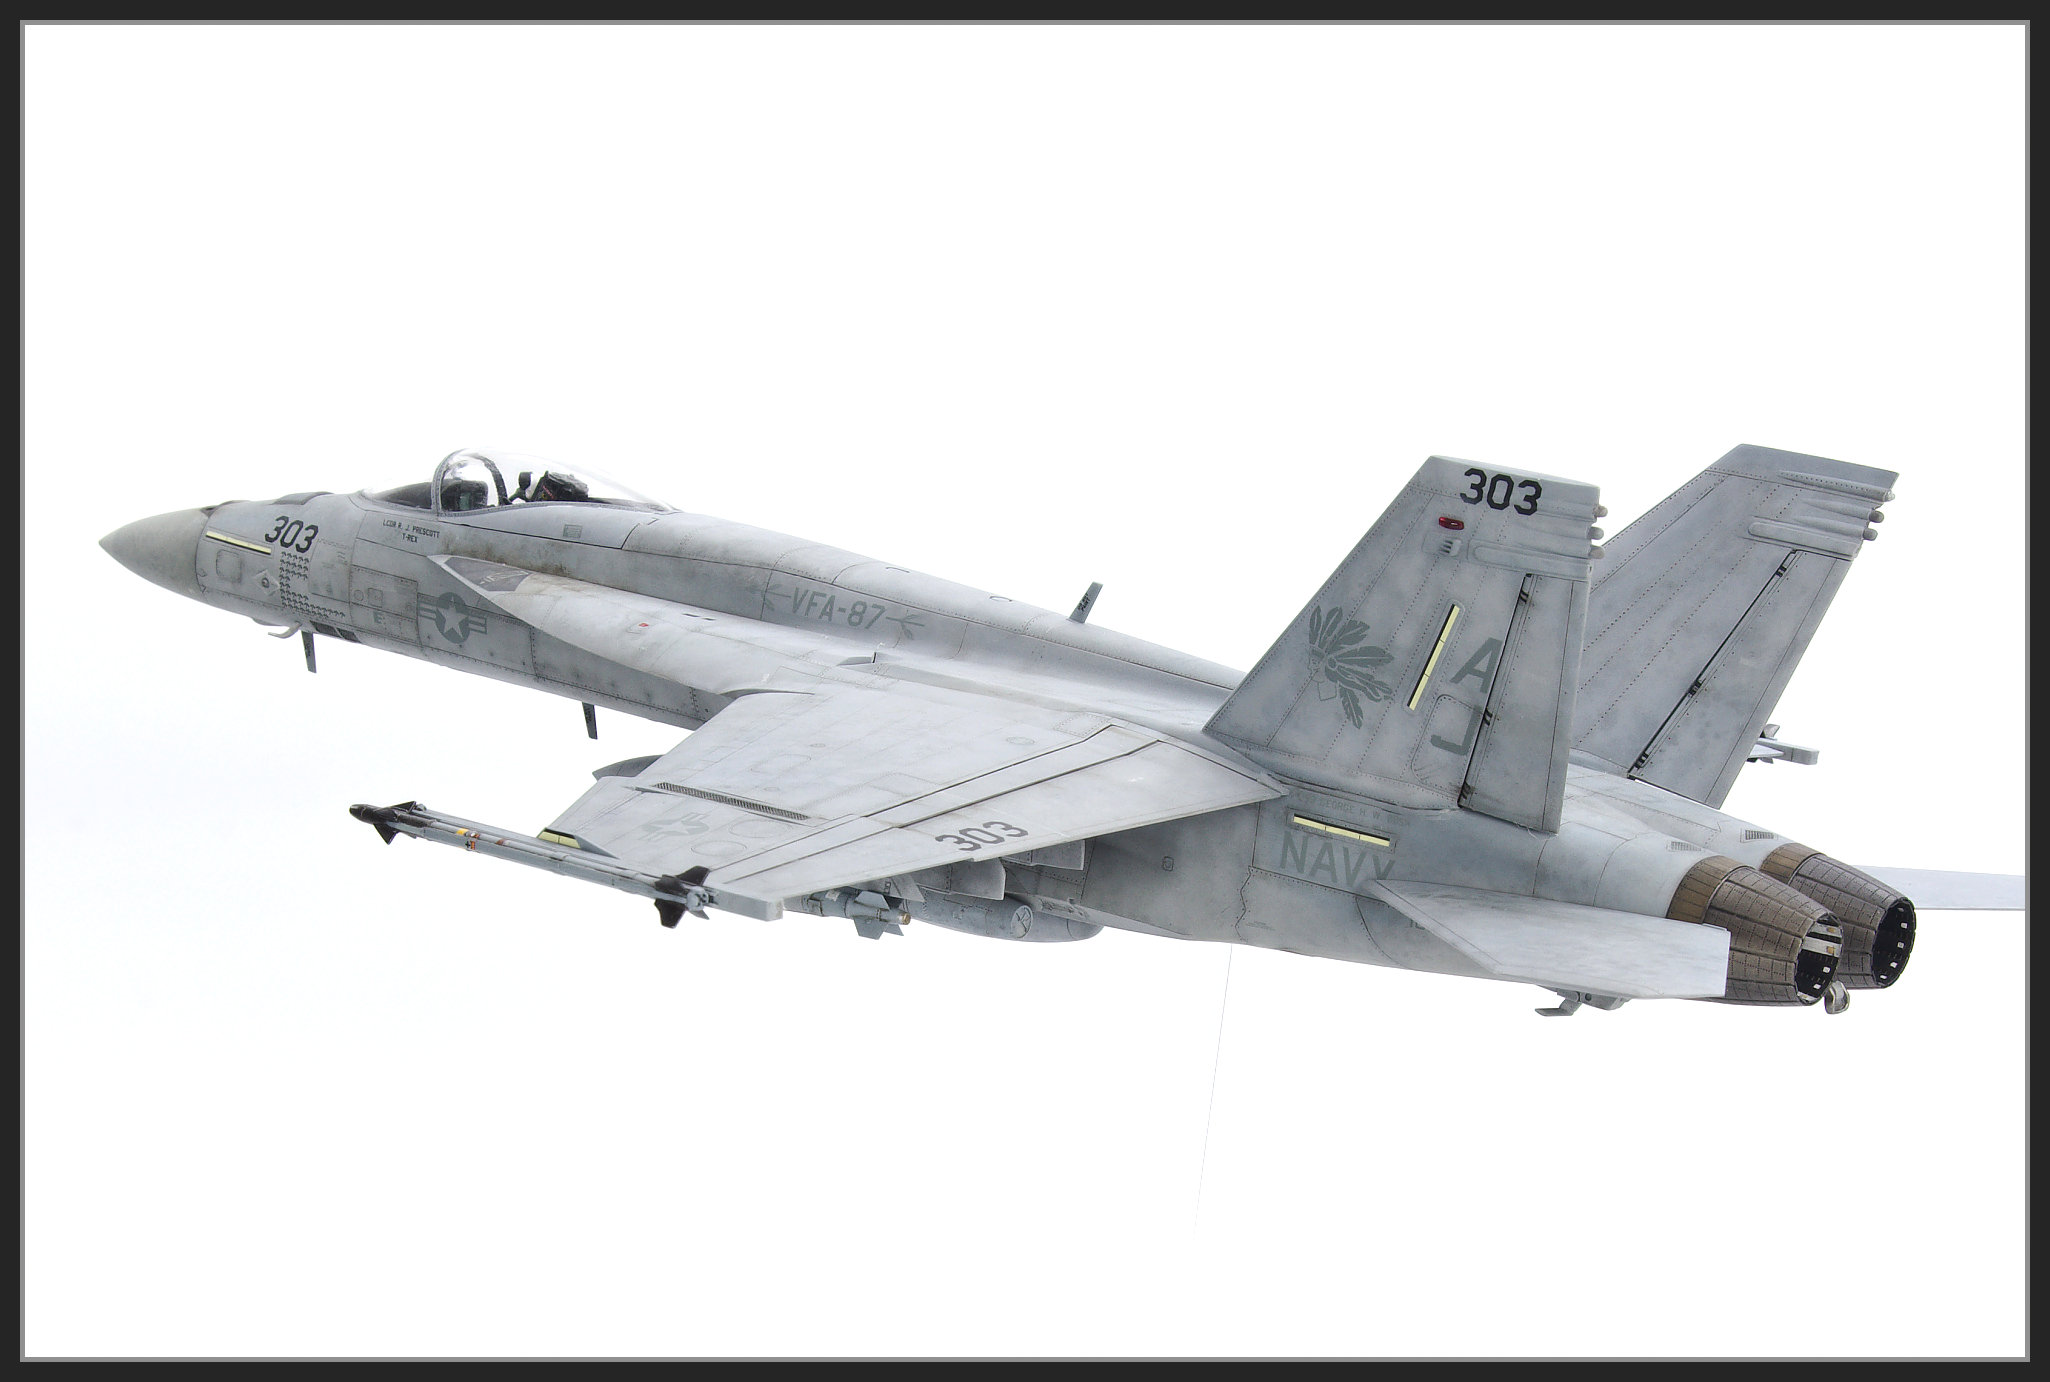
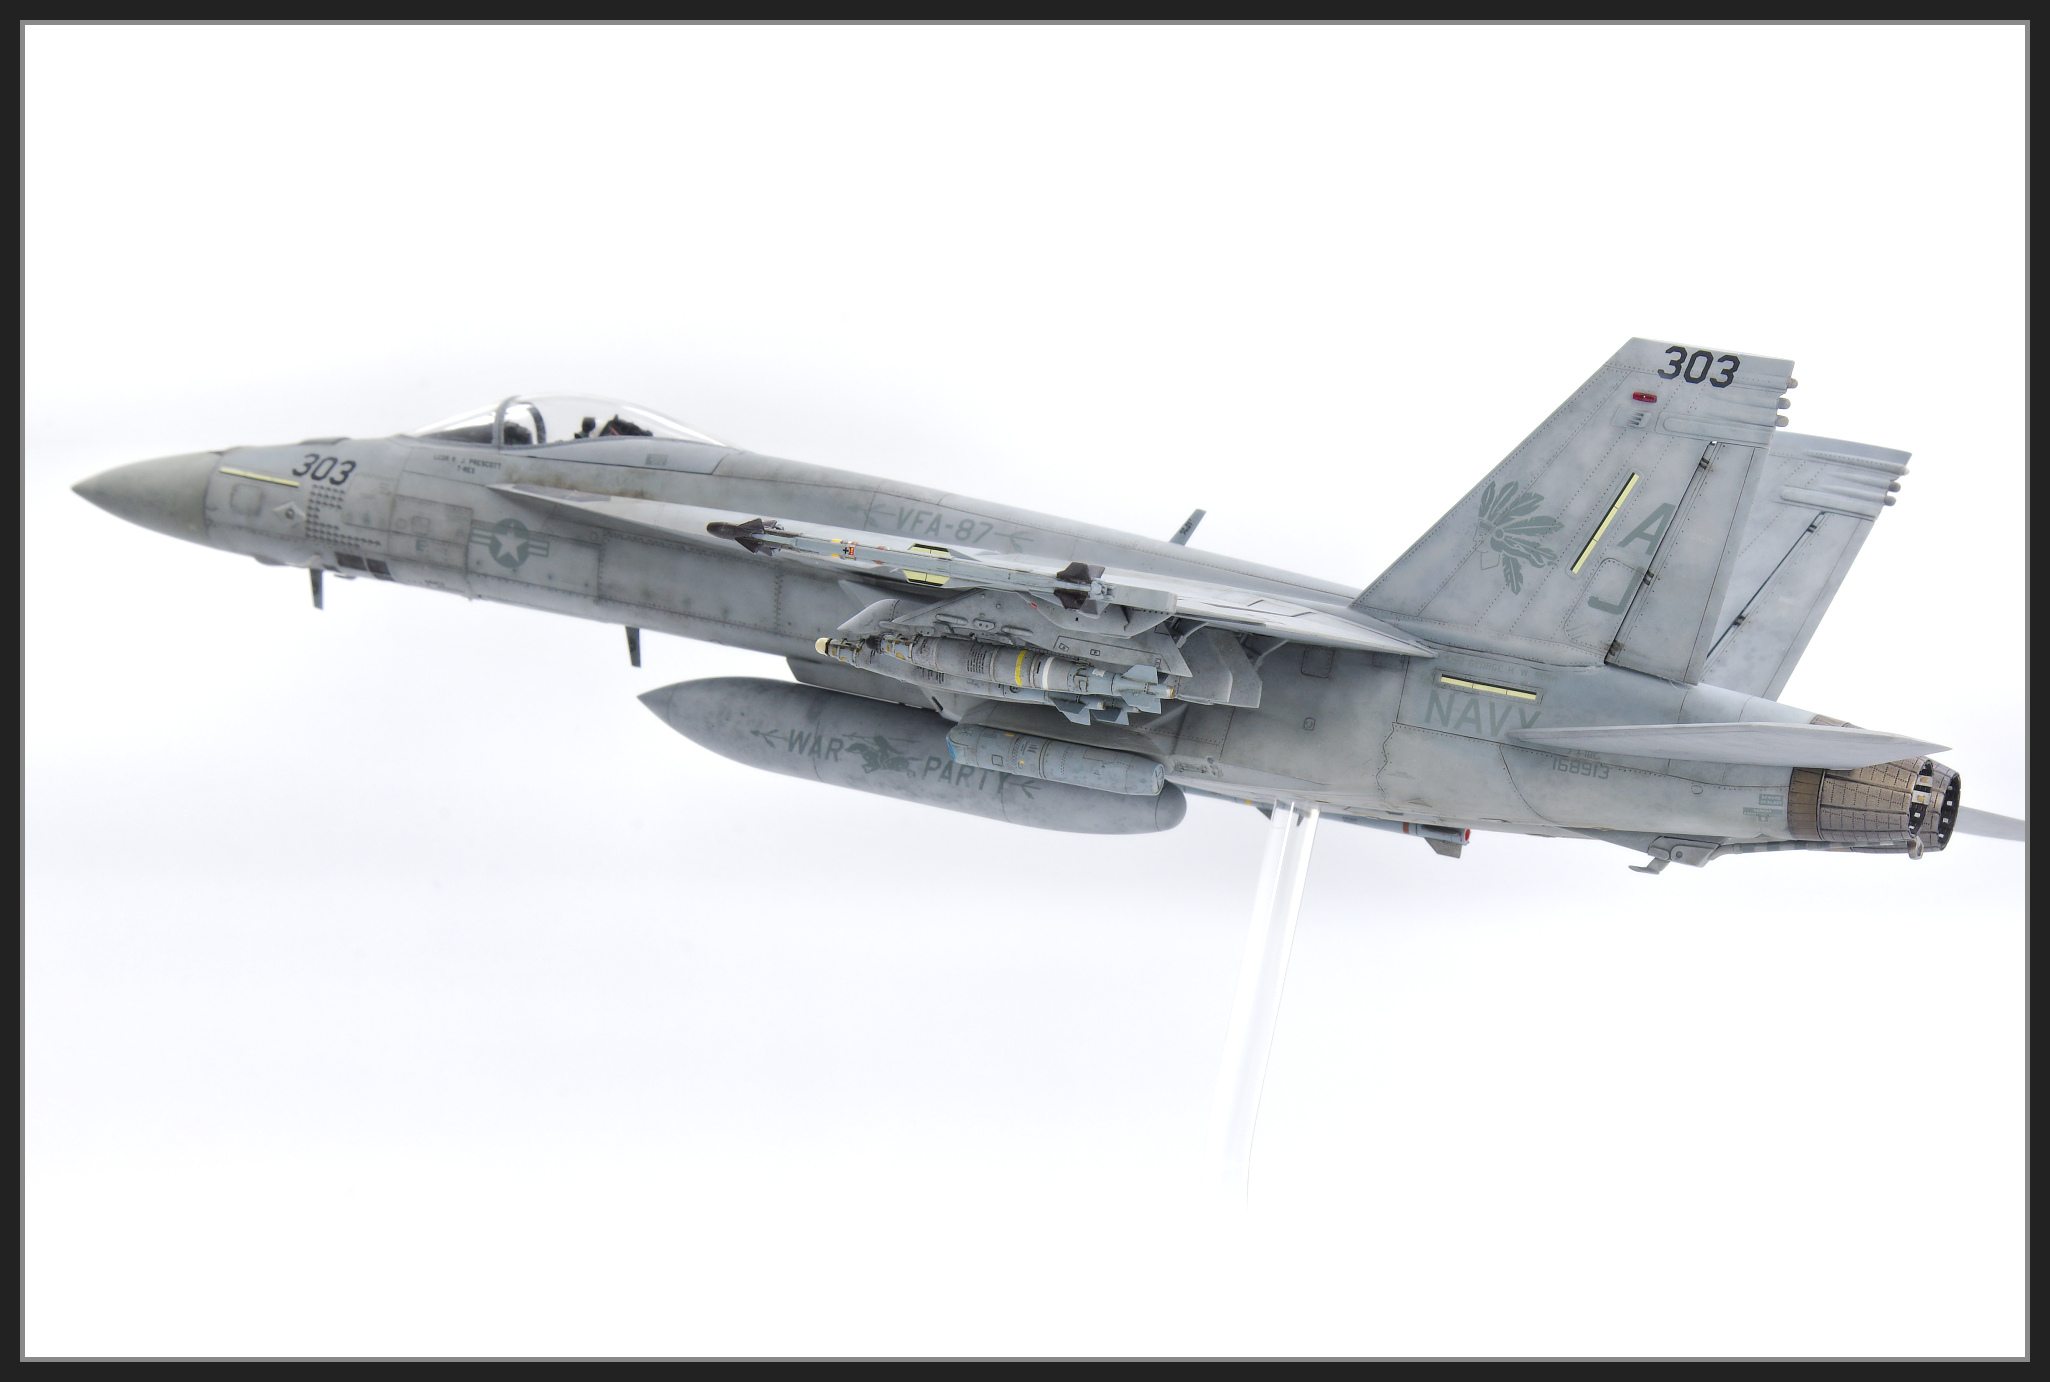
Depicted as F/A-18E Super Hornet BuNo 168913 /AJ 303 from VFA-87 "Golden Warriors" embarked on USS George H.W. Bush for Operation Inherent Resolve in 2017.

From the reference photos I collected I  know this actual jet wasn't as weathered as I have modeled but I wanted to do a relatively heavily weathered low viz aircraft so accuracy in that department went out the window. 

I also like to load up my jet builds with stores but this does mean they do tend to take longer than I expected.  This was definitely the case with this build which took close to 5 months.

The Kit

  • 1/48 Hobby Boss F/A-18E Super Hornet - Kit No. 85812


Aftermarket

  • Exhausts - Aires
  • GBU-32 (Thermally Protected) - Eduard - Part No. 648396
  • GBU-54 (Thermally Protected) - Eduard - Part No. 648598
  • GBU-38 (Thermally Protected) - Eduard - Part No. 648386

  • Wingtip Rails  -  Flying Leathernecks - Part No. FL48-8052

A number of items were taken from the Meng kit. These were given to me by a mate who didn't want them as he was doing a Blue Angels aircraft. These were:

  • AN/ASQ-228 Advanced Targeting Forward-Looking Infrared (ATFLIR) -  I used this because the Hobby Boss one doesn't have clear window and it depicted in the stowed position.  As I was doing the aircraft in flight I wanted the window showing
  • AIM-9X Sidewinders -  The Hobby Boss ones didn't look right and are a fair bit longer than the Meng ones.  The Meng ones have super details (but inferior decals)
  • Pilot and Seat - The Hobby Boss Kit doesn't have a pilot. Fitting the Meng Pilot to the Meng seat was easier than mounting him to the Hobby Boss Seat.


Decals

Furball Aero Design Sheet No. 48-066  -  Team Factory: Carrier Air Wing 8 at War - Operation Inherent Resolve.
Exceptions were as follows

  • AIM-9X - Afterburner USAF Weapons Set
  • AIM-120 - Hobby Boss
  • Eduard Weapons -  Eduard
  • AN/ASQ-228  - Meng
  • Ejection Seat - Meng

The Meng decals I used were actually quite disappointing. The small text was just blocks whereas the Hobby Boss decals had legible text even on the small decals.  They also performed very well where I used them. 


Paint

The main colours I used are below. 

  • Upper Grey (FS36320)  - I started with SMS Dark Ghost Grey FS36320 but it was lacking the blue hue that this colour should have so I mixed a 50:50 mix of it and Mr Color FS36320 (C307) Semi Gloss Grey.
  • Lower grey (FS35375) -  SMS US Medium Grey (PL120) with a touch of Mr Color FS35375 (C308).
  • Radome - Mr Color Dark Sea Grey (C025)
  • Exhausts - Alclad Pale Burnt Metal (ALC-104) for the lighter shade and a random mix of SMS Light Bronze (PMT10) and Alclad Burnt Iron (ALC-121).
  • Targeting Pod -  Mr Color FS35375 (C308)
  • AIM-9X - Main Color and Mr Color FS35375 (C308), Seeker head Mr Hobby Metal Black H28 with a light dust coat of Tamiya LP 20 Light Gun Metal
  • AIM-120 - Mr Color FS35375 (C308) and SMS Insignia White (PL72)
  • Wingtip Rails - Mr Color FS35375 (C308)
  • GBU-38 and GBU-54 - SMS PL120 US Medium Grey
  • GBU-32 -  Mr Color Olive Drab (C304)
  • Various Vallejo Acrylics for details

Clear Coats

  • Gaianote Gloss (Sealing coat prior to decals)
  • VMS Flat
  • Gunze GX113 Mr Colour Super Clear UV Cut Flat


The Build

I am not going to write a detailed article on the build, just include some detail on things I think others may be interested in.  If you look back through my Facebook feed you can find a lot more detail. 

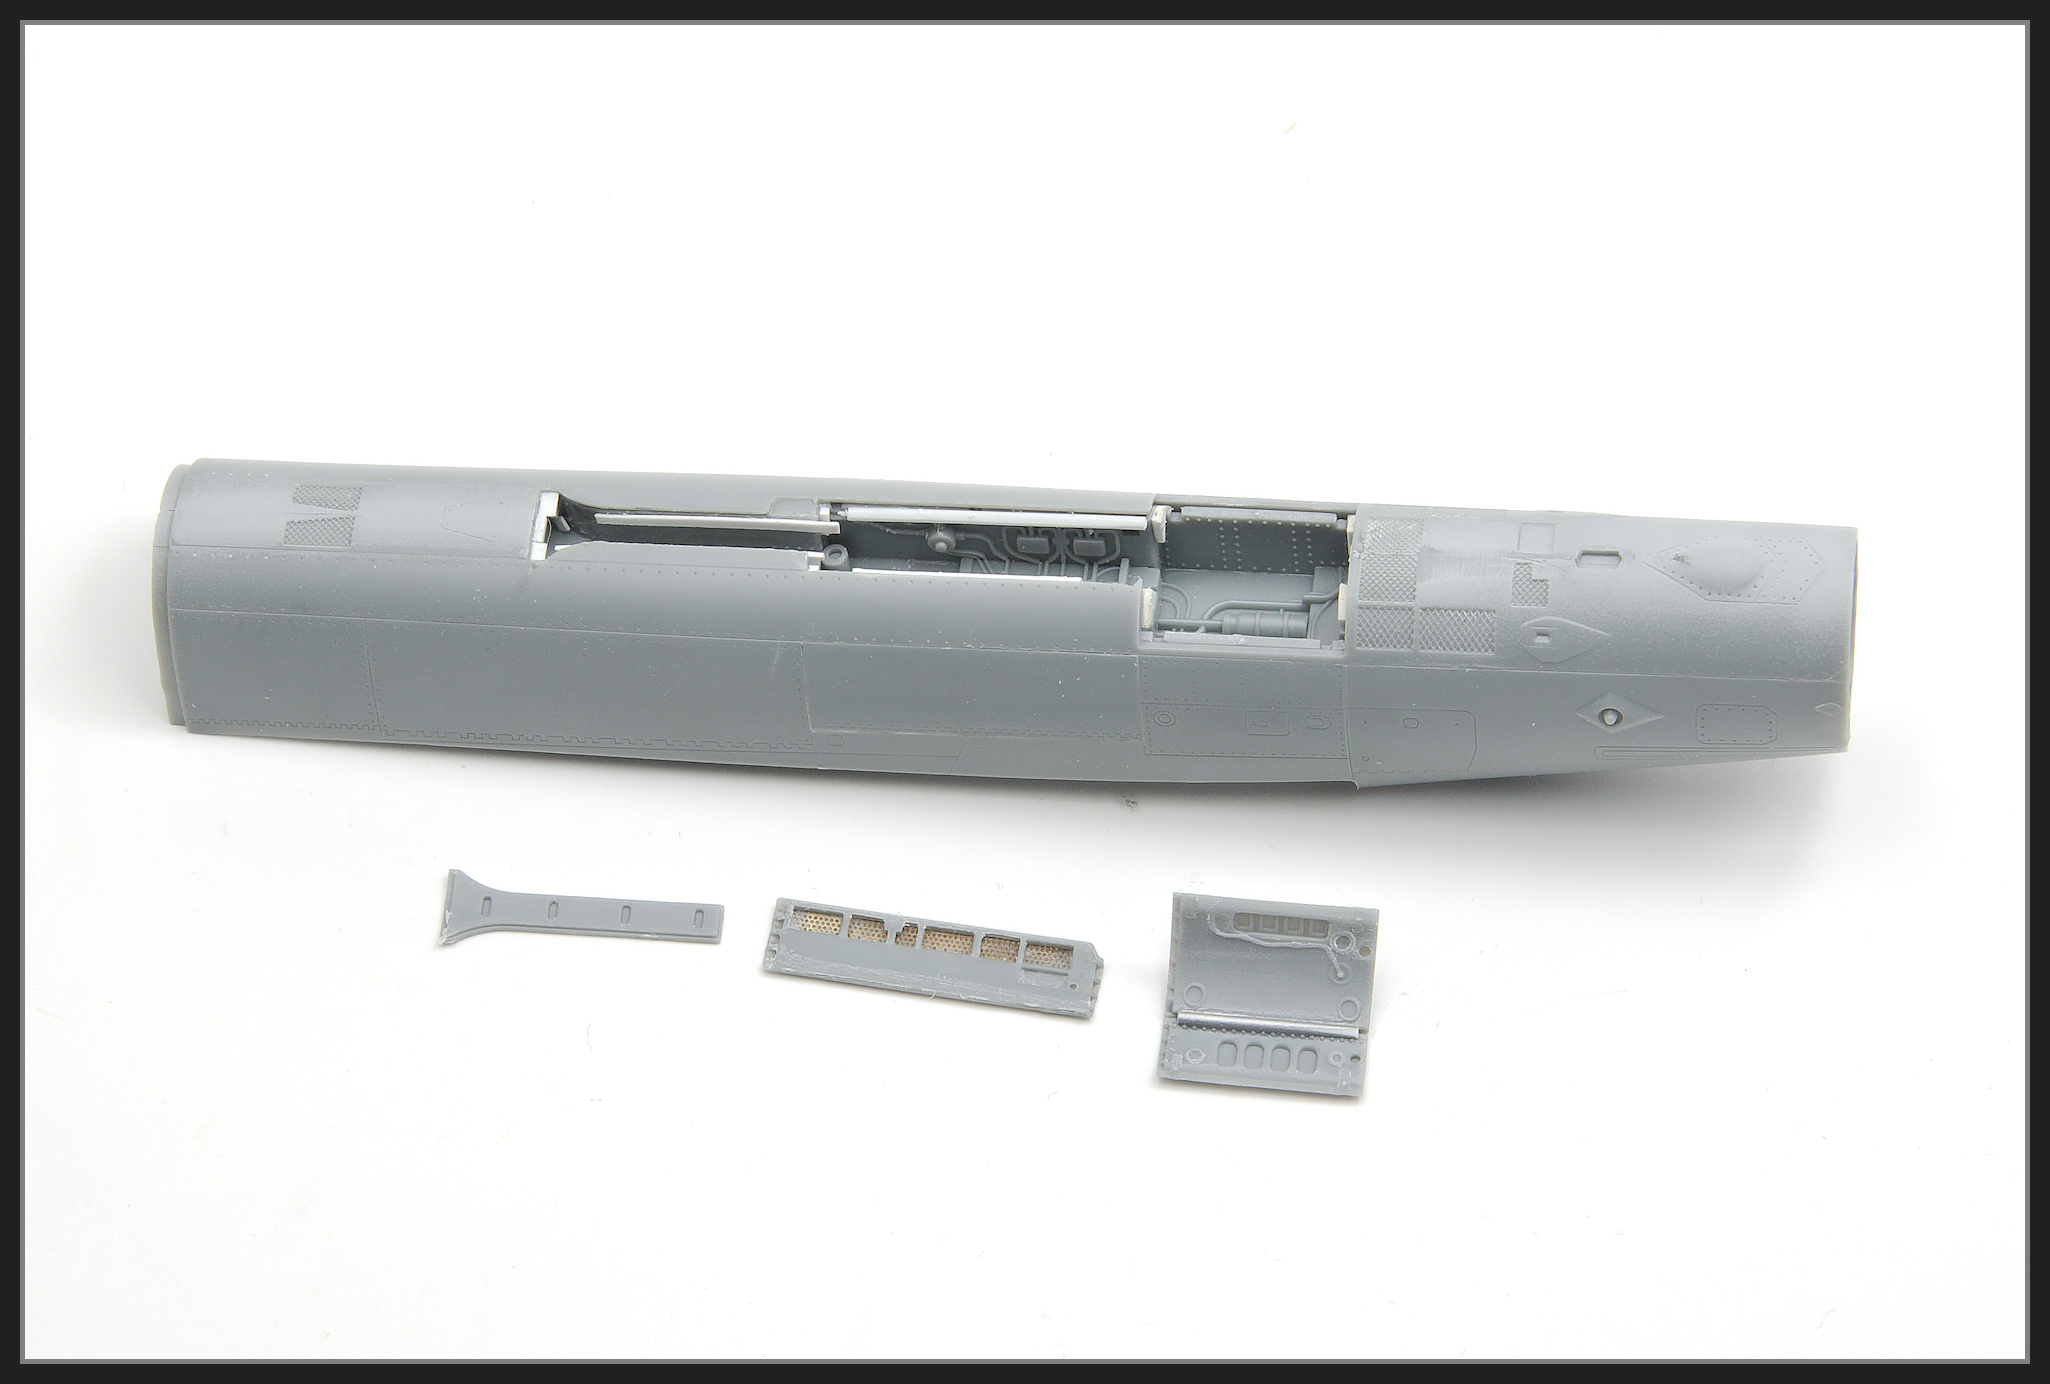
  • Main Sub Assemblies: -  I did have some issues joining the main sub-assemblies. I think this was a result of me getting something misaligned when assembling those sub-assemblies.  I ended up up deviating from the instructions a bit and assembling the bottom before joining the top. I added extra tab's and bracing from card.  Don't add the side pieces at the rear sides if you go down this path as fitting the upper piece is impossible with both fitted, you can fit it with one side piece fitted as shown in the image below.

  • Lower Wing Assembly: -  The other issue which I didn't photograph but has been well documented in other builds is that you can end up with gap between the lower wing and front of aft lower fuselage.  This is easily resolved. Check out The Model Guy's video here (5.02 mins) to see where I mean.
  • Undercarriage Doors: - These fit fairly well in the up position. I didn't have to add any material to fill gaps but I did have to add material to the internal edges so there is something for them to securely attach to.


  •  Top Panel: - Oddly this was far to tall at the rear so needed sanding to fit.

  • Aires Exhausts: - These are to big in diameter for the kit.  

Sadly this typical of Aries, fantastic decal, woeful fit.  I generally only choose Aries when I have no other choice these days. 


In this case the detail of the Aries parts are so superior to the kit parts I had to come up with a way to make them fit.  After much thought  I placed a spacer of approximately 2mm between the upper and lower fuselage halves in the area between the two exhausts.  This increased the diameter of the fuselage openings so the better matched the Aires parts.  


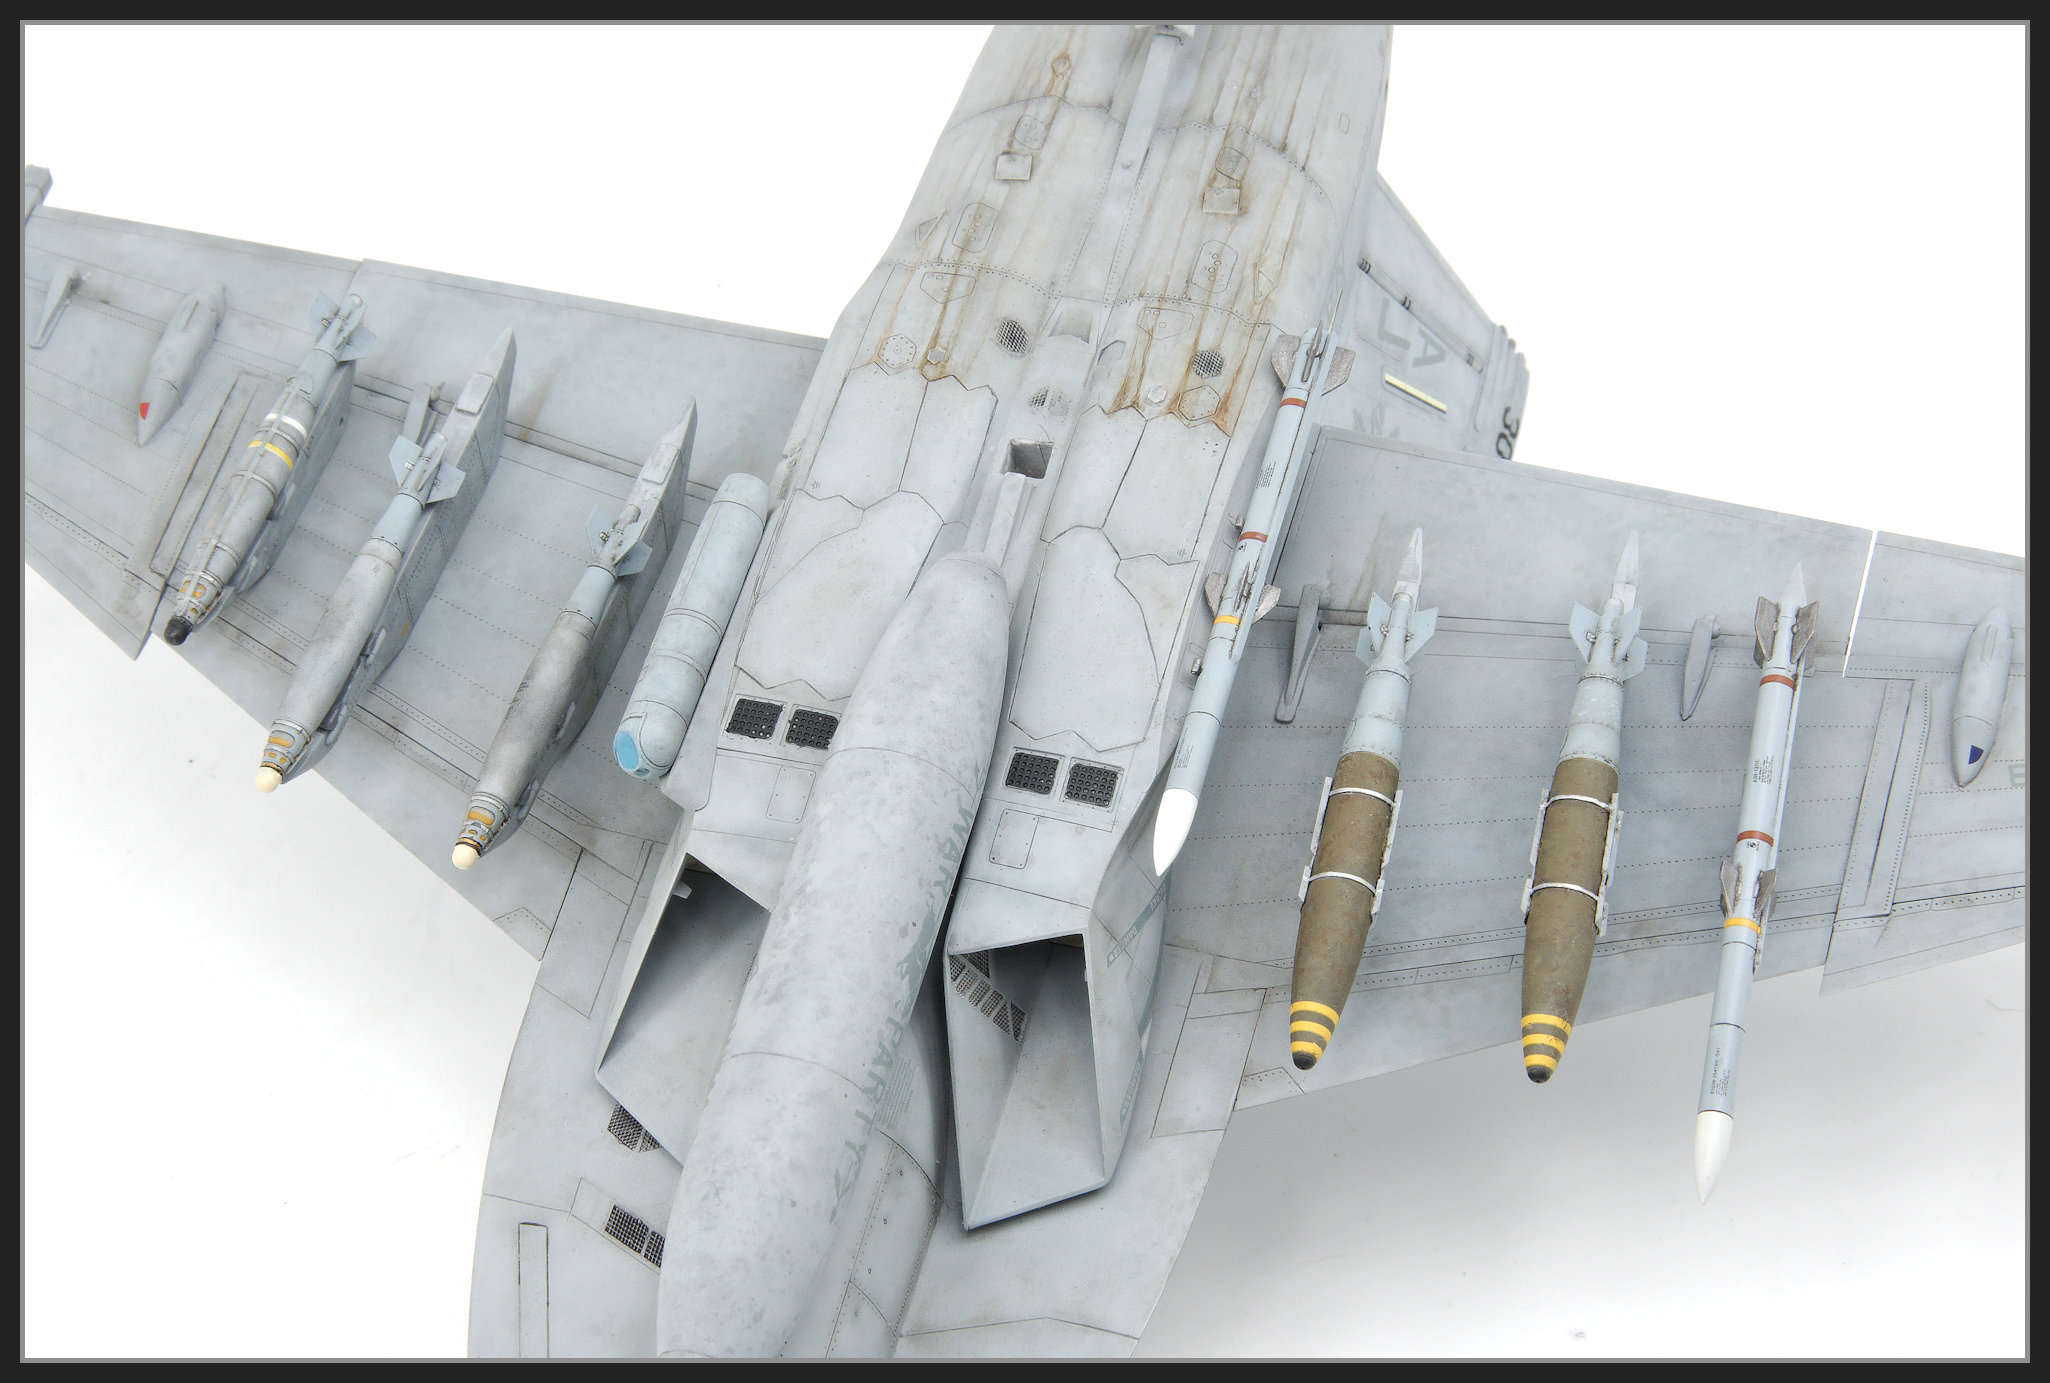
  • Weapons: -  The Eduard bombs in particular took a fair bit of time.  They are really nicely detailed however the thermal coating, whilst probably to scale are a little fine and hard to see. The decals didn't settle into the detail no matter what I tried so I had to try and hide this with some weathering. The PE parts on the GBU-32's were also a pain (I hate PE as a rule) but I do think they good when done.

    Bar the GBU-32's and fuselage AIM-120,  all the other weapons are attached with magnets. The GBU-32's and fuselage AIM-120 are pinned.  To get the fuselage AIM-120 to fit I had to rotate it slightly and re-drill the holes.  The clamps were thinned down significantly so the missile would sit close enough to the aircraft.


The Flying Leatherneck Wingtip LAU-127/A/B rails are beautifully 3D printed, and while marked as for Hasegawa / Meng kits they were also simple to fit to the Hobby Boss kit. No clean up was required.  I chose them as the kits ones had a different profile for the vertical bits were different.


  • The Base: - This is simply a piece of A6 8mm thick acrylic sheet with a 8mm rod inserted into a hole.  A mate milled a square section on the end of the rod to mate the box section I added to the model (you can see that in the image of the lower fuselage above.  He also drilled a 8mm hole in the sheet using a special drill (a normal drill can chip the sheet).  The rod was bent slightly bent by heating it with a hot air gun.

Weathering

Most of the weathering was done with various shades of greys and browns using a number of splatter masks as part of the painting process. Some post shading of panel lines was also undertaken using highly thinned paints of various colours.

Washes, streaks and other stains were done with various oil paints from AK interactive and Abteilung and also mixes of Mr Weathering Colors. 

On the panels under the nose I feel I may have undone some of the nicer effects I'd got with the airbrush with the application of the oils.  The panels look a bit to uniform now but I'd got to the point where I just wanted it done.


Conclusions


Initially I was going to build the Meng F.A-18E kit however I sold all those and ended up with this one.    Surprisingly the underside detail towards the rear of he aircraft was a little soft and needed some re-scribing.  On the top and sides however the detail is far sharper and perhaps superior to the Meng kit.  

The Hobby Boss intakes have a sharper edge than the Meng kit and Hobby Boss includes the Joint Helmet Mounted Cueing System  sensors (?) in the cockpit which I don't think Meng include.  It has a ton of weapons but as noted above I only used the drop tanks and AIM-120's.  

There are few fit issues but nothing that can't be easily dealt with.  

The few decals I used performed really well and have superior printing to the Meng kit. By that I me the small text on the Hobby Boss kit is legible whereas Meng just use blocks. 

Is is better than the Meng kit?  I can't say at this stage but I have a Meng F/A-18F and E/A-18G in the stash so eventually I'll find out. The 

Overall the kit is pretty sound and if I didn't have the Meng F/A-18F I'd be happy to build the Hobby Boss one. There doesn't seem to be much in


The Photos


Some Close Ups