

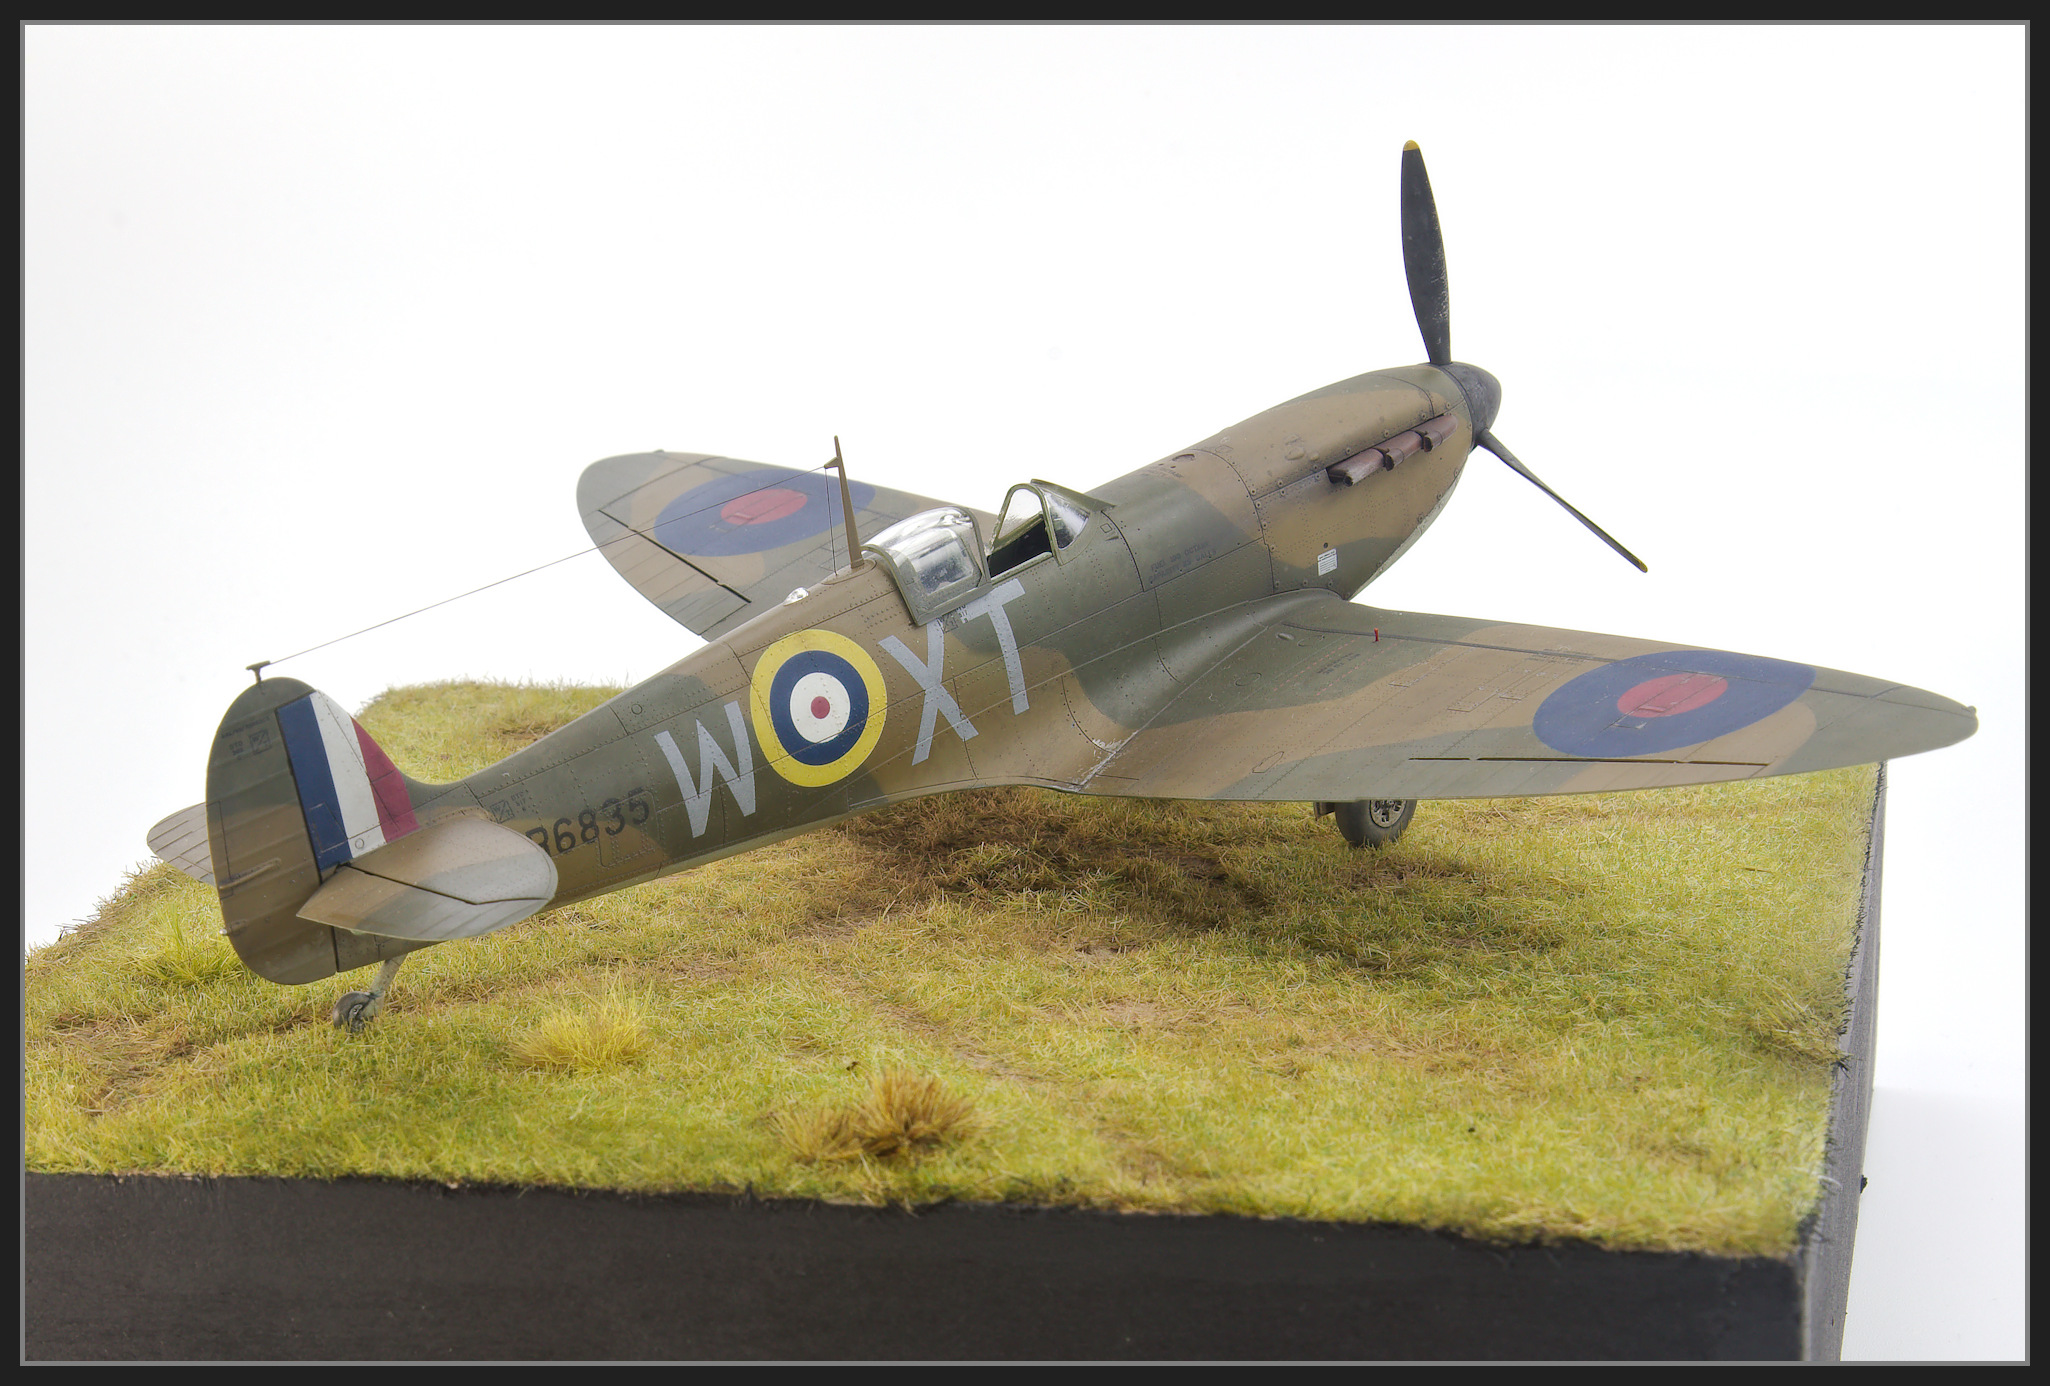
Depicted as aircraft R6835 XT-W flown by a New Zealander Brian J. Carbury,
Being a Kiwi I tend to look for New Zealand subjects in my modelling. It's not hard for Battle of Britain pilots. Pilots from New Zealand made up the third largest number in Fighter Command, only behind those from Poland and United Kingdom itself. This Eduard kit had 2 Kiwi options, Colin Gray and Brian Carbury.
Paraphrased from the Eduard Instructions.
He shot down two Bf 109Es on August 27th, 1940, when No. 603 Squadron arrived at Hornchurch to replace the battle-weary No. 65 Squadron. He scored 15½ kills during the Battle of Britain. On August 31st, 1940, he shot down five enemy aircraft over the span of three sorties, becoming one of two RAF ‘Ace of the Day’ pilots able to claim that status during the Battle of Britain.
The Kit
- 1/48 Eduard Supermarine Spitfire Mk 1A . Kit No ED82151
Aftermarket
- None
Decals
- Kit Decals
Paint
- Interior Green - SMS Interior Green
- Dark Green - Mr Color C369 and Tamiya XF81
- Dark Earth - Mr Color C369 lightened with some white
- Sky - Mr Color C368
- Yellow - SMS Trainer Yellow
- Black - Gaianotes Black Grey
- Tamiya AS 12 for chipped areas
- Clear Gloss - SMS Clear Gloss
- Flat Coat - SMS Clear Flat
The Build
The kit cockpit is very detailed straight from the box. But it is also very fiddly. It’s an exercise in patience getting
everything aligned so you can close up the fuselage.

Fit of the fuselage to wings resulted in a little gap between the wings and fuselage in some spots. Not sure why but I am rushing this a little so that is probably a factor. I also had a gap for the tail planes to fuselage joints. I filled all these gaps with Magic Sculpt which is 2 part epoxy putty.

The worst area of fit is the panel under the nose. I really had to spend some time dry fitting,
and removing material to try and get a reasonable join. I think I could have done a better job than I
did as the gaps are bigger than I’d hoped and don't look like a panel line.
I will fill these with Magic Sculpt.

There is also a little gap between the fuselage and the rear of the wing assembly

The only other area that needed some work was the exhausts which had some quite big sink marks.
Painting
After seam clean up I sprayed some Tamiya AS-12 and then a light coat of hairspray for the wing root chipping. I used the excess As-12 to check the joints any areas I missed during the initial clean-up. Nothing shows up surface flaws like silver.

Fit of the clear parts it perfect. I masked these up and then
painted the black no walk lines. These
were then masked with 1mm tape. You’ll
notice I have incorrectly made the starboard wing the same as the port
wing. The Starboard wing walkway on Mk
1 – MK V should go straight to the wing root and not down to the trailing
edge. Bruce advised me of this error and
I’ll correct it later
I then applied Mr Color Dark Earth (C369) lightened a little
with some white.

I scaled up the instructions and printed them out on self-adhesive label paper. I then cut out the pattern, de-tacked the pieces and stuck them onto the model.

I then painted the dark green. I removed the masks and used Splatter masks
were used to add some variation to the paint finish.

After masking out the upper surfaces the Sky (Mr Color) was
applied. Splatter masks and various shades of greys and browns were used to
apply some tonal variation.

Decaling
This kit has the Eduard Decals with the (not by design) peel-able carrier film. I written have a detailed article on how to apply them (click here) .


On the underside the decals struggled to go over the fairings. A mate had another great idea (2 this year already - WTF), apply the flat PE part on wing surface but leave the fairing off until the decal is applied then attach the fairing. That is for next time.
I struggled to remove the film from the really tiny stencils so I just left it on those.

Weathering
Chipping was done over a hairspray coat which was over some Tamiya AS12. A toothpick and stiff brushes were used. After that a wash of thinned oil paint was applied liberally over the model and wiped off with a paper towel.

Streaking on the underside was done with oils. Mr Weathering Color was stippled on the panels under the wing where the gun smoke staining was.


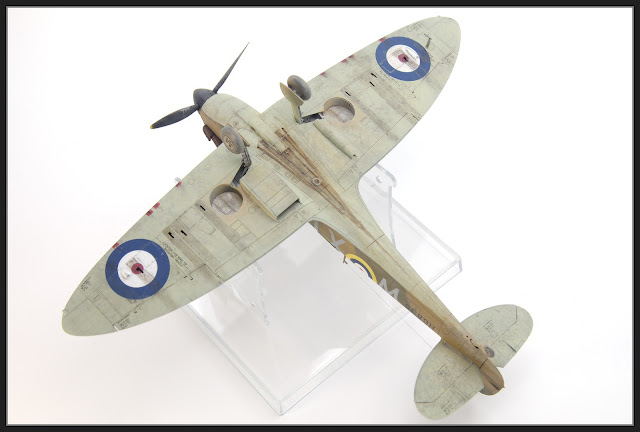
The Photos


Finished Spit Looks fantastic. Can I ask for a quick how to on your display base? Looks way more realistic than most static grass ones I've seen.
ReplyDelete