

Depicted as an aircraft from VMFA 323 United States Marine Corps operating from Chu Lai Air Base, South Vietnam (1967-68).
I generally prefer the long nose Phantoms over the short nose variants as there are more variations in operators and paint schemes. I'm also not really a fan of the colourful USN schemes. That said, when Tamiya released a Phantom I was always going to build it, even if it was a F-4B.
This kit reached the top of the build queue as it was randomly selected from my stash by a modelling mate.
The Kit
1/48 Tamiya McDonnell Douglas F-4B Phantom II lit (Kit No 61121)
Aftermarket
Metallic Details Exhaust Nozzles
Detail and Wonder Landing gear
Model Master Pitot and AoA Probes
Hypersonic Fin Cap
Reskit Multiple Ejector Racks
Reskit Triple Ejector Racks
Eduard M77 Napalm Bombs
Eduard LAU-3A Rocket Pods
Flying Leathernecks LAU-7 Rails
Generic PE Mirror set
Decals
AOA Decals - Spooks From the Beach (1) 48014R - Stencils and Sqn Markings
Tamiya Kit Decals - Main national markings, (as these are cut to fit the folded wings). Instrument panel and some other stencils
The Build
This is the finest engineered kit I've built to date, and yes it's better than the F-14, which until now was at the top. The detail in the F-4B is better than the F-14's. I expect the F-35's are better but I have zero interest in that subject from a modelling perspective.
With this kit everything just fits. If it doesn't, you've made a mistake, simple as that. The engineering is so clever that much of the kit can be built in sub assemblies and painted prior to final assembly.
 |
| Instrument Panels and Decals |
 |
| Cockpit Parts |
 |
| Cockpit Assembled |
 |
| Kit Pilots and Seats |
 |
| Cockpit Installation |
 |
| Kit Engine Installation |
 | ||
| Sub Assemblies Prior to Paint |
Tamiya aren't faultless though, annoyingly it was after I'd applied the decal to the outer portion of the wing I find out, via a random post online, that there is a join line you need to fill. No mention of this in the instructions which is a pity as it would have been easy to fill during construction.
 |
| Fill this line |
The centreline tank has some really fine raised detail to simulate the weld beads. As usual the tank is split in halves so it’s impossible not to lose the detail on the join. Rather than sand all the detail off and scribe some lines, a mate suggested stretched sprue. Although I couldn’t get the sprue as fine as the ones on the original parts I think this looks better than scribed lines, especially the way I scribe lines. In the end I replaced all the raised details on the kit tank with stretched sprue.
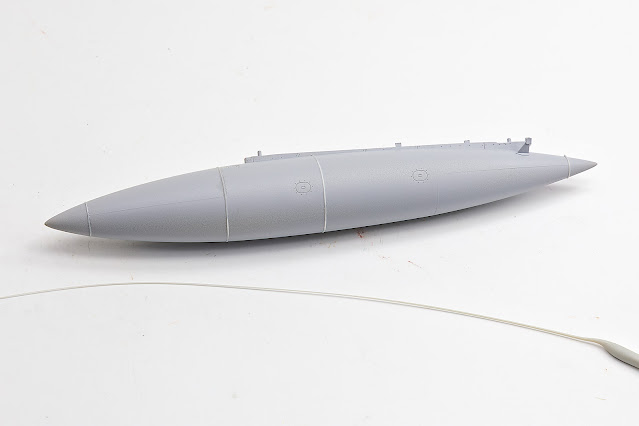 | ||
| Stretched Sprue for Weld Beads |
Ink Weathering
I decided to give Chris (Luftraum/72)'s ink technique a go on this build. The inks are added to a wet surface. After priming the model with Mr Surfacer 1500, I wet the surface with the Pine disinfectant prior to applying the ink. I used this as some people reported that it was an Australian equivalent to US product (409?) that removes the ink. It isn't and it doesn't remove the ink when dry, but on the plus side the model smells piney fresh. Alternatively you can just use some water with a touch of soap (to break any surface tension. If you want to remove the inks Tamiya X20A works but it can also attack the underlying primer or paint if you over do it.
 | |||
| Inking |
 |
| Underside with inking and paintwork |
Base Painting
With light paint schemes like this I like to use different variations of the same colour. Mr Color helpfully give you a Gloss (315) and Semi Gloss (325) of the light grey (FS16440 and FS26440) and these are actually slightly different in shade. The Light grey (Mr Color 324) is quite a bit greyer but adds some interest and is useful for simulating paint touch ups. The LP 11 was used for the Corroguard leading edges the darker grey used for depicting more touch ups / corrosion control activity.
 |
| Base Coats |
 |
| Top Side Paints |
On the bottom, SMS Insignia white is my go to for any white as it covers anything and everything easily. Mr Color Off White (69) was also used often as has a slight greyish tinge in certain light. The proper shade of white is FS17875 (Mr Color 315). It and flat white were used to add some whiter bits in places. The light grey 36322 was used to depict paint touch ups.
 |
| Underside Paint |
Hot Section
You're probably thinking (not you Bruce's Scale Models) what's that idiot using all those paints for. And you're quite right, getting here was far to complicated. The base paint was Mr Color Super Titanium, other shades were added after referring to some reference images.
 |
| Hot Section Paints |
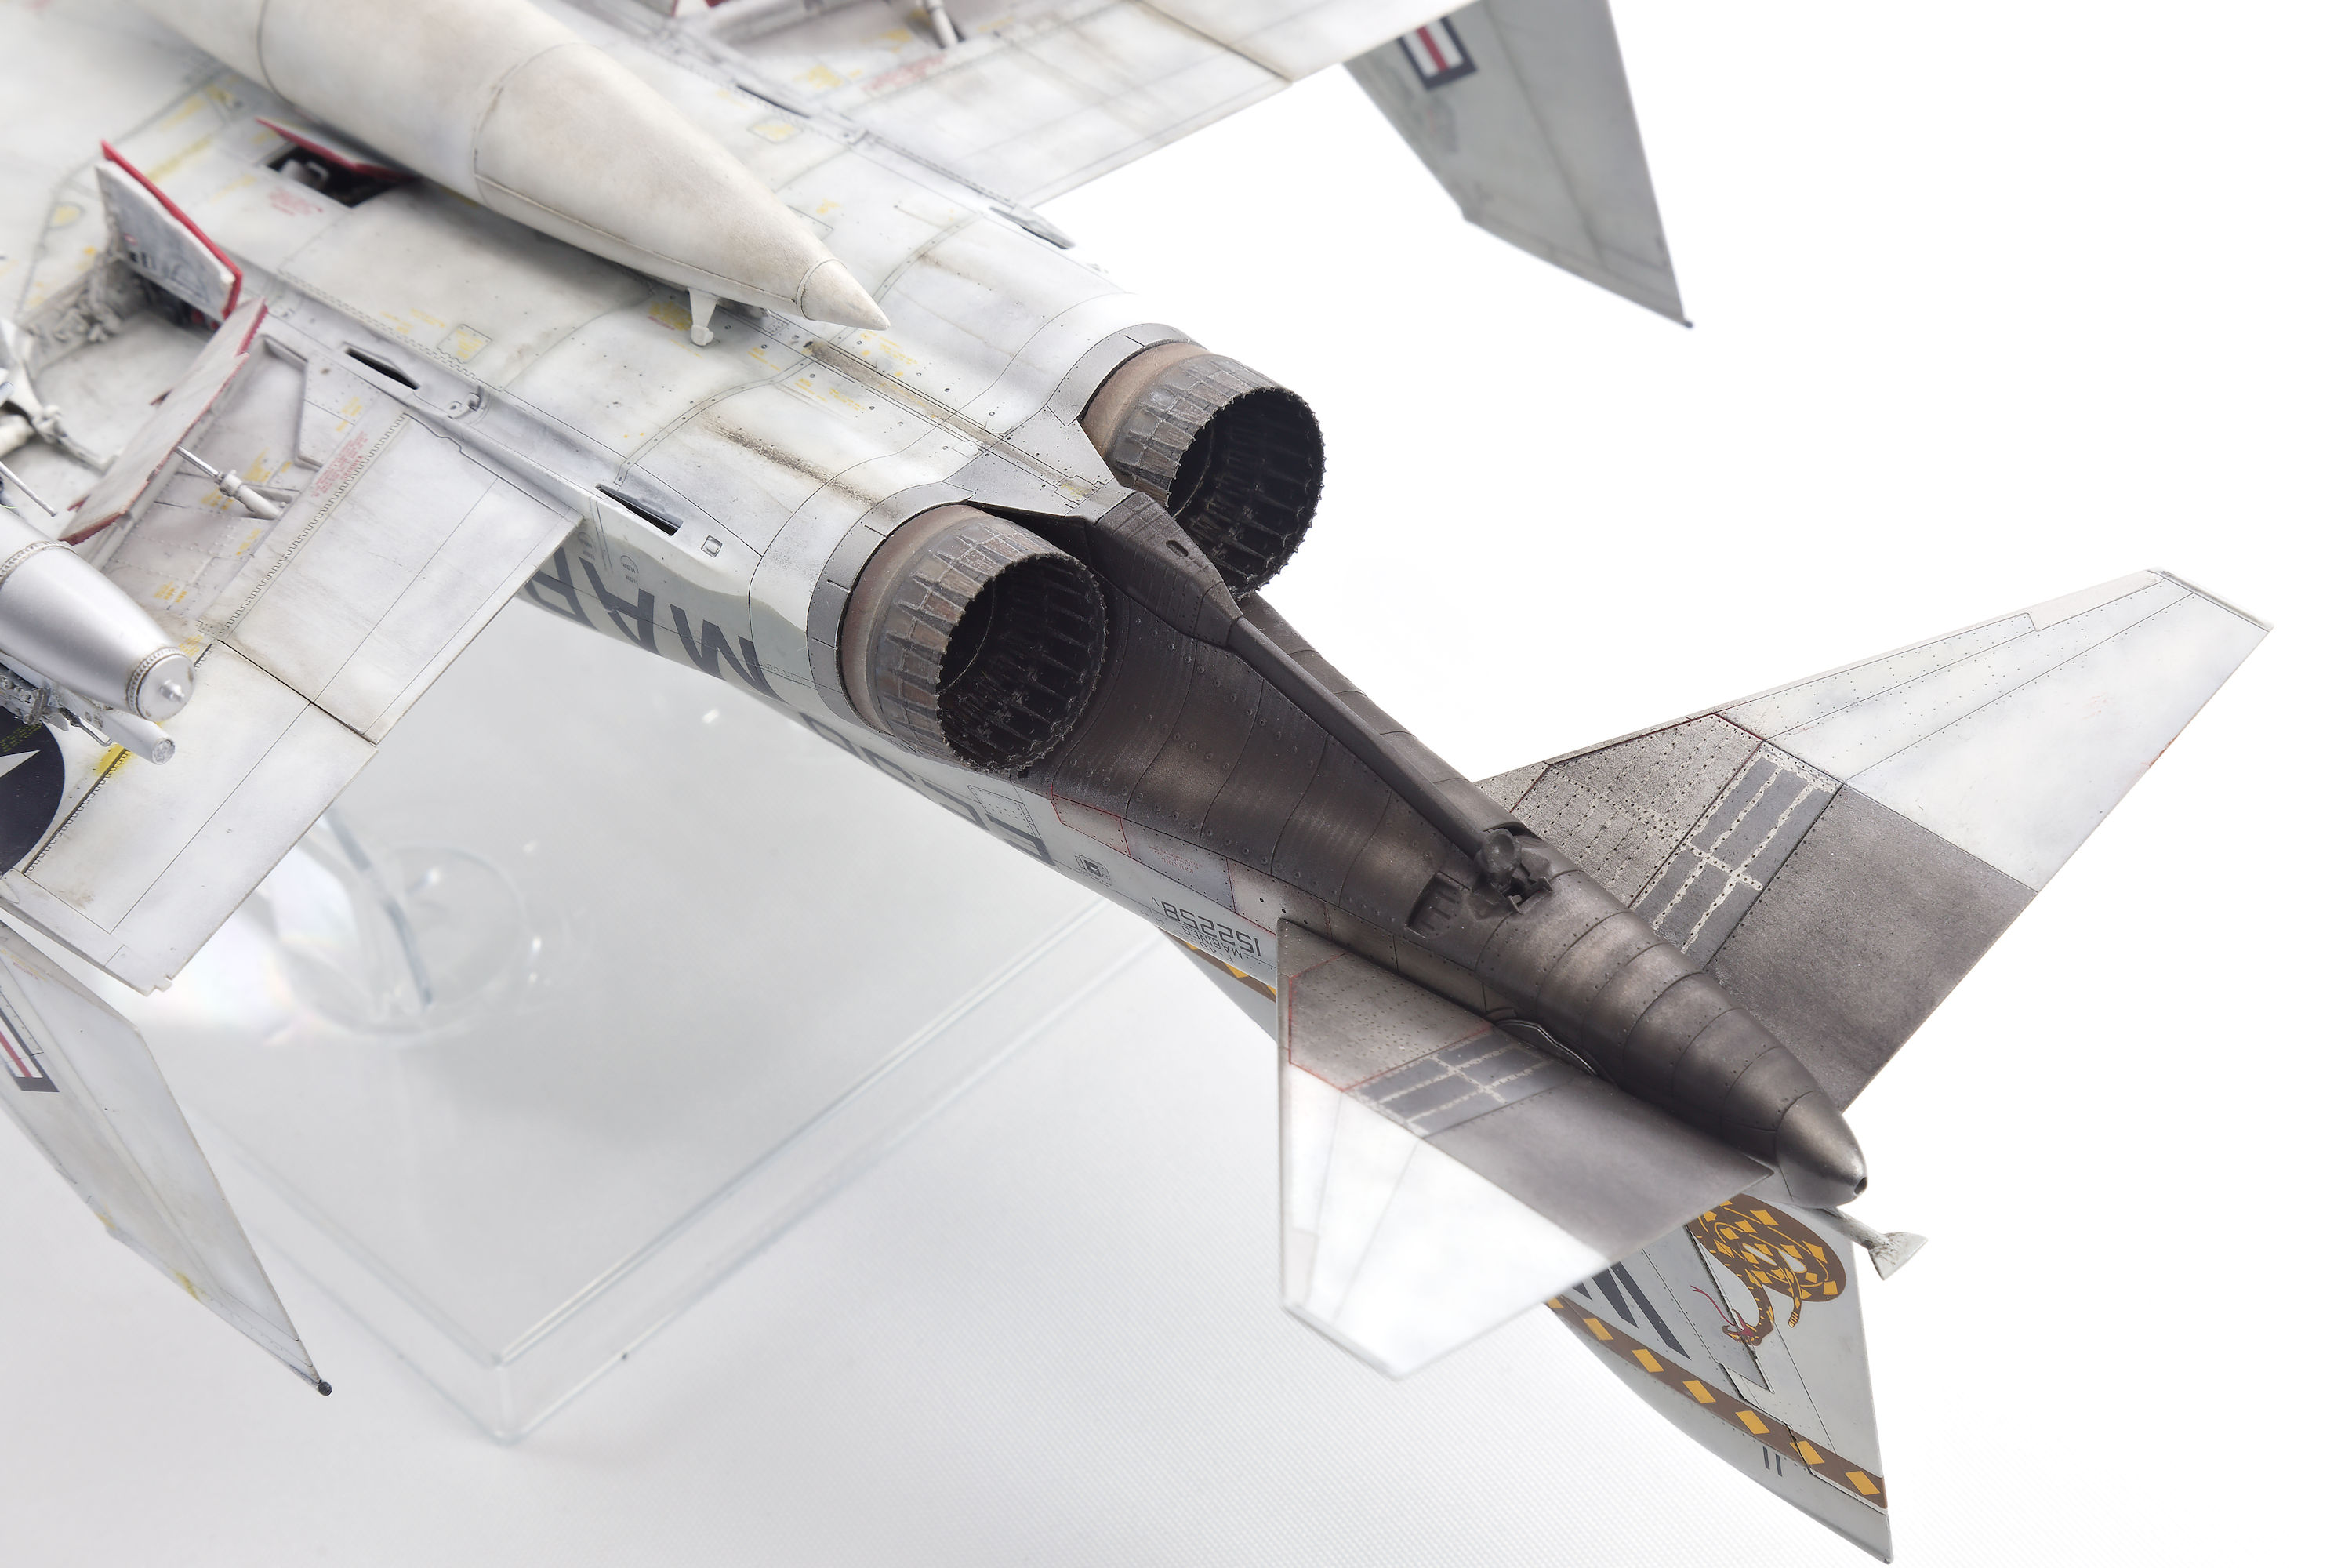
Exhaust Nozzles
These are the Metallic Details exhausts for the Tamiya F-4B. I'm not sure they offer much over the kit exhausts, to be honest, except that you don't have to assemble them.
They were base painted with some metallic lacquers, primarily Alclad exhaust manifold for the outside petals, jet exhaust for the inside, and copper mixed with exhaust manifold for the ring. Oil paints were then used to try and add some variation to the shades on the exhausts.
 |
| Exhaust Paints |
 |
| Completed Exhausts |
The Wash
I prefer to do a wash before decals and I always start with the intention of just dropping the wash into the panel lines and letting capillary action do it thing. But after about 2 minutes I just slather it all over the model. Mr Weathering Color Multi Grey was used as it dries in about 5 minutes and is then easily removed with a paper towel.
 |
| Mr Weathering Color for the Wash |
Decalling
Tamiya decals have a reputation of having thick carrier film. Whilst these looked thick on the sheet, they went down easily. A couple of applications of Mark Fit Super Strong and they snuggled down into the detail really well. I used the Tamiya decals for the national markings as they were pre-cut to fit the folded wings.
 |
| Tamiya Decals are Fine |
One thing I love about F-4s is stencilling. Yeah it takes time, but once I'm in the groove its kinda relaxing. I used the stencils from the AoA sheet. These were printed by Microscale and they appear not as sharp as similar decals printed by Cartograph, however in this case it's an advantage as they look a little worn already.
The unit markings and black USMC markings were printed by Cartograph and performed as well usual. All in all I estimate I spent 20 plus hours decaling.
 |
| Decalling is fun |
 | |
| Underside Decals |
Time to stick on the wing with the underside decal. Thankfully Tamiya's clever engineering means this is not a problem. I used thicker white cap (yes I have replaced the top with one with a green cap) glue for this as it's slow setting and thick so it doesn't run,
 |
| Outer Wing Installation |
Once all the decals were on everything was sealed with a coat of SMS Semi Gloss (I mixed approx 1/2 flat / 1/2 gloss.
 |
| Sub-Assemblies |
 |
| More Sub Assemblies |
Weathering
Weathering was done with various AK Interactive grey oils. After drying a little of the linseed oil out via some cardboard, the oils were applied to the surface and worked in with a stiff brushes. Some chipping on the cockpit sills was done with a sponge.
I used a number of reference photos I found online but also took inspiration from a few other modellers builds of this subject , in particular Doogs Models. Matt has an excellent YouTube series on building this kit and I watched several of his videos multiple times.
 |
| Top Side Weathering |
 |
| Underside Weathering |
The nose cone and tail fin were fitted. I did have to fill a tiny gap between the vertical fin and fuselage. For this I used Vallejo water based putty and wiped away the excess with a cotton bud. Once dry I used oils to hide filler.
 |
| Tail Fitted |
The Undercarriage
Fitting undercarriages isn't my favourite job, in fact it's probably the worst part of a build. I had picked up the Detail and Wonder undercarriage set close to finishing this build after seeing how excellent the detail was.
Sadly the instructions do not explain that you need to fit the whole nose leg into the nose gear when you build the nose bay. This is done very early on in the build. To make things more practical for the modeller they really should have engineered it fit into Tamiya's nose bay.
In the end I cut the top of the Detail and Wonder set to make the leg like Tamiya's piece and thus fit into the receptacle in the nose bay. Doing this meant I could use the detail on the rest of the leg.
 |
| Detail and Wonder Nose leg |
On the plus side the main gear legs are drop fit replacements for the kit parts - as they should be.

All Undercarriage Legs fitted

Weapons and Stores
As usual with jet builds, fitting the weapons took way longer than I'd planned for. I'd built the weapons and attached them to racks right at the start but this didn't stop me breaking a couple off and then having to reattach them.
 |
| Reskit Racks and Eduard Weapons |
 |
| Underside stores |
Exhaust Area
To add a soot like effect to the exhaust area I used some dark grey pigment.
 |
| Exhaust Area |
Conclusion
As I said in the beginning of this post this is the best fitting kit I've built . Tamiya's clever engineering makes this a joy to build. I found myself smiling many times at how things were deliberately engineered to ensure you can't stuff things up.
The detail in the kit is also pretty good. You really don't need much after market, seats and wheels are probably all I'd bother with if I was going to do another. Obviously, if you aren't into the kit schemes then weapons and decals will be needed.
Hopefully Tamiya will release more F-4's but considering it's 2024, and this kit came out in 2021 I'm starting to think they won't. That would be a sad waste of an excellent kit.
Ok enough rambling, onto the glamour photos.
The Photos


No comments :
Post a Comment