Monday, 7 November 2022

1/48 Airfix Supermarine Spitfire FR MK XIVe - 17 Sqn Royal Air Force - Japan 1946


Depicted as an aircraft operated by No. 17 Squadron Royal Air Force based at Mino, Japan in 1946.  

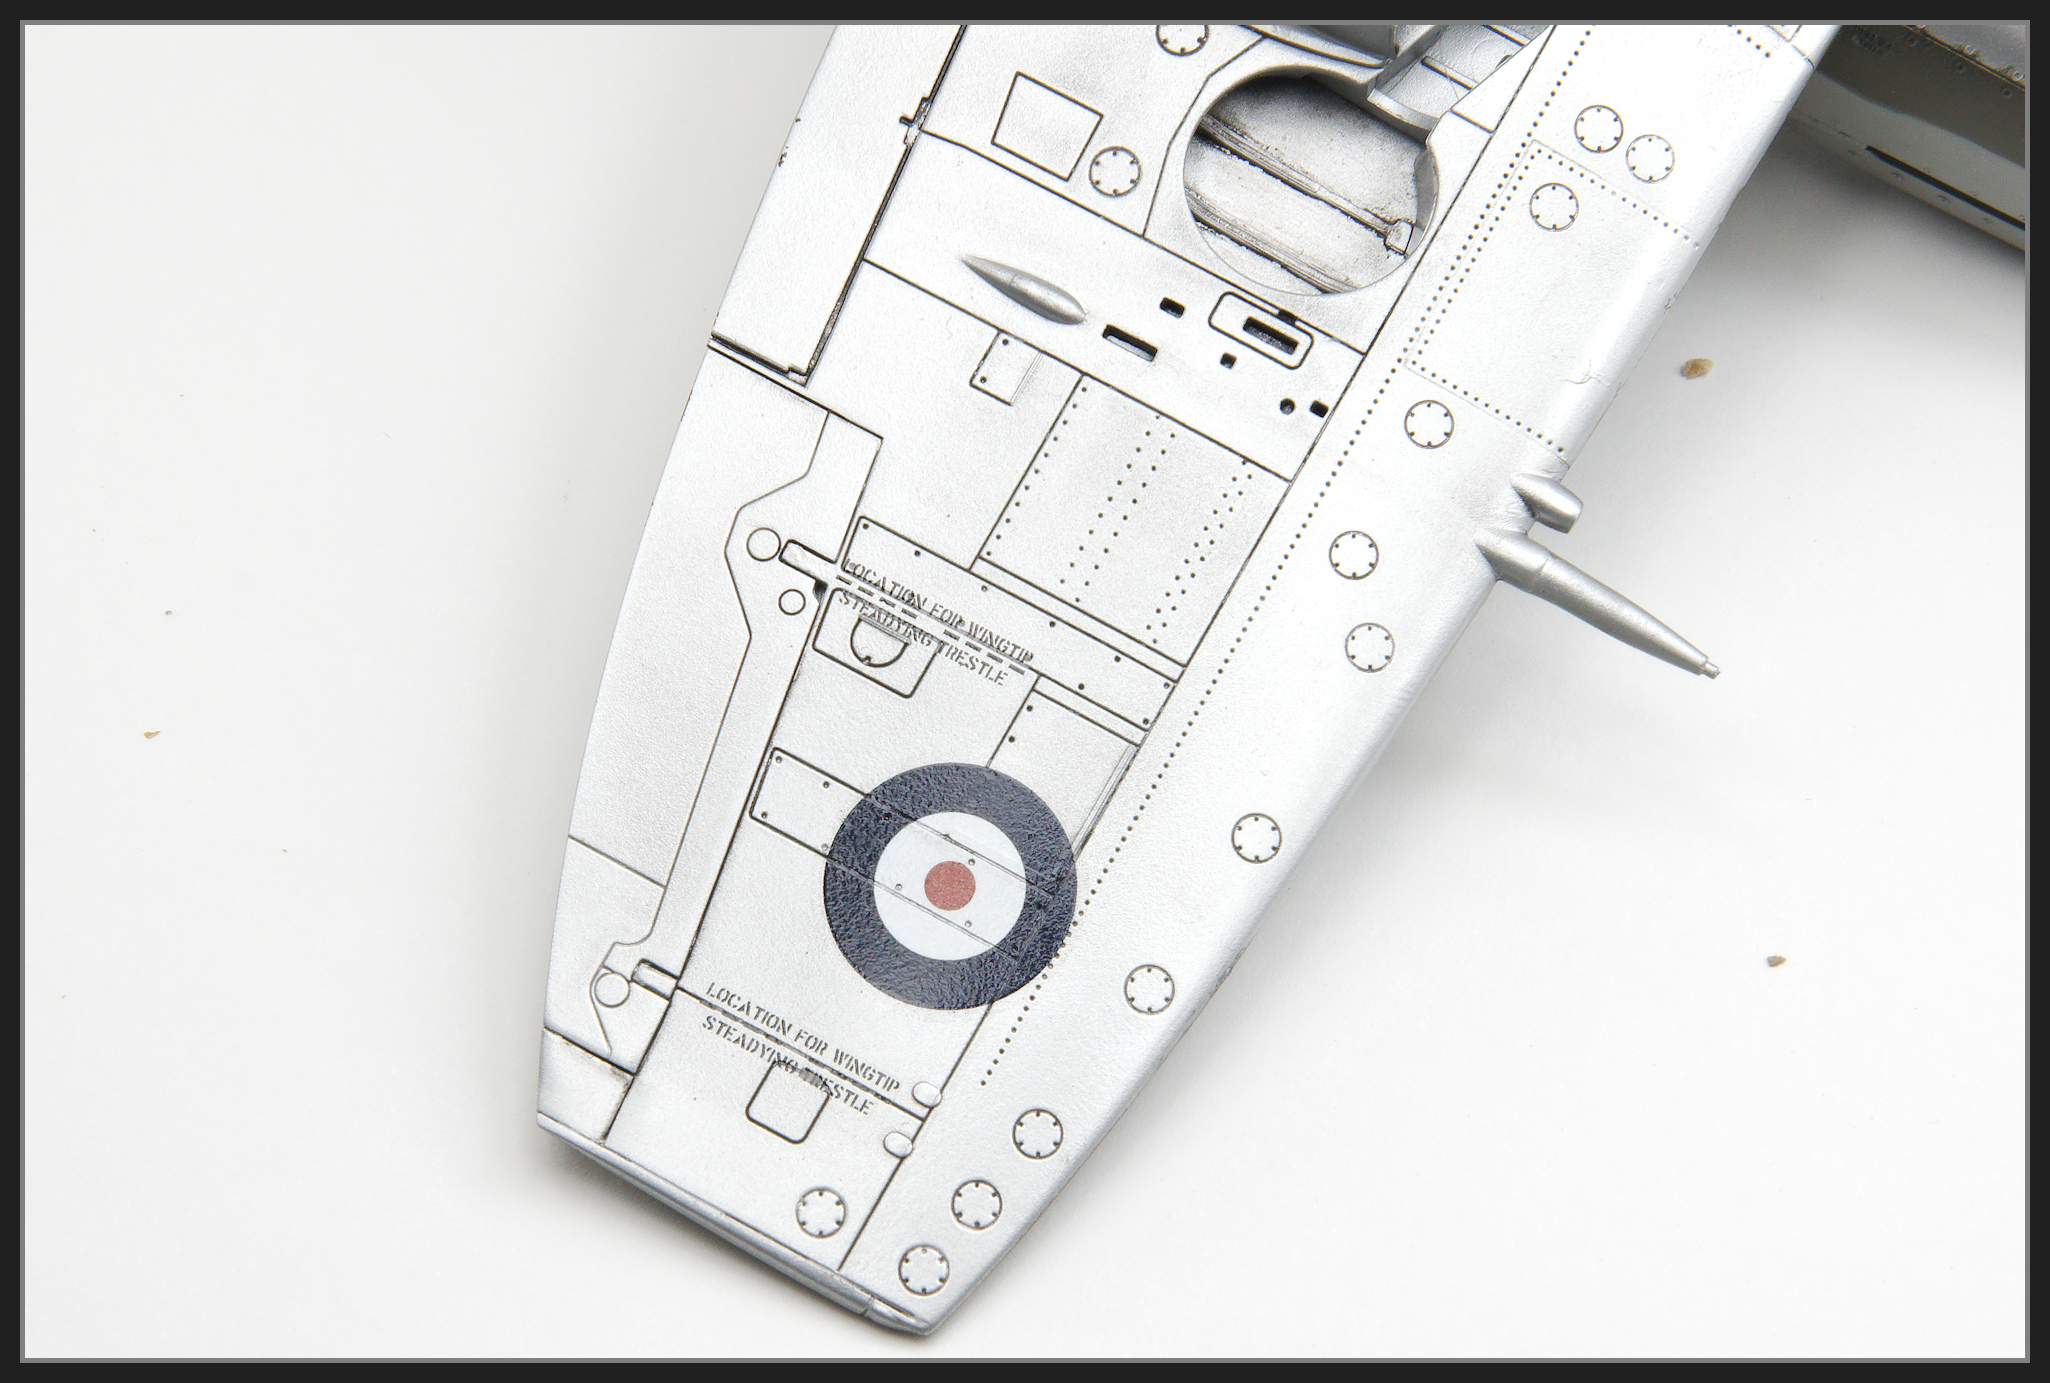
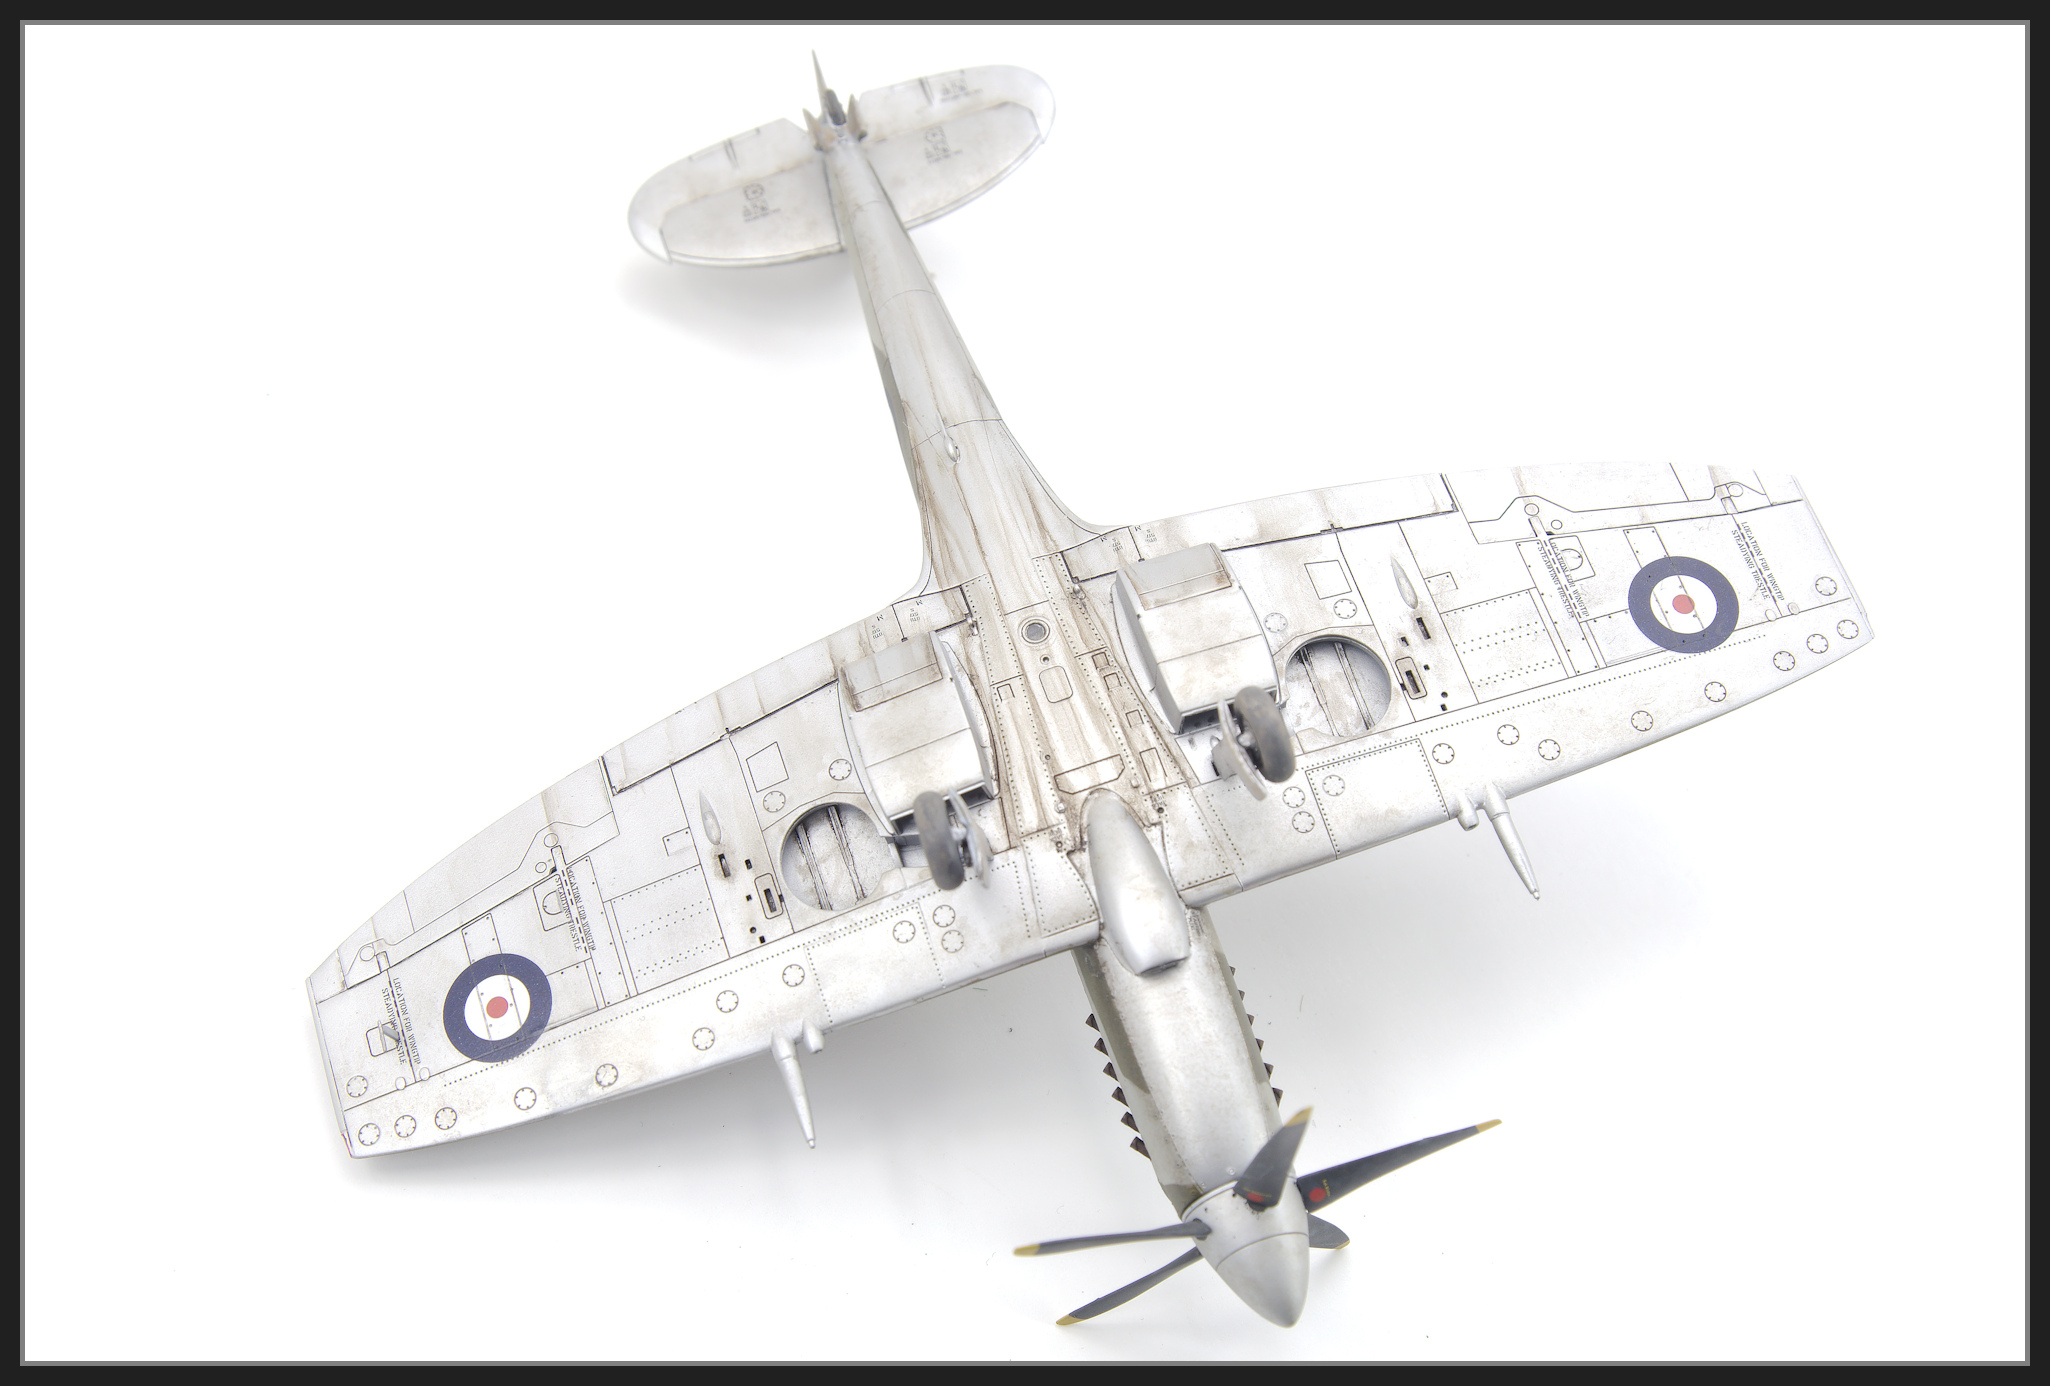
The Japanese based Spitfires were painted in an unusual (to me at least) scheme of Dark Green, Medium Sea Grey over a Silver underside.  I figured this would like a bit different in the cabinet next to my other Spitfires.

The Kit

  • 1/48 Airfix Supermarine Spitfire FR MK XIV Kit No. A05135

Aftermarket

  • Eduard Exhausts
  • Eduard Wheels
  • Eduard Seat Belts
  • Eduard Gun Barrels (from the Mk IX kit)
  • Quickboost Spinner and Prop Blades (for the Airfix Mk 22 kit)

Decals

  • Freightdog FSD48-001 - Brits Abroad (Immediate Post-War RAF)

The Build

Cockpit detail is quite nice from the box. I added Eduard Seat Belts and Airscale decal for the Compass. Instrument panel is the kit decal which is fine in this scale.


The fuel tank cover is about 1.5mm to small in width.  I figured I’d be smart and add some card to the forward end to fill the gap.  I didn’t add it to the rear as it has part of the windscreen assembly and I didn’t want to upset the fit of the clear part.  


As the edges of the fuselage halves aren’t square and I didn’t take enough care, I ended up with the nose not being quite round. Some Tamiya white filler was needed re-shape the nose


I filled the seam with CA and talc, then there were a few sessions of filling, sanding and re-scribing.  There is no fastener detail on the upper part of the cowl or fuel tank cover.  I added some detail with a beading tool and a scribing tool. Some Vallejo filler was used to fill the large gaps around the covers on the cowls.


The wing gaps were the worst I’d seen in quite a while.  


I filled the gaps with a Talc / CA mix and sanded that flush. After leaving that overnight I re-scribed the lines using an old Airbrush needle.  A couple of touch ups were required but the final result was probably as good as it gets (for me at least).


Paint

  • Primer Mr Surfacer 1500
  • Interior Green  -  SMS
  • Seat -  a Vallejo Model Air Rust tone
  • Dark Green  -  Tamiya XF81
  • Medium Sea Grey - Tamiya AS11
  • Silver -Tamiya AS12
  • Gloss -  Gaianotes
  • Flat - Winsor & Newton Galeria Flat Varnish  (post decals)
  • Semi Gloss - Mr C0lor C181
  • Flat -  Mr Color GX 113

Looking at the few reference photos I found online the camouflage demarcation looked quite hard. For some reason I can’t explain I ignored that and tried to get something a bit softer using paper masks stood off with a little therapy putty.  Therapy putty was also used where the paper masks wouldn’t meet.


Once I removed the masks I felt like I’d had a bet each way and wasn’t happy with the outcome. I then tried to freehand some softer edges. Result - more failure.  


So I re-masked the whole model using Therapy putty. I sprayed tight against it to get a hard line. The green used was initially Mr Color Dark Green C361. But I decided to go over most of the model with Tamiya XF81 RAF Dark Green 2.  I keep coming back to this for RAF dark green, either as main coat or a highlight.


Why Therapy putty and not Blue or White tac, or another of modelling type Putties like Panzer Putty? 
Well it doesn’t leave a residue like I found Blue tac or even White Tac does. And as I’ve chosen the extra firm type, it holds its shape much longer than Panzer Putty does.


Panzer Putty seems like a less firm version of the same material.  The stuff I have doesn’t hold its shape very long at all which is annoying on vertical surfaces. Finally it’s half the price of Panzer Putty


Decaling 

A gloss coat of Gaianotes Gloss was applied to unify the finish.  The roundels, fin flash and serial were from a Freightdog sheet printed by Fantasy printshop.  These weren’t as fragile as the ones I used on the Vampire but again they didn’t settle well into the details. I tried Micro Sol, Daco Strong, Mr Mark Setter and Tamiya Super strong along with a hairdryer to try and get something happen but nothing I tried worked as I hoped.  

I have had a few issues recently with decals not sucking into details and I am wondering if the water temperature I use is not warm enough to soften the decals. 

I let them set overnight then the next afternoon I worked the decal into the details with a mechanical pencil.


After another sealing coat of Gaianotes gloss it was time for a Flat Coat to make the carrier film disappear. I decided to use Winsor & Newton Galeria Flat Varnish as these type of Acyclic flats coats seem to be really good at hiding the carrier film.

 I hadn’t used this for a while and after it starting going down I remembered why.  I couldn’t get a nice consistent coat.  I eventually ended up hosing it on to thick. Most of it did disappear but one large lump remained.  I tried sanding it away but ended up with a divot.  

This was repaired by carefully laying down some coats of Mr Surfacer, sanding a, painting and repeating until I was happy.  I really like the skinny Flory sanding sticks for jobs like this.


Weathering

Prior to weathering I decided to give the model a coat of Mr Color (C182) semi-gloss as the flat coat was really flat and would make some the oil work harder to remove if I wanted to.

I started on the underside with oils. AB 502 Sepia is my favourite and it, along with a AK dark grey and AB 502 Raw umber were the main colours used here.  I quickly sealed the streaks with another light semi-gloss coat, then to break up the large bits of silver I flicked oil paint off a brush followed by using a coarse bit of sponge to stipple the oil pots in before the dried.  I actually liked the effect here particularly on the nose.

I decided to keep the underside semi-gloss so a final sealing coat of Mr Color C182 was applied 


Top side weathering was also done with oils. Like the bottom these were mainly AB 502 Sepia and Raw Umber and specked onto the model then blended and / or stippled using sponges and a paint brush.

I deliberately didn’t go for the chipped wing roots., rather I went for a dirty look in the wing roots to depict grubby boots of the maintenance guys (we all know pilots don’t get dirty) climbing up and down servicing the aircraft. I probably went a bit further than I’d intended but I decided to leave it and move on. Once I was happy everything was sealed in with Gunze GX 113 Flat.


Finishing Steps

I hate the geometry of Spitfire undercarriages. Fit on this one wasn’t the worst I’ve dealt with but it still needed more thought than I liked.  From looking at the parts I could understand how the designer wants you to fit the leg.  The leg has a pin that mates in a hole on the fuselage and there are two surfaces that the leg needs to butt join to get the right angles.  A tiny of bit of force was needed to get everything aligned correctly.  I used CA glue on the pin that mates to the fuselage, and on one of the butt joins, Once this grabbed I applied normal cement on the third position and then over the other mounting point.  Once the normal cement set Thin CA was then applied over two butt joins - just to be sure.  One of my modelling weaknesses is that I am a compulsive over gluer.

To set the Eduard wheels I first glued in the tail wheel.  This fit like a glove.  Using a liberal dollop of Hypo cement in the wheel mounting receptacles I pushed on the wheels. 

To line things up I place the model on its wheels on a shelf at eye level and adjust as required . I use Hypo cement as it is slow setting but very tacky so you have a lot of working time to adjust the wheels to get the flat spots on the ground and the angles correct.


The green looked a bit monochrome so some scuffs were added with a couple of green pencils.

The propeller is the Quickboost one for the Airfix Mk 22/24 Spitfire.  The blades look nicer than the kit one so I figured I’d use it.  It was simply butt joined to the fuselage, not ideal I know. I could have used the kit mounting arrangement but I’d already painted and weathered it before I released I should have removed more of the casting block. It was good enough for me so on it using Hypo cement to allow me to position it as I wanted.

The cockpit door is another Quickboost item.  The Kit one isn’t to bad but the Quickboost one is next level better.  It was attached with some blobs of white glue.

A hole was drilled for the VHF whip antenna which was a broom bristle 

All that was left was to remove the masks, unusually for me there virtually no contamination on the clear parts. The canopy is attached with a few dabs of white glue. 


Conclusions

This isn’t one of Airfix’s better kits. The fuel tank cover, rocket cover, and wing roots being the things that really should have been done better considering it was released in 2019.


Still with a bit of patience it can be built into a nice looking model without too much effort. Would I build another? Pat some stage, yes. I do need to do a Spitfire in the SEAC scheme. I’d also love a high back MK XIV.

The Photos


Wednesday, 12 October 2022

1/48 Airfix de Havilland Vampire F.B. Mk.5 - No 75 Sqn Royal New Zealand Air Force


Depicted as NZ5776 from No. 75 Squadron Royal New Zealand Airforce circa 19

After the long drawn out Hobby Boss Super Hornet build I felt like I needed a quick and easy palette cleanser under the belt.  

I had a couple of the new Airfix Vampires in my “For Sales pile that weren’t looking like being sold anytime soon and after looking at the plastic over few beers one evening I figured it looked simple enough that I could it smash it together in a couple of weeks.  

A mate also informed there was an aftermarket decal option for an RNZAF FB. Mk 5, and that I can build the FB.5 from the box.


The Kit

  • 1/48 Airfix Vampire F3 . Kit No Airfix A06107 

Aftermarket

  • None

Decals

  • Euro Decals de Havilland Vampires ED48103

The Build

This was a pretty straight forward build although I did waste some time trying to hide the join lines in the intake tunnels.  That was pretty pointless as you can’t see much in there once the intake face is on.


The kit decal on the plastic looks as good as you can get.  Results like this are why I am a fan of decals over raised decals for instrument panels. 


The booms lock into the fuselage although I had to open them up a little to get them to slide in properly.   The spars help keep everything aligned. I did fill the internal seam in the jet pipe but initially forget the external one on the bit that protrudes outside the fuselage.  This was done later.
Weight was added in in the area behind the cockpit as I was unsure that I could get the required weight in the nose.  


My upper fuselage was a little warped so some clamping was required.  In hindsight I should have fitted the intake faces at this time as they would have aligned and held everything together and I probably wouldn’t have needed the so much clamping.


CA and talc was used to fill the seams on both sides of the fuselage. Good on Airfix for putting these joins away from detail and not on panel lines.   I didn’t bother adding any weight in the nose as I thought the weight behind the cockpit would be sufficient.  I would find out later it wasn’t.


Paint

  • Primer Mr Surfacer 1500
  • Interior Black - Gaianotes Black Grey
  • Silver -  Tamiya AS12 and SMS Silver
  • Clear Gloss -  Gaianotes Gloss
  • Flat Coat - Gaianotes Flat
The windshield and canopy fitted perfectly I started with a primer coat of Mr Surfacer Black 1500. 

Then it was SMS silver, but it appeared to craze the plastic in a few spots. I have had this issue with SMS in the past. It’s pretty hot paint and I'm not a "build up the opacity slowly" kinda guy.  Scott Taylor, the owner of SMS, reached out to me advised he thinks it’s a reaction with the Mr Surfacer. He isn’t sure why it happens and it’s a bit random.

To solve this I sprayed a coat of Tamiya AS12 (which I should have just used it from the beginning) over the SMS silver. This filled a bit of the pitting.  I then spot primed the worst areas with Mr Surfacer and let it dry.


Some light sanding of the Mr Surfacer and then I applied another coat of AS 12.  Then a random dark grey paint was applied through a splatter mask to dirty up the surface a bit.  Now it is was time for decals.  


Decaling 

 The roundels, fin flash, tail boom checks and serial numbers are from the Euro Decals de Havilland Vampires ED48103.  These are printed by Fantasy Printshop and to be honest I wasn’t that impressed with how they performed.  

The first 2 roundels ripped pretty much straight away and they didn’t really settle down into the detail at all, even with multiple applications with a number of decal solvents. 


I only used the roundels in lieu of the kit ones as they are a slightly lighter blue which looked closer to the colour in my reference photos.  Thankfully the Euro Decals sheet allows you to do more than one aircraft so there were spares.  I’m not sure about the gold fern. I’d have thought it should be silver but this is a quick build so I went with it.


The stencils, bar the rescue arrow, were from the kit and performed superbly.  The decals in Airfix’s current range of kits are always excellent in my experience (they are printed by Cartograph).  

The rescue arrow came from a Gekko Graphics A-4K set.  I sealed the decals with SMS gloss prior to weathering.


Final Steps

After the decals dried I sealed them with Gaianotes gloss.  A wash of a thinned grey Oil paint for the panels and Mr Weathering Color black for the moveable surfaces was applied.  Once this dried it was removed with a paper towel.  A coat of Gaianote flat was applied to knock the gloss off. 

I then fitted the drop tanks, which didn’t mate to the wings at all well.  I adjusted these to fit as best I could then glued them on.  Vallejo putty was used to fill the gaps with the excess wiped away with a wet cotton bud (or 5).  Once dry I brush painted the putty with Vallejo Model Air Aluminium. 
Both the main and nose undercarriage set ups are a little more tricky to fit than I’d hoped. But I got them on eventually.  

If I built this again I’d dry fit all the undercarriage bits before gluing the upper and lower wings together so I could understand how they are supposed to go together.

When I put the gear on I found it was very close to a tail sitter.  To solve this I coated some lead shot in white glue and dropped it into the cockpit.  I then hung the aircraft nose down overnight to try and get the shot to stick in the nose.  This worked.


The underwing antenna had been removed earlier in the build and hole drilled in the appropriate place.  I used a piece of brush bristle to replace the plastic part. I let it sit overnight to allow the glue to cure.


Conclusions

Bar the undercarriage, this was an extremely enjoyable build. The kit goes together really quickly and there is minimal clean up required.  For me the detail is adequate for the subject and scale.  I think it took under 15 hours of build time from box opening to it going in the cabinet.  If I build another it will be done wheels up to make the build even simpler (and quicker).


So if you are looking for a quick and simple build that reminds you of modelling as kid then this kit is as close as it gets.

The Photos