

I've loved the Lizard Aggressor scheme since the first time I saw it. It's just taken me a while to get around to building it.
The Kit
- Tamiya F-16C/N "Aggressor/Adversary", Kit No. 61106
Aftermarket Used
- Cross Delta Reinforcing plates
- Master Models Probe Set
- Royale Resin Nose
Decals
- Afterburner Decals 1/48 Arctic Aggressors, Sheet No AD 48-034
- Furball Decals Canopy Seals
- Daco Decals F-16C Stencil Set (for the tanks)
- Afterburner Decals 1/48 USAF Armaments Set Part 1, Sheet No. 48055
Here's the stuff I started with to use on this kit. I never intended to use all of this but I like to get it out just in case.
This build will be in flight to try and reduce the build time, plus the
kit wheel well needs some work and I'm not in the mood for that.

Paint
- Green - Mr Color 302 FS 34092
- Tan - SMS PL 116 US Tan FS 20400
- Dark Brown - SMS PL106 US Dark brown FS301409
- Grey - Mr Color 317 Grey FS36231 (Radome)
- Cockpit Grey - Mr Color 306 FS36270
- Exhaust - Alclad Pale Titanium mixed with some aluminium
- White - SMS Insignia White
- Vallejo Acrylics for details
- SMS Gloss
- SMS Flat
The Build
I like to deviate from Tamiya's instructions for the intake and assemble the full length intake in upper and lower halves. I deal with the lateral seam, then gluing the top and bottom bits together. I then deal with the longitudinal seams. Thankfully you can't see much more that 30 mm in here so you only have to concentrate on the bits near the intake mouth. Using white putty also helps.
You can also see where the stand attachment which is a piece of 1/4 inch box styrene glued in with some Magic Sculpt to make sure it stays secure.

The join between the front and rear bits of the upper
fuselage is the make or break on this kit.
Get it wrong and the kit may as well be binned. Thankfully Tamiya make
it easy for you to do the gluing from the inside.

Cockpit tub painted up. Nothing magical here although I use FS36270 in lieu of the FS36231 for my US jet cockpits as I think the lighter colour looks better in this scale.
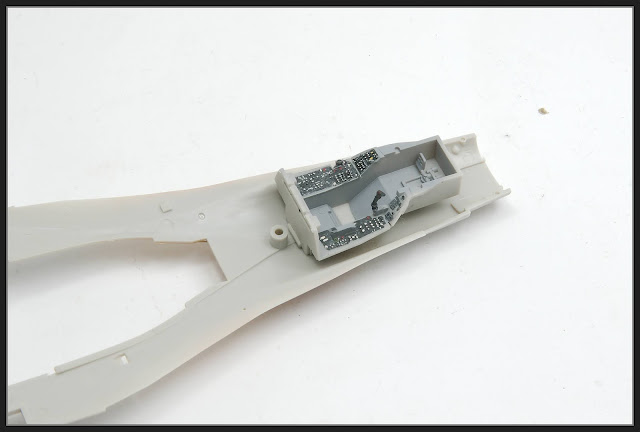
More sub assembly work. I find I need to get this stuff out of the way as early as possible otherwise I'll get near the end of the build and not want to do it.

With all the sub-assemblies done it’s time to put them together. I added some of the colours in areas where I thought it would be hard to get to later.

Here is how the intake assembly fits into the lower
fuselage.


Fit of the upper and lower fuselage is good. You do need to ensure you get some glue on the right angle joins on the rear fuselage.

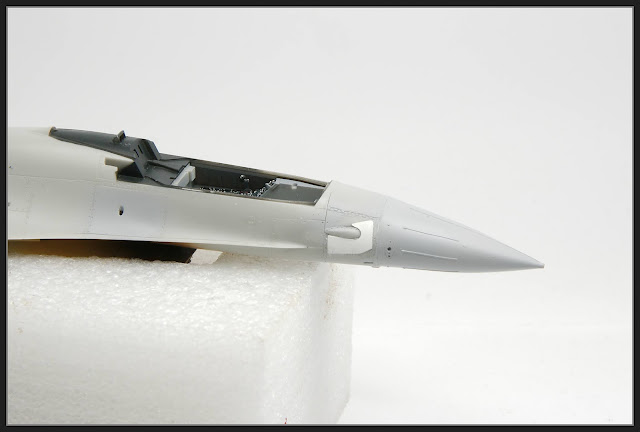
Onto the nose. I
decided to use the Royale Resin nose rather than deal with a seam on the kit nose
and then try and restore the lightning strips.
But the problem with the resin nose is attaching it with
enough strength, so when I inevitably hold it by the nose, it doesn’t snap
off. I didn’t want to just rely on the
bond between the nose and the edges of the kit so I had to come up with some way
making this stronger
I first stuffed some Magic Sculpt two part epoxy into the
nose making sure it stuck to the circumference.
After the Magic Sculpt began to set I then the resin nose into the Magic
Sculpt until it mated to the model.
Initially I had hoped the nose would adhere to the Magic Sculpt but it
didn’t. I’d even drilled some holes into
the nose for the Magic Sculpt to fill, this increasing the strength. This didn’t work.

So I settled with pressing the nose onto the Magic Sculpt
until it was flush with the model. This
had the advantage of filling any small gaps between the nose and the kit. I removed the nose and waited for the Magic
Sculpt to set (should have taken a photo).
I then used 5 minute epoxy glue to secure the nose to the kit. Another advantage of this is that you can
scribe the join between the nose and kit to depict the join.


I had used the Cross Delta reinforcing plates for the wing and upper fuselage plates. They stuck fine. But I just couldn’t get the ones on the nose to stick as well as I wanted.
So, as suggested by a mate I removed the, and used them as templates to cut ones out of 0.005” card. Taking care not to apply to much to melt the thin card I attached them with Tamiya Extra Thin.
Time to paint. I usually don’t bother priming as I don’t see the need when the plastic is already smooth and there has been no work or re-scribing done. That said I will spot prime certain areas.
First off would be the light tan colour (FS20400) which SMS have straight from the bottle. I like SMS paints and have been gradually acquiring more and more of the, I have had no issues with them …. Until now.


The light tan really did a number on the surface of the model – but only in some places These images show it after I have stripped off the paint. If you zoom in you can see there are some serious pitting in places..
Talking to mates, and to Scott , the owner of SMS (who was nice enough to respond to a PM at 9pm on a weeknight), the consensus was that I had applied it to heavy / wet. And that is possible, but in my defence I’d not applied it any different to how’d applied other SMS colours or Mr Color Lacquers. Obviously a primer coat would have helped here as well, but again I’ve not struck paint as hot as this one before – lesson learnt? (probably not).
There was not much else to do but Bruce (bin) in or try and fix it …. I figured I had nothing to lose by having a go at fixing it.
Sand, Mr Surfacer , repeat. This time I primed the whole
model. Because of this I had top deepen the panel lines and rivets on the wings.


Second time around with the SMS Tan. I took a lot more care this time with the
amount paint applied. The tan still
showed up some pitting I didn’t see after the Mr Surfacer coat. I applied a few more light coats of the Tan
to fill the pitting. This mostly worked
but there are areas that are still pitted.
I have decided to move on and live with it.


The difference in shades is because some phots were taken on my phone and I couldn't be bothered correcting it.


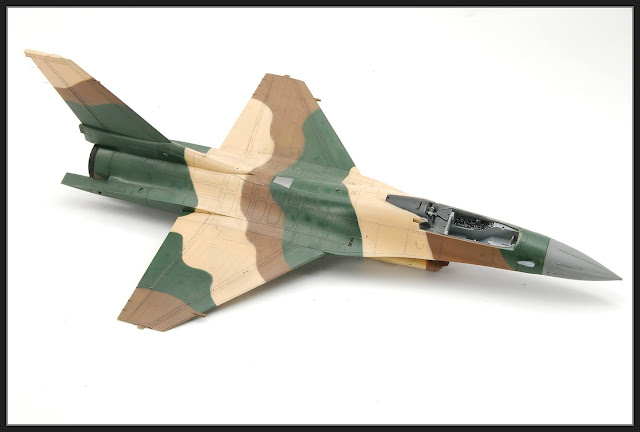
Onto the camouflage. I started with some paper masks to do the camo pattern on the horizontal stabilisers.

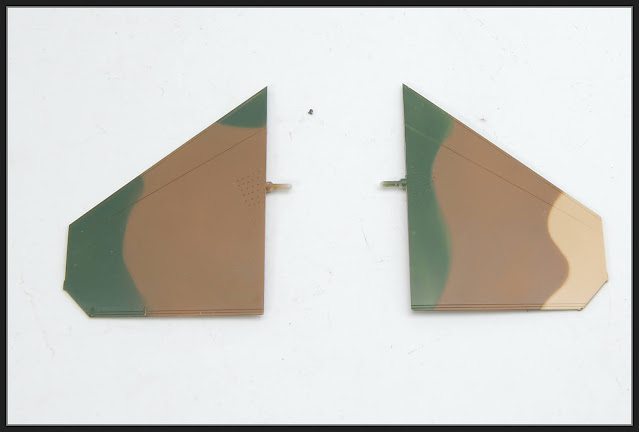
Next was the green and browns. The green is FS 34092 Mr Color 302. The afterburner instructions say it should be FS .4079 but I think 34092 looks closer to the photos.
The brown is SMS PL106 US Pale Brown (FS30140) I did the colours in stages to make handling easier. I started at the tail. Then the top and bits of the nose, before moving back to the wings and rear fuselage. A combination of paper masks and panzer putty was used for the masking.


I hate when you don’t look hard enough during he build phase and notice things you should have fixed long before now. A couple of panel lines on the underside that shouldn’t be there needed to be filled.


Next was the first wash of diluted oil paints. I tried
different colours for the different camouflage colours.
Looking at the reference photos I had, I started with some oils to add weathering marks. I also splattered Mr Weathering Color (mixes of browns and blacks) and stippled them in.

I forget to photograph the decaling. That's was because there is pretty much nothing to say, they are from Afterburner, and printed by Cartograph so they just work. I did apply a light gloss coat using SMS gloss first.

The decals around the canopy are from Furball as I decided to use those instead of those from the Afterburner sheet.
Getting the pilot into the jet required a bit of force to get the seat to sit down low enough. There was a bit of mucking around required to get his hands to at least look like they are in the right place.


I know these jets often fly lightly loaded but there are enough images around with them carrying a few tanks . I liked the contrast the grey tanks and racks add to the model. I spent a while weathering the tanks, not that you can see it here. Attaching all the bits took time. The canopy didn’t, and still does sit as flush as I’d like. Not sure why.

To secure it I used some Deluxe Materials Odourless CA as this doesn’t affect clear parts. I then lightly clamped the canopy down and left it for a few hours

To be honest I don’t think the canopy fit is as good as it should be but I was ready to move on to the next build.
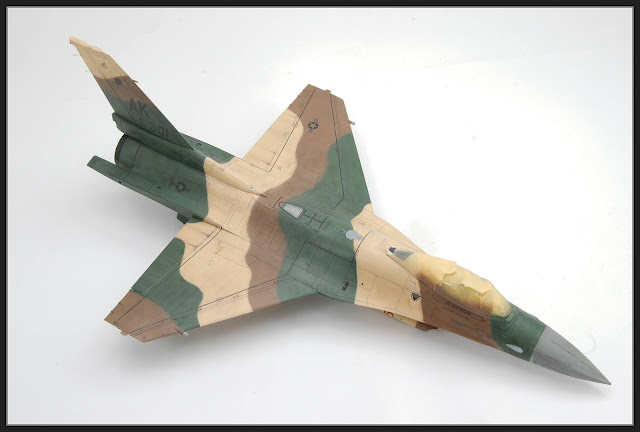
The Glamour Shots
Check out the blog page with all the glamour shots here.
No comments :
Post a Comment