
Since I started this build on this blog I'll continue it here.
The Aires Seats have seat cushion detail that whilst isn't wrong, is not really common. So, stealing another idea from John S's build on ARC I decided to simulate the more common cushions with sticking plaster.

I wasn't happy with the first go so peeled it off after painting and tried a couple of different brands. The one on the left is to coarse for 1/48, but may be good in you want simulate fabric in larger scales

After airbrushing the seats with nato Black I picked out the details with various Vallejo Paints. Decals are from a Afterburner decals F-14 sheet. I bought one of their F-14 sheets primarily for the stencils. I gave the seats a wash with the black Tamiya enamel wash. This worked well to bring out the details in the straps. A fine Gundam Marker was used for the stripes on the ejections seat handles. I should really have replaced the PE hand grips with wire are they are a bit one dimensional (it looks worse in these big photos)


Next task was to add the cross detail self adhesive detail set to the front fuselage. This is a great idea for certain raised detail. I'd like to see more aftermarket like this

I had a go at scribing the vent detail. I still wasn't happy, but I think I could have pulled it off with a bit of a tidy up. I was thinking decals maybe the easy answer

And then I noticed

Doh!!!!!!!!!!!!!
Now I've got those huge gouges to get rid off, and it's got to smooth for the decals....
Whilst I was waiting for the filler to dry in those gouges I was working on the cockpit Tub.
I started by painting the entire tub Gunze H305 (FS36270). I find tha the correct colour, FS36231 is way to dark for 1/48th scale. The Black is Nato Black from Tamiya.
All the detail was picked out using Vallejo Acrylics, except for the yellow which is Humbrol 24 , Trainer yellow (the only Yellow paint I think looks the correct shade of yellow f that makes sense).
A grey enamel wash was used to bring out the detail and some dry brushing was done with a grey.
As the Aires Cockpit has the wrong HUD for a F-14B I decided to use a HUD cover, it's not glued on so it's a little crooked in these images


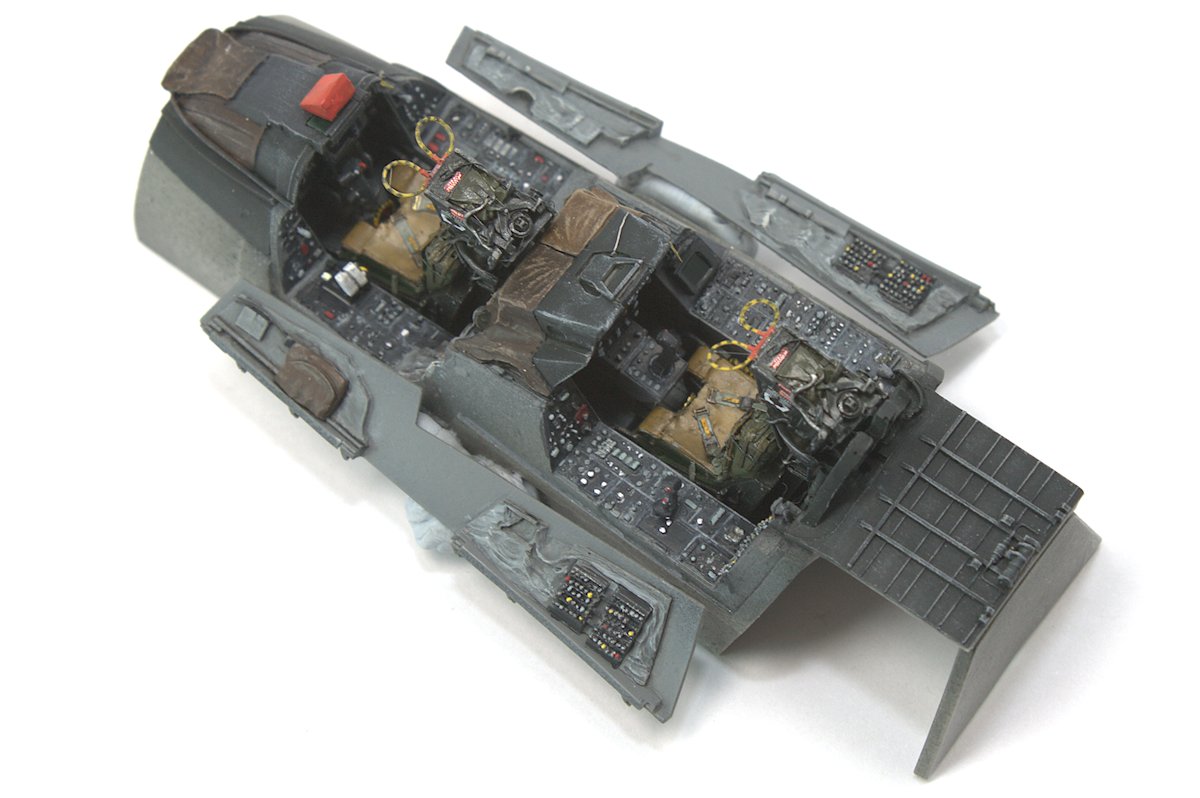

Finally, here's a close up of the instrument panels
