Monday 31 December 2012

1/48 Stug Build - I'm calling it done

I'm calling this done on the last day on 2012.

Used a lot of techniques from the AK interactive FAQ2 book and videos. All in all I'm happy.

I wanted a heavily weathered and battle weary winter Stug and I think I've achieved it.

Have a great 2013.

Here are the pictures


Thursday 27 December 2012

1/48 Stug Build - Update 3


I've returned to my Stug build build after a couple of months away. This is being built to learn/practice some of the armour weathering techniques I've read about as I want to try them on my aircraft builds. As such I'm not being particularly anal about accuracy.

Here she was at the end of the last update

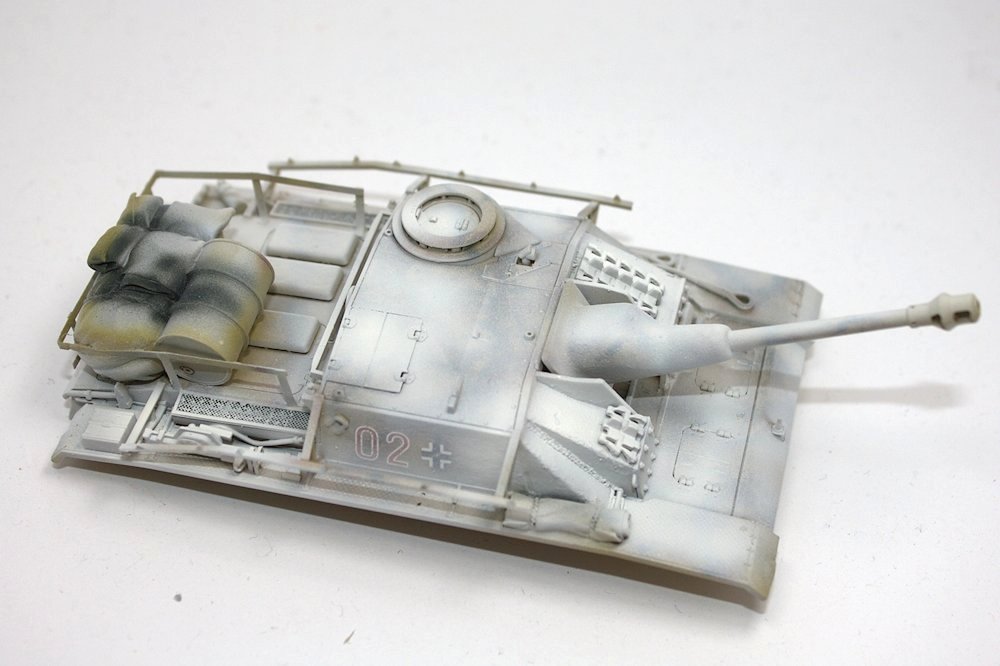
I wanted to give the "hairspray technique" again. This I used AK's Chipping fluid so I applied it with my airbrush. It didn't seem to cover as well as hairspray, pooling in some areas and forming beads on others... Not giving this much thought a the time I left it for 10 mins then pressed on and sprayed Tamiya Flat white over the model.


After leaving it for 15 mins in the shed (which was about 33 degrees C) I proceeded to try and remove the white wash. This wasn't as successful as I hoped and the painted didn't come off as easily as last time.

I'm not sure if this was due to:
1. the AK chipping fluid not adhering to the model,
2. or that I left it to long before applying the white paint or starting the  chipping (especially considering the heat in the garage)
3. or that the Tamiya white had to much lacquer thinners in it.
4. or a combination of the above

Anyway it took a fair bit of scrubbing to get a worn look. I then used the sponge technique and some enamel white to re-apply some whitewash to areas I thought I'd been overdone.

After it was done I applied a flat coat and a pale grey filter. I then used the Tamiya black enamel wash as a pin wash. I applied a few other filters , mainly just to see what would happen.


Then I painted the tracks and attached the hull to the upper, prior to this I added some mud using the Tamiya texture paint to the underside of the guards. I figure some mud would stick there


I also had a lot of fun painting the stowage and wood using some of the techniques in the AK interactive FAQ2 book. I think I'm going to whitewash the timber board though


I've still got the streaking etc to try but I'm open to suggestions on what else I can try


Tuesday 18 December 2012

1/48 Revell Ventura Part II


Some more progress

One of the issues with this kit is the scratches in the cockpit and lower glazings. It seems to have been ignored by many reviewers but it's a real disappointment IMHO.

 I spent a hour or so polishing it out with various Tamiya Compounds and micro mesh. Then I dipped the clear parts in Future and set them aside for a week to dry.

I decided to add some sun screen curtains to the overhead. These were made from paper towel and wire. I shamelessly stole this from this build


Fit of the cockpit glazing was So so. I found the glazing about 1-1.5mm to narrow. I positioned the glazing in the middle and then sanded the edges of the kit to try and flare it into the width of the glazing.


The glazing was also a bit tall, but that was probably due to be sanding a little to much material off the top when eliminating the seams. I took a little of the bottom of the glazing by sanding on on my glass work surface and built the top a little with magi sculp (white putty on the image above)

The Fit on the lower gunners position was perfect though


Once I was happy I glued the clear parts, including the nose in with Gator Glue. Prior fitting the guns I drilled the barrels out.


The fit of the insert for the mid upper turret is also excellent.


And the way the turret goes together is quite neat.


But I still rather have the insert fitted, but not the turret parts prior to painting. I still mulling over how to achieve this

I've weathered up the bomb bay a bit. The detail is quite nice as it is I just added a few random stencils.


I had also rubbed down a bit of the raised panel on the underside. I decided to remove it completely and replace it with a bit of 0.005 thou card