Depicted as NZ5776 from No. 75 Squadron Royal New Zealand Airforce circa 19
After the long drawn out Hobby Boss Super Hornet build I felt like I needed a quick and easy palette cleanser under the belt.
I had a couple of the new Airfix Vampires in my “For Sales pile that weren’t looking like being sold anytime soon and after looking at the plastic over few beers one evening I figured it looked simple enough that I could it smash it together in a couple of weeks.
A mate also informed there was an aftermarket decal option for an RNZAF FB. Mk 5, and that I can build the FB.5 from the box.
The Kit
- 1/48 Airfix Vampire F3 . Kit No Airfix A06107
Aftermarket
- None
Decals
- Euro Decals de Havilland Vampires ED48103
The Build
This was a pretty straight forward build although I did waste some time trying to hide the join lines in the intake tunnels. That was pretty pointless as you can’t see much in there once the intake face is on.
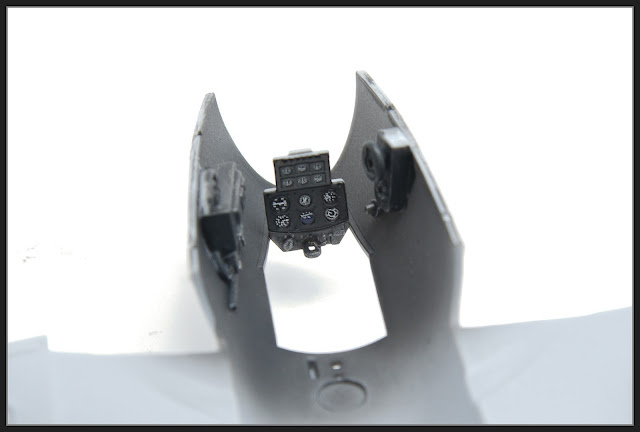
The kit decal on the plastic looks as good as you can
get. Results like this are why I am a
fan of decals over raised decals for instrument panels.
The booms lock into the fuselage although I had to open them up a little to get them to slide in properly. The spars help keep everything aligned. I did fill the internal seam in the jet pipe but initially forget the external one on the bit that protrudes outside the fuselage. This was done later.
Weight was added in in the area behind the cockpit as I was unsure that I could get the required weight in the nose.
My upper fuselage was a little warped so some clamping was required. In hindsight I should have fitted the intake faces at this time as they would have aligned and held everything together and I probably wouldn’t have needed the so much clamping.
CA and talc was used to fill the seams on both sides of the fuselage. Good on Airfix for putting these joins away from detail and not on panel lines. I didn’t bother adding any weight in the nose as I thought the weight behind the cockpit would be sufficient. I would find out later it wasn’t.
Paint
- Primer Mr Surfacer 1500
- Interior Black - Gaianotes Black Grey
- Silver - Tamiya AS12 and SMS Silver
- Clear Gloss - Gaianotes Gloss
- Flat Coat - Gaianotes Flat
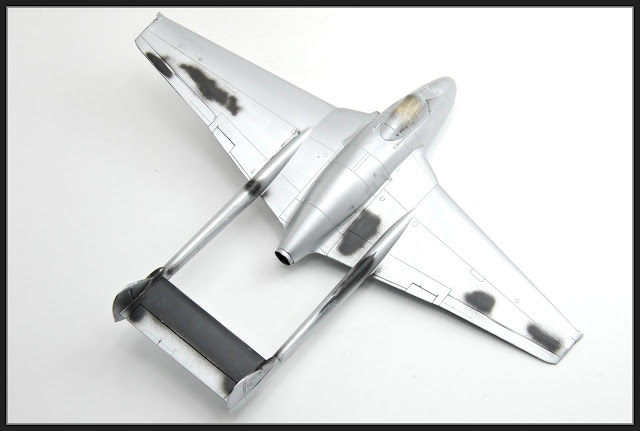
To solve this I sprayed a coat of Tamiya AS12 (which I
should have just used it from the beginning) over the SMS silver. This filled a
bit of the pitting. I then spot primed
the worst areas with Mr Surfacer and let it dry.
Some light sanding of the Mr Surfacer and then I applied another coat of AS 12. Then a random dark grey paint was applied through a splatter mask to dirty up the surface a bit. Now it is was time for decals.
Decaling
The roundels, fin flash, tail boom checks and serial numbers are from the Euro Decals de Havilland Vampires ED48103. These are printed by Fantasy Printshop and to be honest I wasn’t that impressed with how they performed.
The first 2 roundels ripped pretty much straight away and they didn’t really settle down into the detail at all, even with multiple applications with a number of decal solvents.
I only used the roundels in lieu of the kit ones as they are a slightly lighter blue which looked closer to the colour in my reference photos. Thankfully the Euro Decals sheet allows you to do more than one aircraft so there were spares. I’m not sure about the gold fern. I’d have thought it should be silver but this is a quick build so I went with it.
The stencils, bar the rescue arrow, were from the kit and performed superbly. The decals in Airfix’s current range of kits are always excellent in my experience (they are printed by Cartograph).
The rescue arrow came from a Gekko Graphics A-4K set. I sealed the decals with SMS gloss prior to weathering.
Final Steps
After the decals dried I sealed them with Gaianotes gloss. A wash of a thinned grey Oil paint for the panels and Mr Weathering Color black for the moveable surfaces was applied. Once this dried it was removed with a paper towel. A coat of Gaianote flat was applied to knock the gloss off.
I then fitted the drop tanks, which didn’t mate to the wings at all well. I adjusted these to fit as best I could then glued them on. Vallejo putty was used to fill the gaps with the excess wiped away with a wet cotton bud (or 5). Once dry I brush painted the putty with Vallejo Model Air Aluminium.
Both the main and nose undercarriage set ups are a little more tricky to fit than I’d hoped. But I got them on eventually.
If I built this again I’d dry fit all the undercarriage bits before gluing the upper and lower wings together so I could understand how they are supposed to go together.
When I put the gear on I found it was very close to a tail sitter. To solve this I coated some lead shot in white glue and dropped it into the cockpit. I then hung the aircraft nose down overnight to try and get the shot to stick in the nose. This worked.
The underwing antenna had been removed earlier in the build and hole drilled in the appropriate place. I used a piece of brush bristle to replace the plastic part. I let it sit overnight to allow the glue to cure.
Conclusions
Bar the undercarriage, this was an extremely enjoyable build. The kit goes together really quickly and there is minimal clean up required. For me the detail is adequate for the subject and scale. I think it took under 15 hours of build time from box opening to it going in the cabinet. If I build another it will be done wheels up to make the build even simpler (and quicker).
So if you are looking for a quick and simple build that reminds you of modelling as kid then this kit is as close as it gets.


