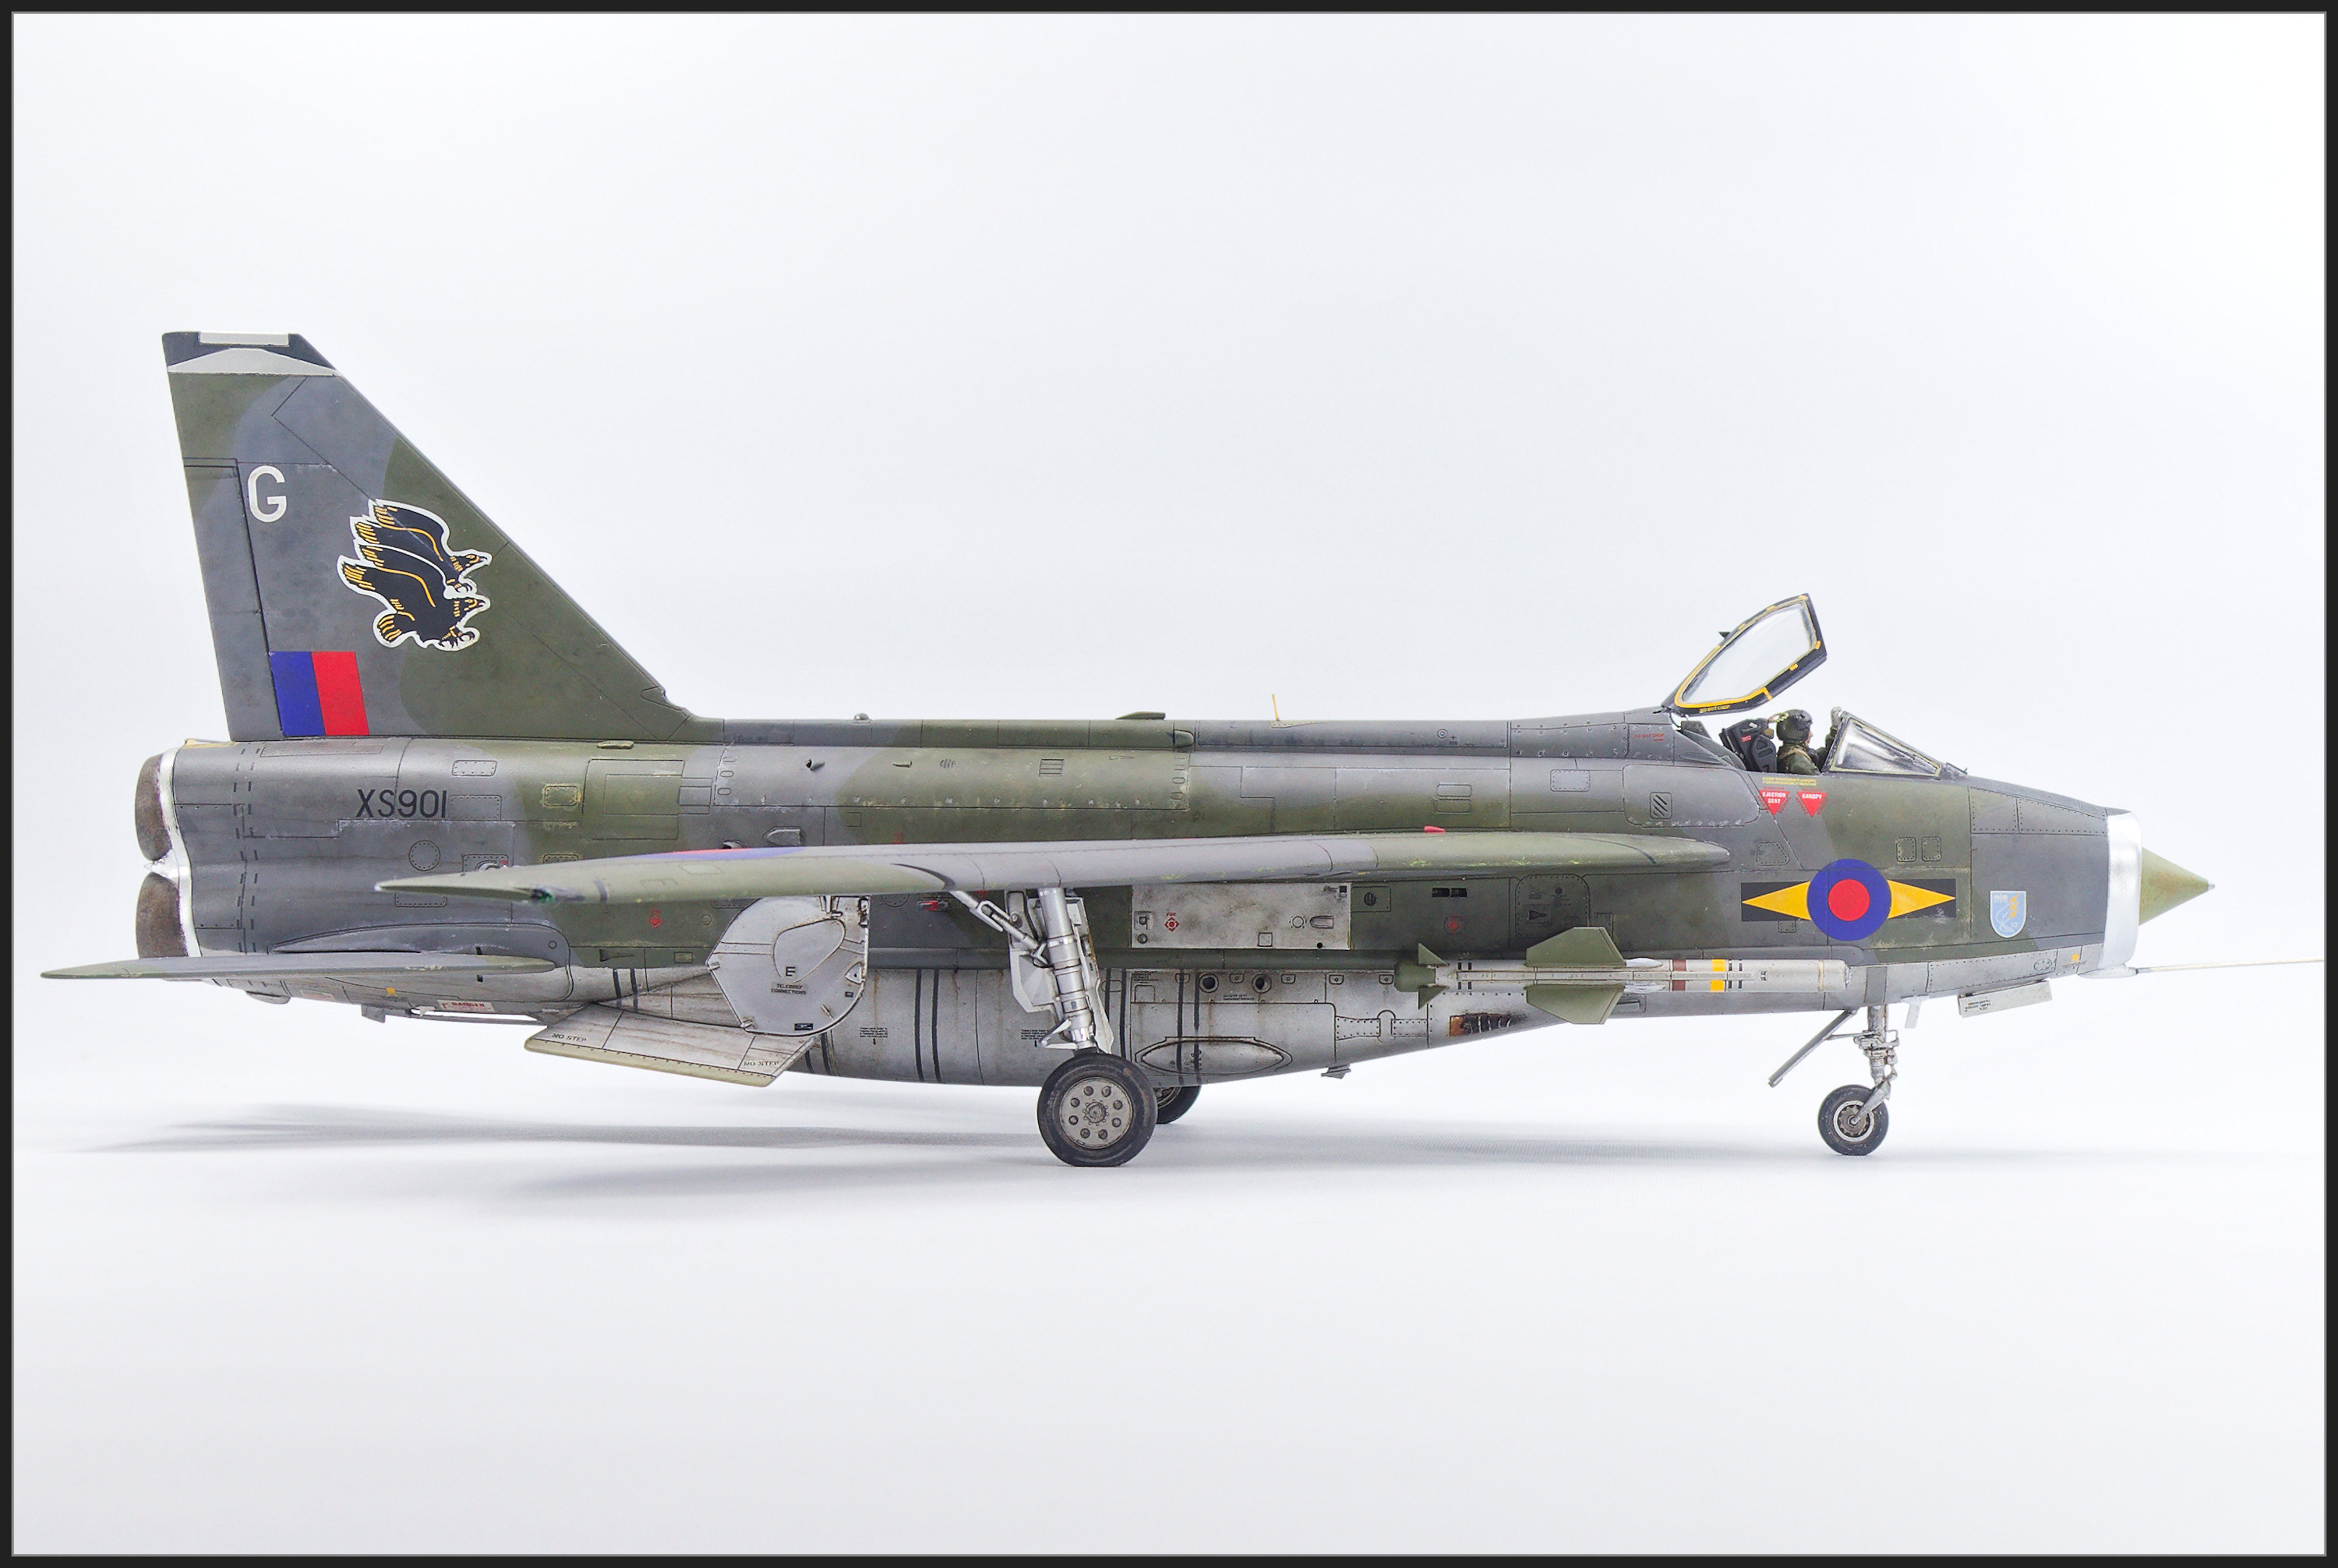
Depicted as an aircraft operated by No. 11 Squadron Royal Air Force from RAF Binbrook. I tried to model a tatty looking aircraft near the end of the types service life.
To me, English Electric Lightning screams power. Sure it may have had short range, poor weapons and it never reached its true potential but it looks like a fighter. (or what I think looks like one).
The Kit
• 1/48 Airfix English Electric Lightning F.2A / F.6 (Kit No A09178)
Aftermarket Used
• CMK Undercarriage Set
• Aires Exhaust
• Armoury Weighted Wheels
• ResKit Redtop Missiles
• Eduard Photoetch Set
• Hobby detail Metal Pitot
• SAC Undercarriage Set (nose leg only)
The Build
Rather than a traditional build article I am going to write more of a review type article and give my impressions on the kit. My other builds (Lightning F.2A and Lightning F. Mk 1A) give some ideas of how I have tackled the kit in the past
Engraving
Considering it’s a kit from 1997 the model has quite nice exterior detail. The engraving is pretty good overall with the notable exception being the big ventral tank, where the engraving is a bit soft.
The same plastic is in all boxes of the Lightning and hence all variants (F.1, F.1A, F.3, F.2a and F.6) can be built from any kit (decals excepted). This means comprises were definitely made with respect to accuracy, and especially when it comes to internal detail.
One area that could have done with fastener detail is the nose ring. These are usually bright chrome and the fasteners are really visible. I had a go at trying to rivet but gave up.
 |
| Some parts showing engraving |
Cockpit Details
Cockpit detail is pretty poor. The instrument panel is good enough and the cockpit sidewalls have some raised detail but it doesn’t really resemble any of the actual variants.
Airfix give you decals that go over the raised detail on the IP and sidewalls. I actually like this option when the decals match the detail. Sadly, in this case they don’t come close.
 |
| Cockpit detail is pretty poor |
Visibility into the cockpit is pretty limited so the poor detail in there is easy to ignore. Especially if you use the very nice pilot figure supplied in the kit. I think it’s better than some of their recent offerings.
 |
| Elon the pilot |
However, the area behind the top of the seat is really noticeable with the canopy open but detail here is crude at best. That said I chose not to do anything on this build.
 |
| The area behind the seat is very crude |
There is an Aries Cockpit set that addresses a lot of these issues. But it’s Aires so you know what you will be doing. I’d love just the bit behind the seat as a standalone upgrade.
There are plenty of resin seats around but be aware that the Quickboost one, which has lovely detail, doesn’t fit.
Undercarriage Bays
The detail here is again pretty poor even considering the age of the kit. And yes, the main bays are quite visible due to the high wings. The nose bay is a small dark hole and nothing can be seen in there so the lack of detail there isn’t an issue.
 |
| Kit Nose Gear Bay |
There are aftermarket options for the undercarriage bays (Aries and CMK). Whether they are worth the effort is a decision for you. I have fitted the CMK wheel bays a couple of times. A lot of sanding and thinning is required. A friend fitted the Aires main gear bays and noted they weren’t too bad but still a bit of work was needed.
 |
| CMK Main gear Bays |
 |
| CMK Main and Nose Gear Bays |
Exhausts
Only the tips of exhausts have detail that is visible unless you’re using a torch. But Airfix is again lacking here.
I had intended to use the ResKit exhausts for this build. These are amazingly detailed but complicated and seemed to require a bit of modification to the kit. I wasn’t up for that.
Virtually none of the detail will be visible so Aires was used (again) as they are drop fits.
 |
| Aires Exhausts are a Drop Fit |
 | |||
| Aires Exhausts are a Drop Fit |
Landing Gear and Wheels
The kit requires a bit of weight in the nose. The axle for the nose gear is thin as are the forks.
I have never trusted the kit nose leg to hold the weight of the model so have always used a SAC gear set, despite these being less detailed than the kit.
The plastic main gear legs are pretty nice and strong enough
so on this build I just used the nose leg. They needed a bit of clean up but
look OK.
Another advantage of the white metal nose gear is you can bend the forks out to fit the wheel once everything is painted.
As for the wheels, well the kit ones are OK but the Armoury Models weighed ones are nicer.
 |
| Nose bay and SAC Nose Leg |
 |
| Kit Main legs and CMK gear Bay |
 |
| Main gear leg and Armoury Models Weighted Wheels |
One issue with the undercarriage parts is that the strut needs to be modified to fit into the model. The image below shows what changes are needed.
 |
| Landing Gear Strut Modifications |
Eduard PE Set
Eduard have a PE set that has some useful parts for the model. It has a nice PE top for the man gear bays which is a simple improvement.
The cockpit and seat parts would also be useful if you didn't have other aftermarket bits.
Lots of the really small bits in the kit parts, like antenna’s etc are quite blobby and hence pretty awful. So I used the tiny antennas from the PE Set along with the mirror (which I lost and had to replace from a generic mirror set) and some canopy detail. That said a lot of the set isn’t that useful.
Alternately a guy who
could do some CAD could make a 3D printed nice antenna set, or you can
just cut them from card.
 |
| Underside showing PE (White) Antennas |
Weapons
The Kit weapons are more than usable. That said ResKit have some amazing Red Top and Firestreak missiles. I used the Red Tops on this one and they are (IMHO) a highlight of the build.
 |
| ResKit Red Top Missiles are stunning |
Fit
Overall, it is pretty average. The big components (wings, tail, ventral tanks) fit as good as you can expect for a kit of this vintage.
The worst area is the nose bay, radar bullet and intake. None of that really fits at all well. And it’s such a prominent feature of the aircraft that you need to get things aligned. Adding a resin nose bay doesn’t make it easier but even the kit parts don’t really fit well.
In my experience the nose ring profile doesn’t match the fuselage so this can’t be left off until the end as you need to mate it to the fuselage.
Another major issue is the lack of positive attaching methods for things like undercarriage doors, antennas, weapons, and even the canopy. There are far too many butt joints or tiny attachments in this kit. And while the weapons pylon attaching points look OK at first glance, in reality they aren’t great. Glue them on before painting.
Fit of the main and nose gear legs are exceptions. These are aren't too bad.
The aircraft, loaded with missiles and sitting on its wheels is a IPMS judge’s wet dream when it comes to symmetry. And getting everything looking symmetrical is really difficult especially due to the lack of those positive attaching points. I don’t think I have ever really been happy at the end of a build. Generally, I just run out of fucks.
Painting
The main colours used were:
- Dark Green - Mr Color RAF Dark Green C330 with a couple of large dollops of Radome Tan
- Dark Grey - Tamiya XF77 IJN Grey (Sasebo Arsenal)
- Silver - Tamiya AS12 for the base coat then lots of metallic post shading. Alclad Duralumin is probably the closest colour
- Nose Bullet – Mr Color 21 RAF Dark Green, chipped with Mr Colour Interior green and some browns.
- Nose Ring - Mr Color Super Chrome rubbed with AK Interactive True Metal Silver
- Black – Gaianotes Black grey
Top Notch masks were used for the camouflage pattern. These fitted well so made the painting process simple.
 |
| Top Notch Masks Applied - Just get the colours right |
 |
| Base Colours On |
As part of the painting process splatter masks were used to add some variation to the base colours. Darker and lighter shades of the green and grey were used over those colours. On the bare metal areas differing metallic shades were used.
 |
| Splatter Mask Work |
Decals
A gloss coat then a wash of ABT 502 Sepia was used prior to decaling.
Kit decals were used and these worked well as you'd expect as they were printed by Cartogragh. There were a couple of errors in the instructions where they called out the wrong number decals for particular locations.
 |
| Kit decals worked well |


Weathering
Coloured pencils were used extensively for the weathering. Greens, greys and yellows were the primary colours used. Black was used where panel lines needed some extra work. Prismacolor, Monte Martre Earth Tones and AK weathering pencils were brands mainly used.
 |
| Coloured Pencils were used to add wear and tear |


For the underside oils were used for the streaks and discolouration.

Final Coats
The model was sealed with a couple of light coats of SMS Semi-gloss (mix of gloss and flat) on the metal areas and Mr Color GX 114 on the coloured areas.
Conclusion
This is the third 1/48 Airfix Lightning I have built. All of them have been tough builds and this was no exception.
While the kit is well thought of online, I suspect this is looking through some rose-tinted glasses. That said it is still the best kit of this subject in any scale. But that’s a low bar.
Overall, I am quite happy with how it turned out, particularly the paint finish. That turned out better than I’d hoped. As usual with this kit the fiddly bits at the end resulted in me getting quite frustrated at times.
In the end it’s unlikely I will build another of these any time soon. There are just so many better engineered subjects out there that I want to tackle. That said if I ever build another, I think I will do it in flight. This should result in the weak points of the kits (cockpit, main landing gear bays) being hidden.
The Photos