Update time. All of this work was finished last year and I did intend to update whilist I was on holiday.. but I got side tracked with something else.
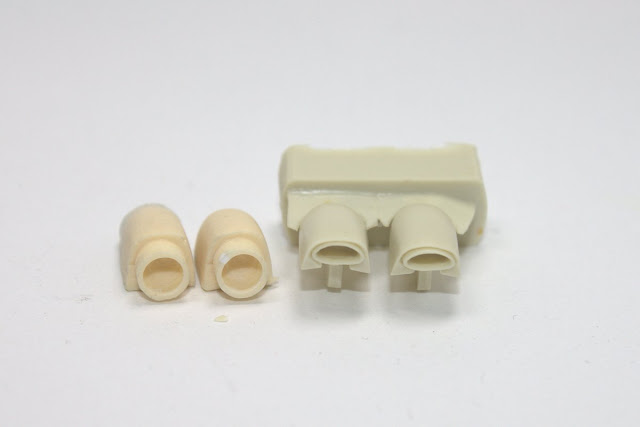
As I was working on fitting the LSM open cowl flaps I decided I wasn't entire happy with them. The resin wasn't quite as nice as I hoped, but as I couldn't "fix" it, I decided to press on . I was also unhappy with the exhausts as they didn't look quite right, they looked way to big nothing like the kit parts. I checked out some references for the RNZAF aircraft and realised that their exhausts are oval, not round as the LSM ones are. I had also noticed that the RNZAF used the closed wheel hubs , as opposed to the open ones I'd bought from LSM. This is yet another example of me not doing another research before opening the wallet. ;)
Anyway, there was enough unhappiness that I headed off to Ultracast for some new wheels and exhausts

Here you can see the difference in exhausts

Whilst perusing Ultracast I stumbled across the very nice Vector corrected cowl set. It was quite reasonably priced so into the bin it went, after all I was doing a large order for some club mates so post was free :)

When this arrived I was unsure how to remove the large plugs from the front of the cowls. Coincidently there was post on Hyperscale that day that shed some light on the method. You just scribe/cut on the inside of the cowls, as this area is cast very thinly. Once it's off you just clean up with some sand paper wrapped in a roll. It was quite simple in the end.

The Vector set has some awesome detail in the open cowls.. Most of it will be hidden though.

The set also has replacement parts for the area aft of the open cowls. As I'd assembled the nacelles these had to come off. The rasor saw made quick work of this.

The fit of these wasn't to bad. although a bit of sanding was needed to smooth things out.

Whilst waiting for the resin to arrive I decided to "wire the engine using 0.020" safety wire Not entirely accurate but it looks effective IMHO. Before wiring I painted the engine with Alclad . Detail paint was done with a brush and Vallejo acrylics and a Tamiya black enamel wash was applied.

There was quite of bit of finagling needed to get the cowls flaps and cowls fitted ensuring they were square and correctly aligned. A few applications of Alcald primer and Mr Surfacer were used to fill some imperfections and scratches on the cowl.

As I'd lost of bit of the raised panel on the tail I sanded it entirely flush and replaced it with some 0.005 thou card

Once this was done I sprayed the whole thing in Mr Surfacer and set it aside to dry

No comments :
Post a Comment