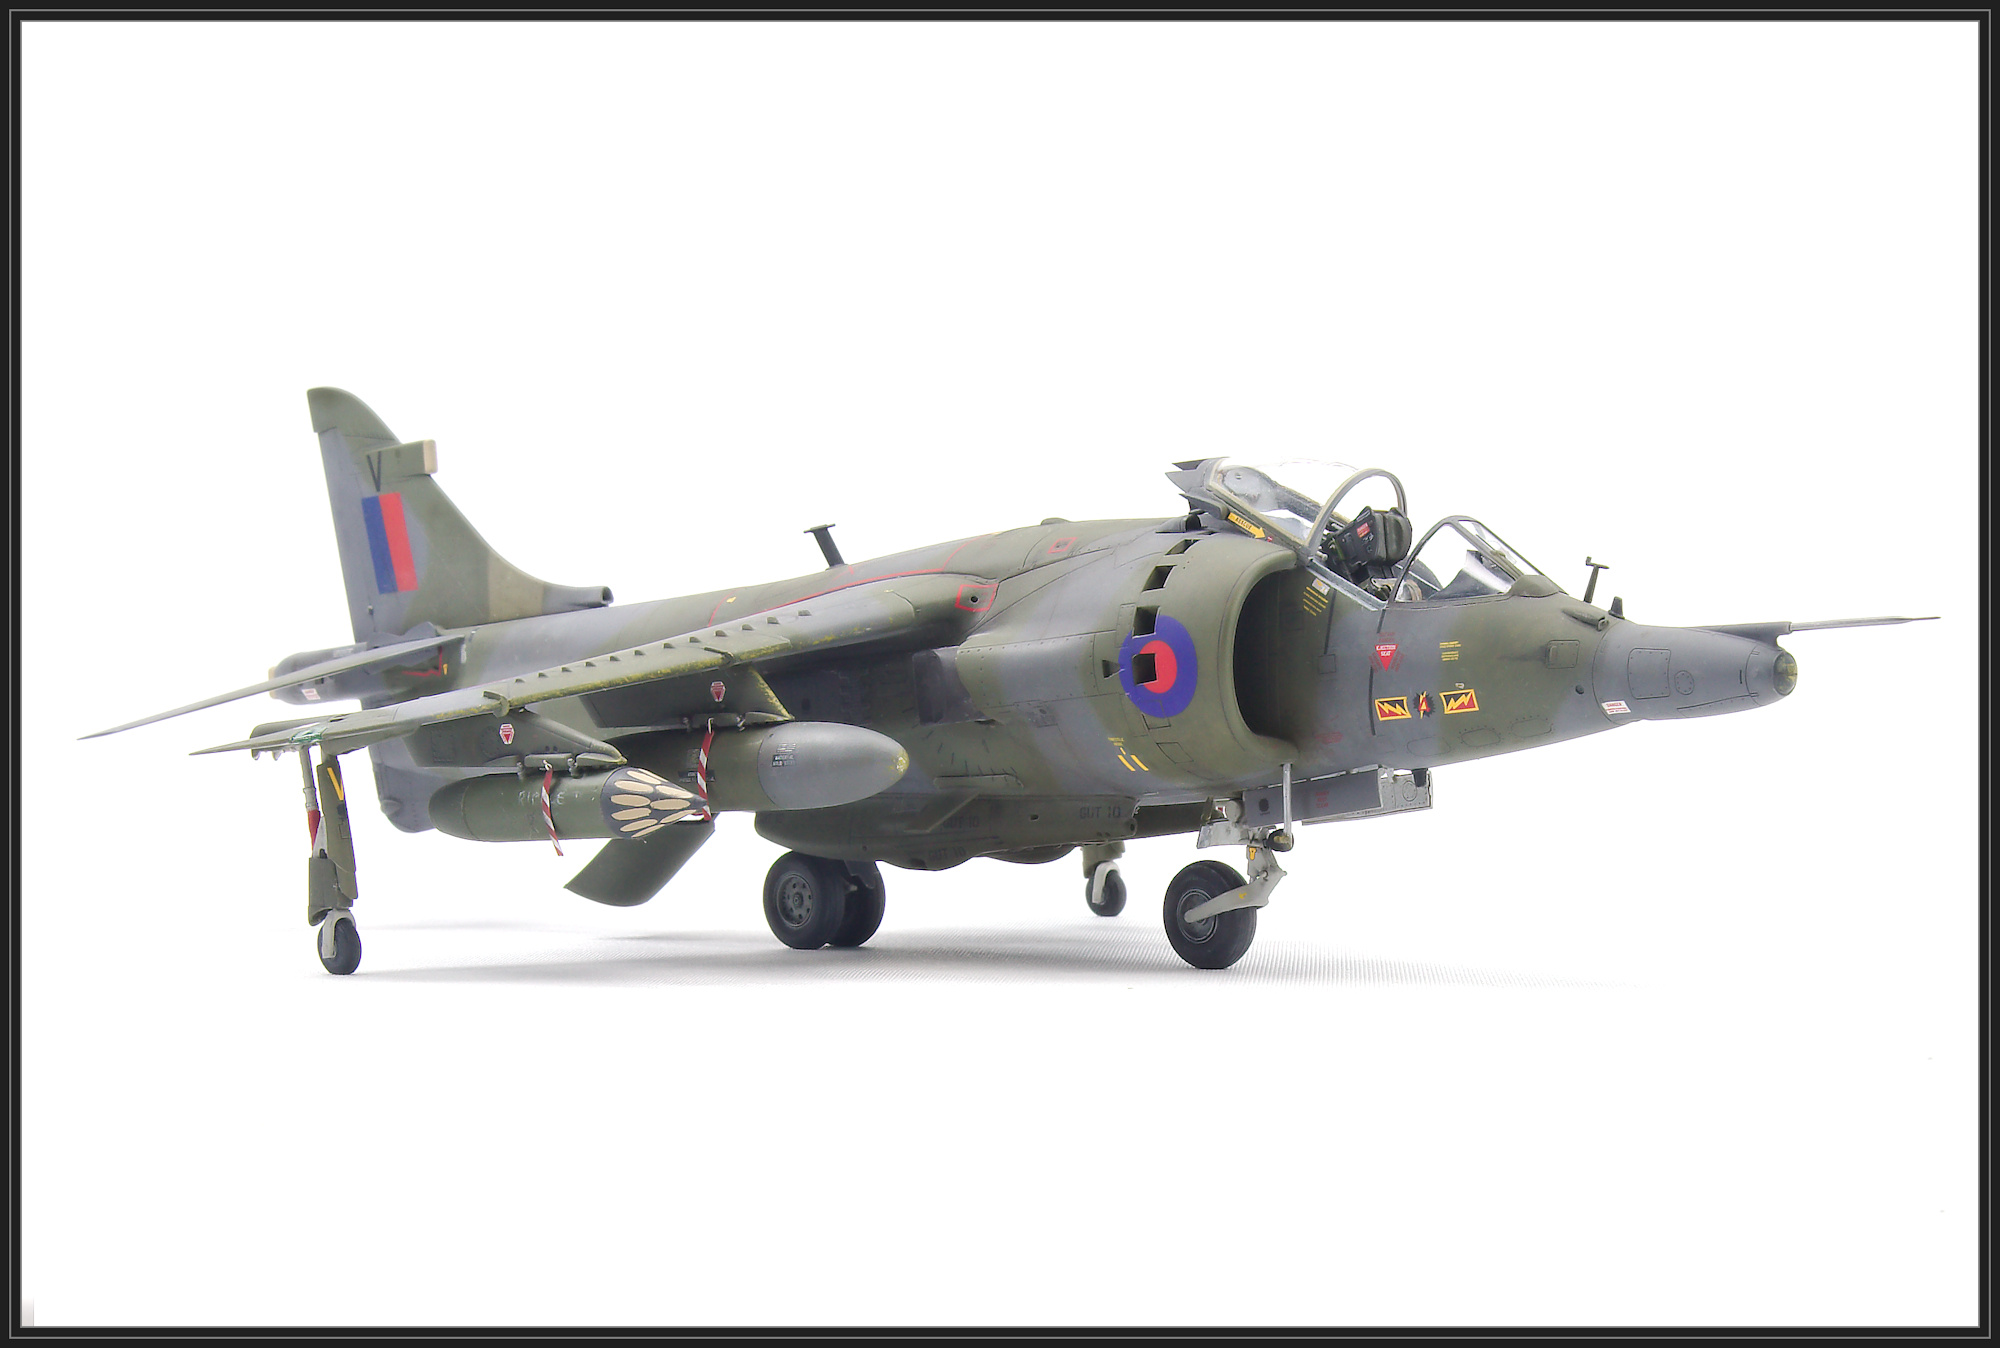
I have always liked the look of the Harrier Gr.3 with the LRMTS nose. So I was happy when Kinetic finally released that variant. I had built the Kinetic Sea Harrier FRS.1 a few years ago so I knew this wouldn't be a straight forward build although the Gr.3 was labelled as one of their gold series kits.
The thing I wanted to achieve with this build some some nice contrast between the green and grey. I'd built a Kittyhawk 1/48 Jaguar in this scheme in the past and wasn't entirely happy with paint finish in the end.
The Kit
- 1/48 Kinetic Harrier Gr.3 Kit No. K48060
Aftermarket
- Phase Hangar Resin Centreline Pylon
- Phase Hangar Resin Outriggers and Wheels
- Reskit Wheels
- Reskit Matra 155 Rocket Pods
- Aires Exhausts (for the Sea Harrier)
- Quickboost Scoops
- Eduard Seat Belts
- Master Models Pitot (modified)
- Eduard Steel RBF Tags (pylons)
- HGW Fabric RBF tags (Outriggers)
The Build
I have a separate blog post with a full build thread here if you are interested. If not here's a summary.
The builds pretty easily and it is better than the Sea Harriers. Engraved detail is good overall. On the down side there are some fit and accuracy issues. The fit issues are fairly easily addressed with a little planning.
The main accuracy concerns are the location of the pylons and the rather bare gun pods. Blackdog have a nice detail set for this kit which I'd have used if it was available when I started.
The cockpit is a little bare, especially on the rear walls beside the seat. I didn't think you'd see these areas so I didn't add any details. I probably should have.
All that said it's the best Harrier Gr.3 in the scale (and possibly in all scales).

A couple of build tips
- Don't build the nose gear bay as per the kit instructions, assemble them to each fuselage halves
- Don't fit the internal mechanism or the mounts for the exhausts if using resin exhausts
- Fit spreader bars to avoid big gaps between the wings and fuselage
- When installing the landing gear:
- Fit the nose and outriggers first and let them set up for an couple of hours.
- Cut a little from the top of the main gear leg and Drill a hole in the top of it.
- Drill a corresponding hole in the airframe so you can easily adjust the length of the leg to get all the wheels on the ground.
The Paint
This build was all about the paint. The Build thread explains my paint choices but this is what I used for the main colours
- Dark Green - Mr Color RAF Dark Green C330 with a couple of large dollops of Radome Tan
- Dark Grey - Tamiya XF77 IJN Grey (Sasebo Arsenal)
- Black - Gaianotes German Grey
- Internal Grey - Mr Color FS36320
- Roundel Red - Tamiya Flat Red
- Roundel Blue - Tamiya Flat Blue
- Undercarriage - Mr Color C332 Light Aircraft Grey
- Exhaust Shroud - Tamiya Dark Iron
- Exhausts - Alclad Burnt Iron with various other metal shades
- Zinc Chromate Yellow Chips - Vallejo German Armour Dark Yellow
Weathering
A lot of weathering was done with splatter masks over the base coats. Various darker greens, greys and a bit of brown was used.
The other products used were:
- Various Oil paints, particularly ABT 502 sepia, and various AK Interactive Dark Greys
- Coloured Pencils
- Magic wash (Future and Tamiya paint) for the undercarriage bays.
Clear Coats
- Gloss - Gaianotes - Pre decals
- Flat - SMS Flat
Decals
- Kit decals (superb)
- Airscale for the Cockpit and Ejection seat
Conclusion
I am very happy with the paint finish on this build, I think it's one of my better jobs. I could have done a better job on the pylons and the rear of the cockpit.
The Photos
I couldn't resist snapping a couple of shots beside it's Cold War contemporary, the Jaguar.


No comments :
Post a Comment